Enable Notification
This is the final step of the configuration to enable the ‘Email to Text’ feature. Notifications can be enabled in the following two ways:
- Default Notification Settings
- Sender ID Notification Settings
1. Default Notification Settings
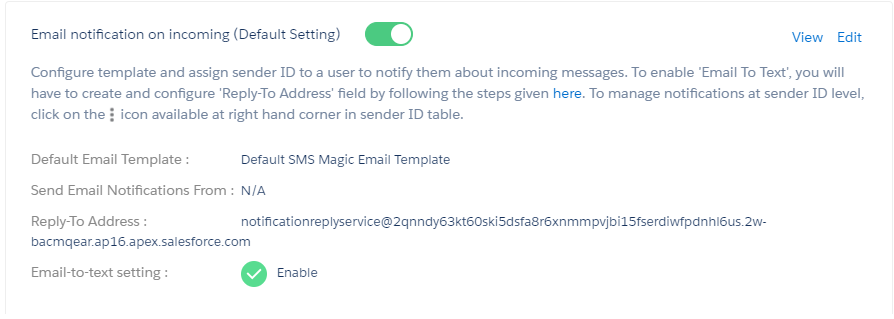
In default notification settings, you can configure templates and assign sender ID to a user to notify them about incoming messages. To enable ‘Email To Text’, you will have to create and configure the ‘Reply-To Address’ field by following the steps given here.

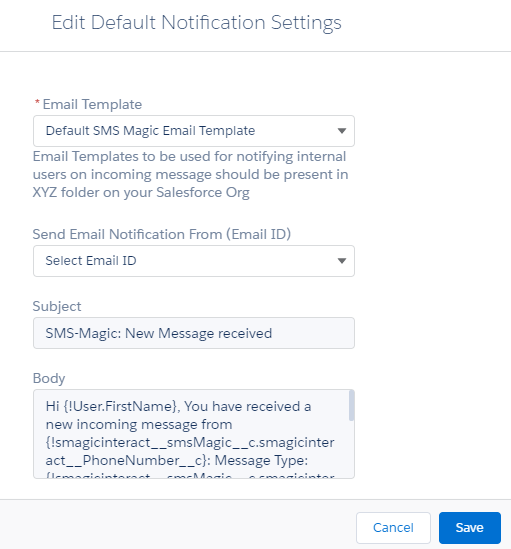
- Click on the ‘Edit’ button, the following window will appear:

- Select the default SMS-Magic email template from the ‘Email Template’ drop-down list
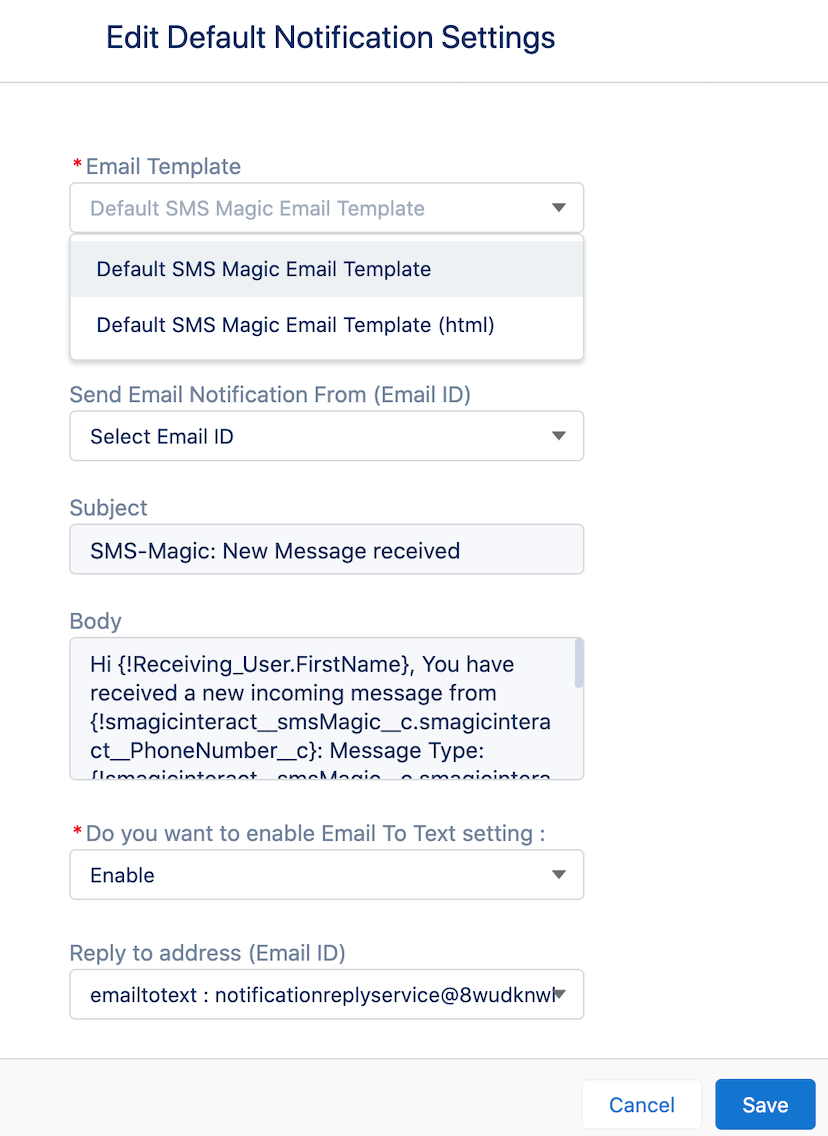
- Select the email ID from the drop-down list in the ‘Select email notification from’ field
- Select ‘Enable’ option in the ‘Do you want to enable Email to Text setting’ field
- Click on the ‘Save’ button
The steps to manage notifications at the Sender ID level are explained in the following section.
2. Sender ID Notification Settings
This section will help you enable notifications at the Sender ID level, which will in turn help you to stay up to date whenever you receive a message.
- Go to Converse Settings
- Click on Sender ID and Assignment on the left
- Choose a Sender ID and click
and click on the ‘Assign to Users’ option. The following window will appear:
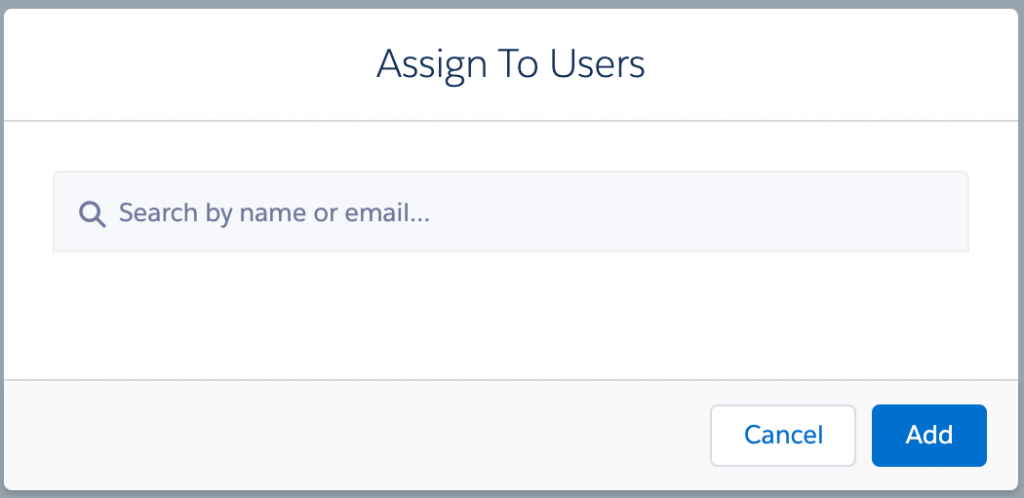
- Search a user by entering the name or email ID
- Click
and click on the ‘Manage Notifications’ option to enable notification. The following window will appear:
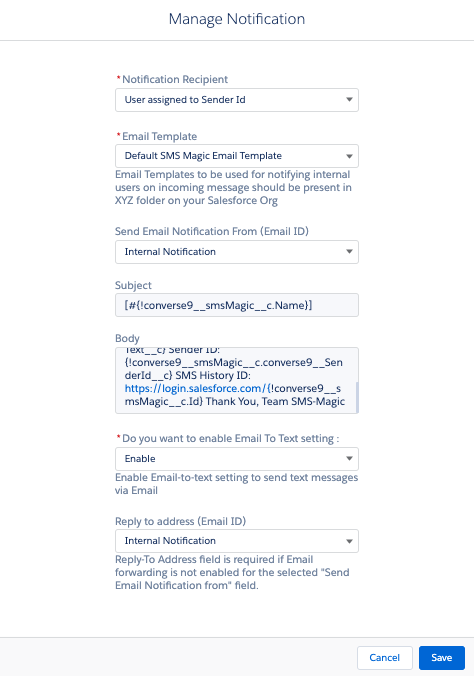
- In the Manage Notification pop-up window verify the pre-filled details
- Select an Email Template if you wish to use some other template in place of the default template

- Select an Email ID if you wish to be notified through that
- Select ‘Enable’ option from the drop-down list in the ‘Do you want to enable Email To Text setting’ field and a new drop-down appears
- Select an Email ID if required or continue with the default notification method
- Click on the ‘Save’ button
- Enable Notification on incoming using the toggle button
The above function can be managed from the Default Configuration Section when you click on the ‘Edit’ button as shown in the image below.