
Auto-Reply to Texts
Auto-reply is one of the first automation you need to implement because they reassure customers that they will be taken care of as soon as possible, no matter when they send you a message.
To create Auto-reply, first, you need to create a message flow and then trigger an Auto-reply message using the action key.
To create an auto-reply to text message flow, do the following:
1. Go to the App detail page and click Setup.
2. From the list, select Automation.
3. From the Setup Automation Campaign dialog, select the number of steps that are part of the message flow.
4. On the Message Flow configuration page, select the Auto Reply flow type.
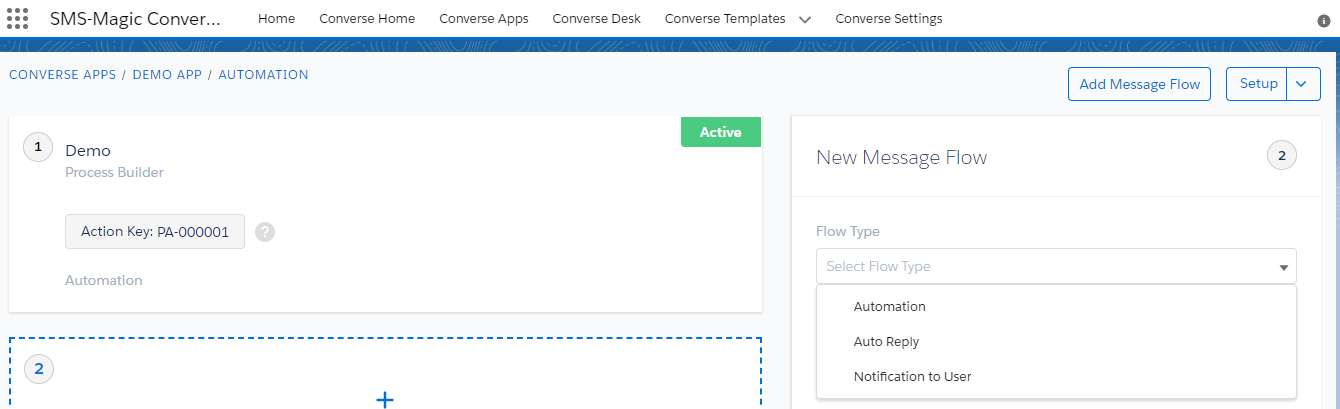
5. Enter the keyword for the message flow in the Keyword field. The keyword is decided by the user.
6. Enter the name of the message flow in the Name field.
7. Enter a short description of the message flow in the Description field.
8. Select the sender ID in the Sender ID field.
9. Select the action trigger in the Message Flow Trigger field.
10. Select the template in the Template field. The text of the template is displayed.
11. Click Create.
Trigger an Auto-Reply Message Flow from Flows
Using the Action Key generated for each message in a message flow the user can trigger further messages from Flows. The triggering of the messages is based on certain criteria and conditions. In the following example, we send auto-replies based on the incoming message keyword.
What is the Action Key?
For each message created in the message flow, a unique Action Key is generated. The action key is necessary to trigger messages from the Flows.

To Trigger an Auto-Reply SMS Message based on a Keyword Response:
- From the Salesforce navigation on the top right click Setup.
- Select Flows by searching it in the Search Setup field.

- Click on the Flows option as highlighted in the image above. the following page will appear:

- Click on the New Flow button, and the following page will appear:
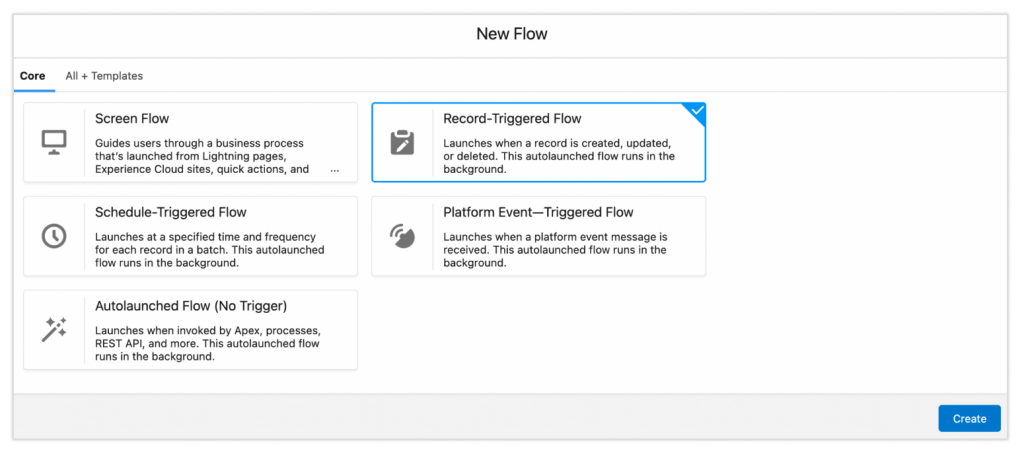
Here, you will get many flow template options to select from. As per your requirement, select the right type of flow to continue. For instance, select the ‘Record-Triggered Flow’ and click on Create button.
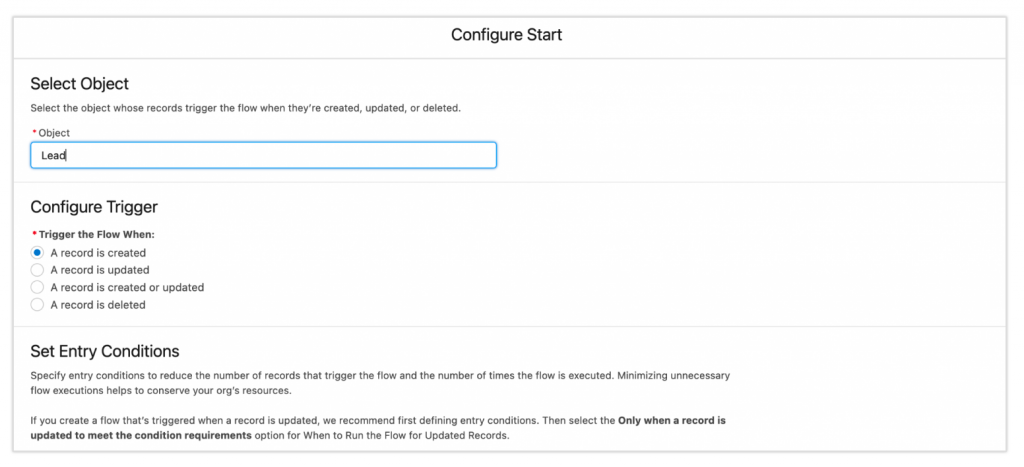
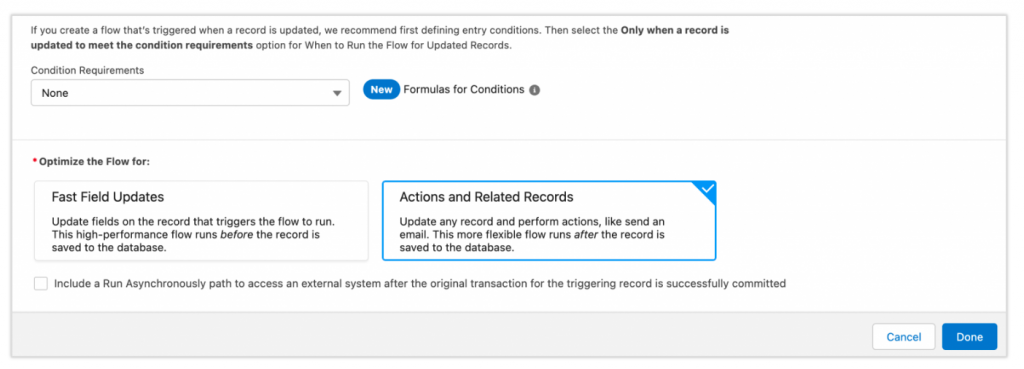
Here, consider an example when a customer wants to trigger an automated message when a record is created, updated, or deleted. Enter Object as Lead, select trigger option as ‘A record is created’, and click on the ‘Done’ button to proceed.

Once the object is created, you need to define the elements. Click on the plus sign in the flow as shown above. The following elements will appear:
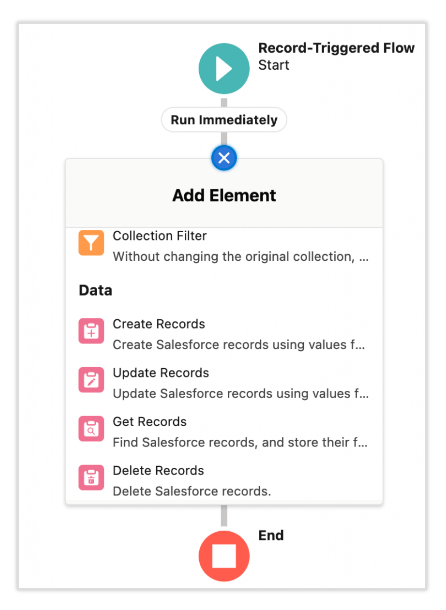
- Select the Create Records element to create records. The following page will appear:
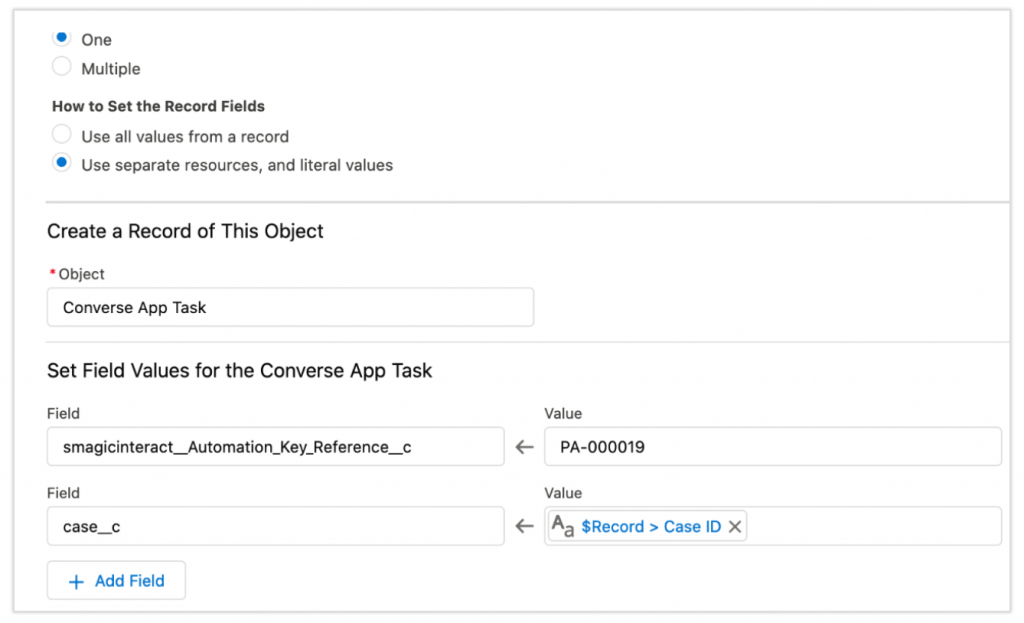
- Select the method in which you want to set the record fields.
- In the Object field, mention as ‘Converse App Task’.
- In the next section, you need to set field values for the converse app task.
- You can add more fields by clicking on the ‘Add Field’ button.
- Add the required criteria in the flow and click on the ‘Save’ button
- Click on Run to test the flow
- Click on Activate to activate the message flow