
Create Consent Manually
1. Click. The app launcher appears.

2. Under ‘All Items’, click on the ‘Consents’ link. The Consent List view page appears:

3. Click on the ‘New’ button. The Add New Consent Record pop-up window appears.
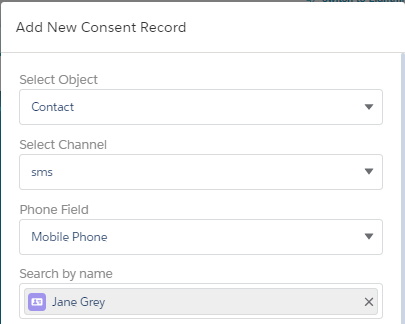
4. Refer to the table below for more details on individual fields.
| Field | Description |
| Select Object | Select the object for which you want to create the consent record. |
| Channel | Select the channel with which you want to create the consent record. |
| Phone field | Select the phone field from which consent records will be considered. |
| Search By name | Search the contact name for which the consent record will be created. |
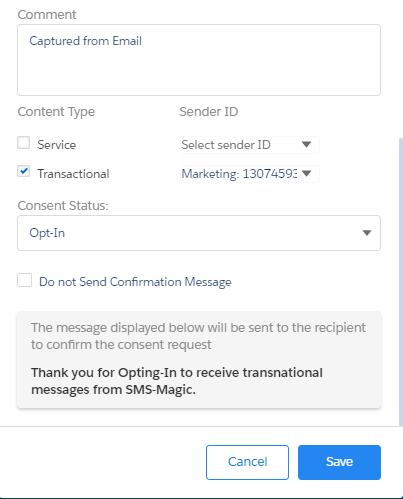
| Comment | Type a comment for the record. |
| Content Type | Select the appropriate checkbox next to select the appropriate content type. This parameter will appear only if they have been configured in Step 1 of the Compliance Configuration process. Contact your System Admin for more details on the consent record parameters configured. |
| Sender ID | Select the Sender ID from which consent will be initiated. Sender ID list will be displayed based upon the channel you selected above. This is available only if Sender ID is configured as a consent record parameter in Step 1 of the Compliance Configuration process. Contact your system admin for more details on consent record parameters configured.Note: If you have selected a channel as WhatsApp or Facebook, the Sender ID field will be mandatorily triggered irrespective of your org level compliance configuration. |
| Consent Status | In the drop-down list select the status of your consent. The available options are: Opt-In, Opt-Out, and Pending. |
| Do not send Confirmation Message | Select this check-box to avoid sending a message to confirm the consent status of the customer. |
| Confirmation Message Sender ID | Select the sender ID that will be displayed when the confirmation message is sent to the customer. |
5. Click on the ‘Save’ button. The Consent Record List will be added to the consent database and appears as shown:

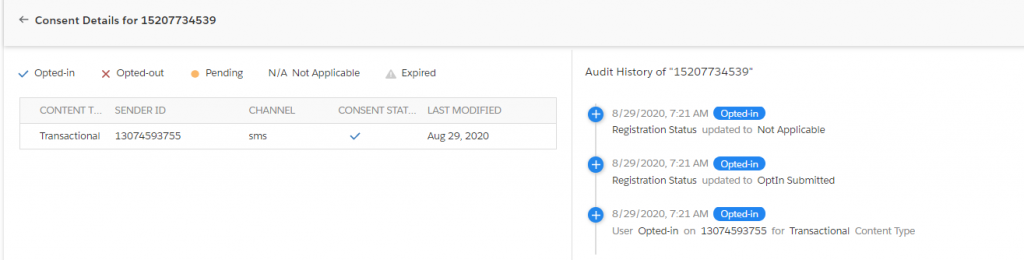
6. Click on the individual record and the record details can be seen as below:
7. You can check the consent confirmation message sent in SMS-History as per your double opt-in configuration set.
