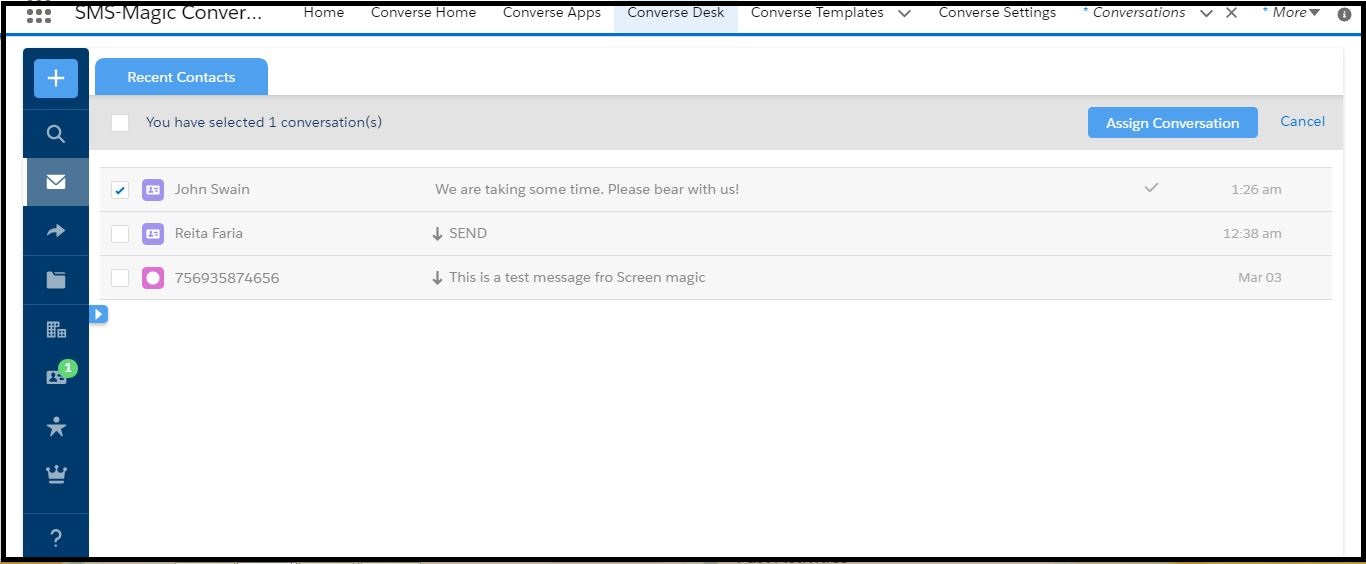
Assign Conversations
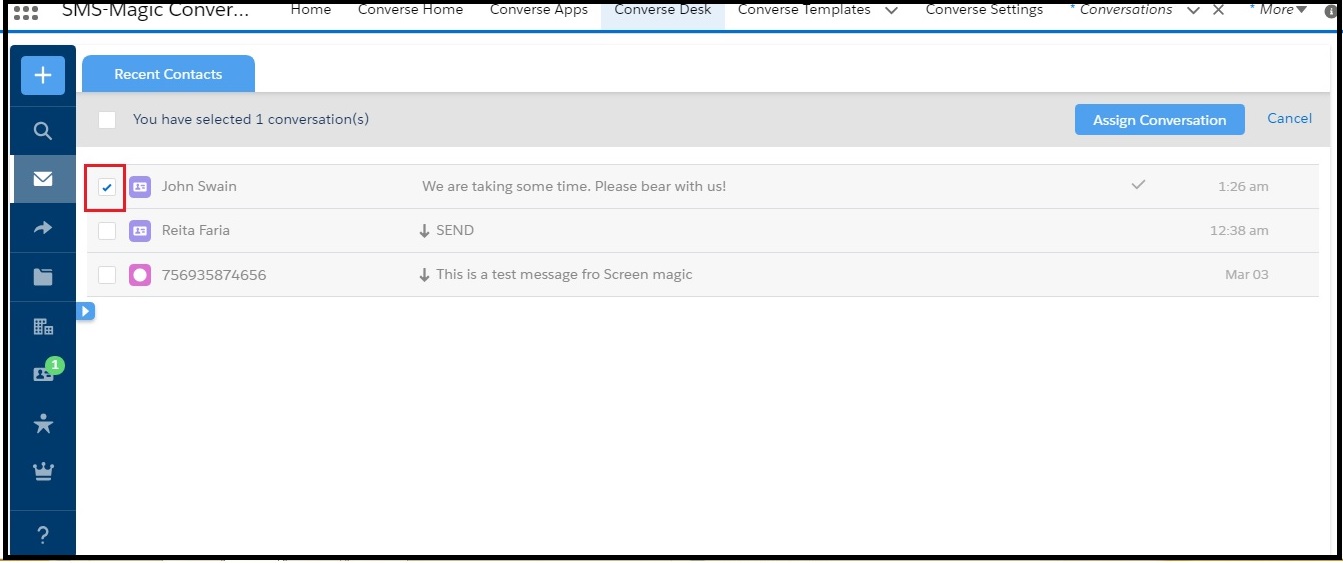
- On the Converse Desk, select a filter. The conversation list appears.
- Click
 on the conversation row you want to assign and then click Assign Conversation from the drop-down menu that appears. A selected check box appears next to the conversation.
 - Select all the conversations that you want to assign.
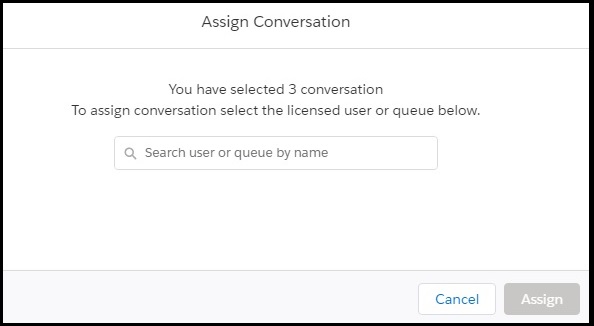
- Click Assign Conversation. The Assign Conversation dialog box appears displaying the number of conversations you have selected for assigning.
- In the search box, enter the first three initials of the user to whom you want to assign the conversations.
- Select the user name.
- Click Assign. The selected conversations are assigned to the user.
Conversation Reassignment Notification.
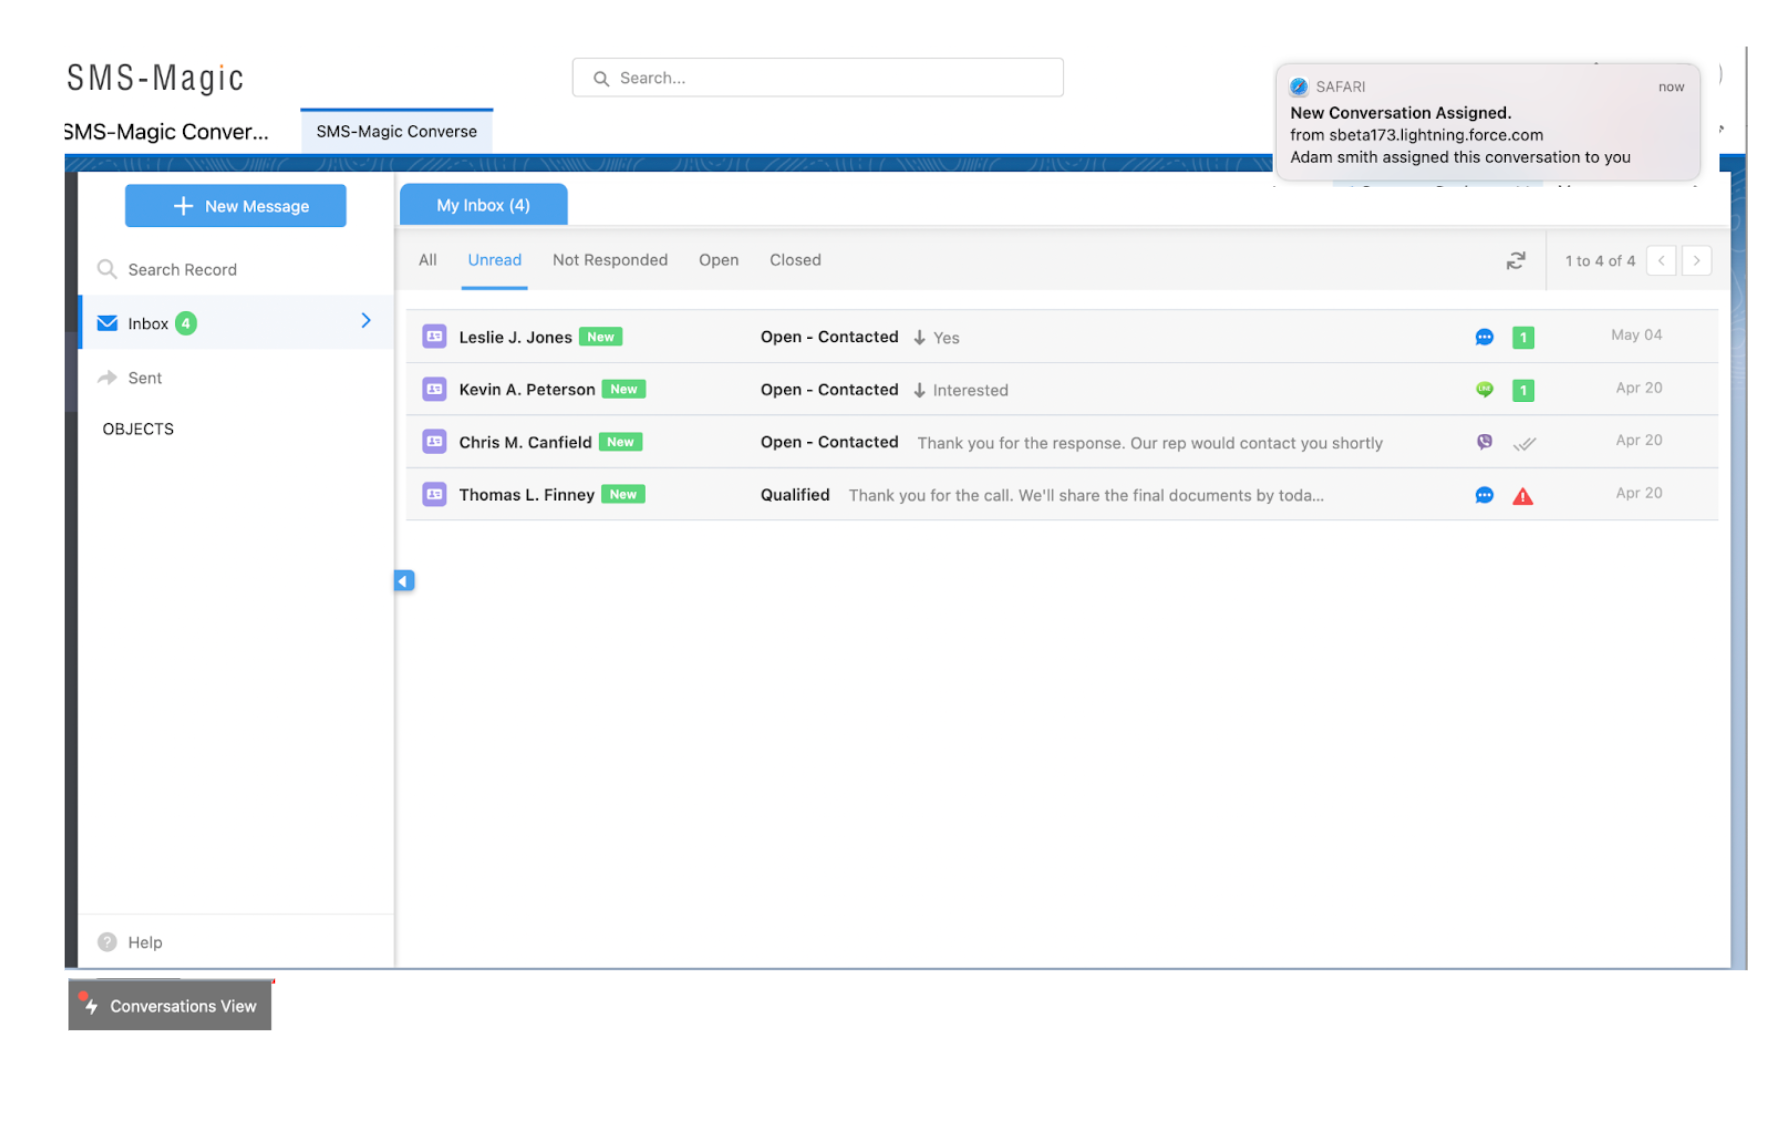
Here on the top right-hand side of the page, you can see a notification with a message (New Conversation Assigned). The users will be notified that new conversation has been reassigned.