To activate the Email Service Address, do the following:
1.From the Salesforce navigation on the top right click Setup.
2.Select Email Services by:
•Using the Search Setup field, or
•Using the Quick Find search field, or
•Selecting Platform Tools > Custom Code > Email Services.
3.From the list of Email Service select NotificationReplyService under the Email Service Name column.
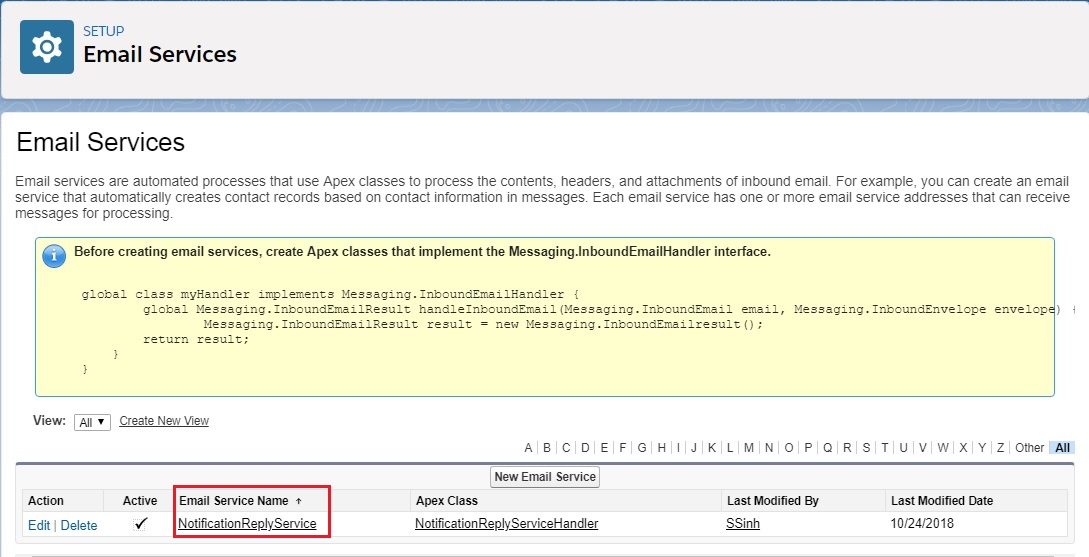
Select the Email Service to add the Email Service Address
4.Click New Email Address.
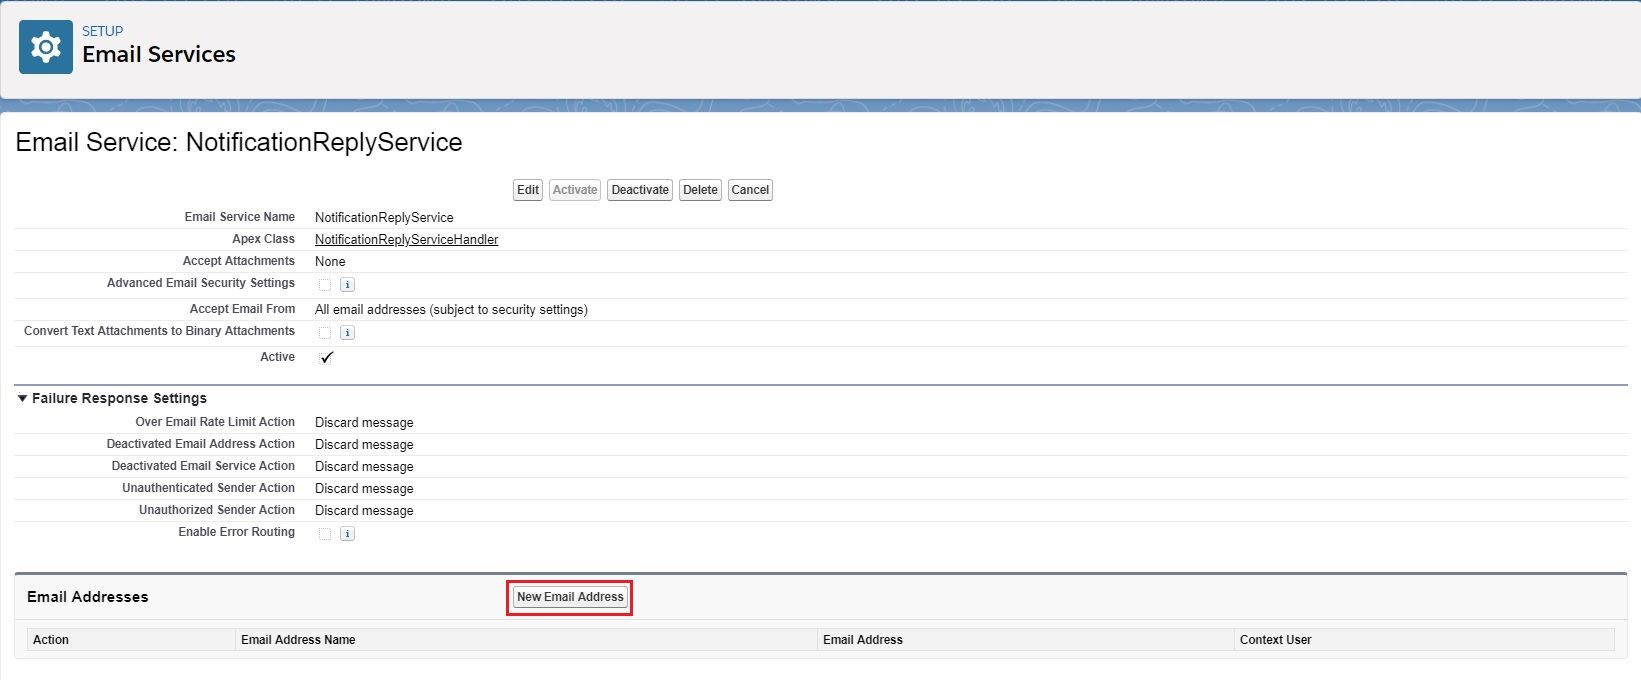
Click New Email Address
5.Enter NotificationReplyAddress in the Email Address Name field. This address generates the notification. This is mandatory.
6.Enter notification-reply-address in the Email address field. This is mandatory.
7.Set Context User as Admin or User. The Admin or User is responsible to send the reply for incoming notification.
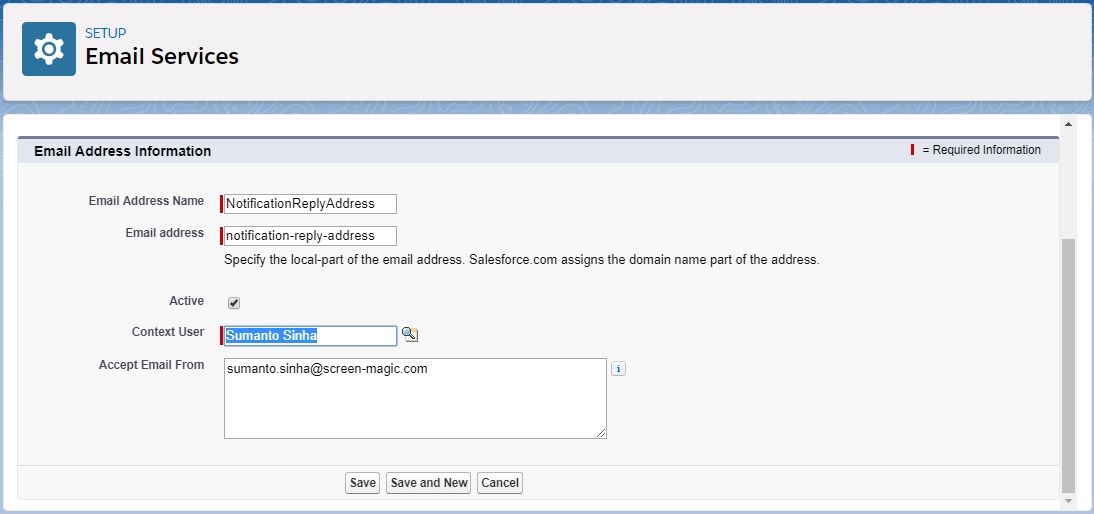
Setting up the new Email Service Address
8.Set Accept Email From domain to accept emails.
9.Click Save.
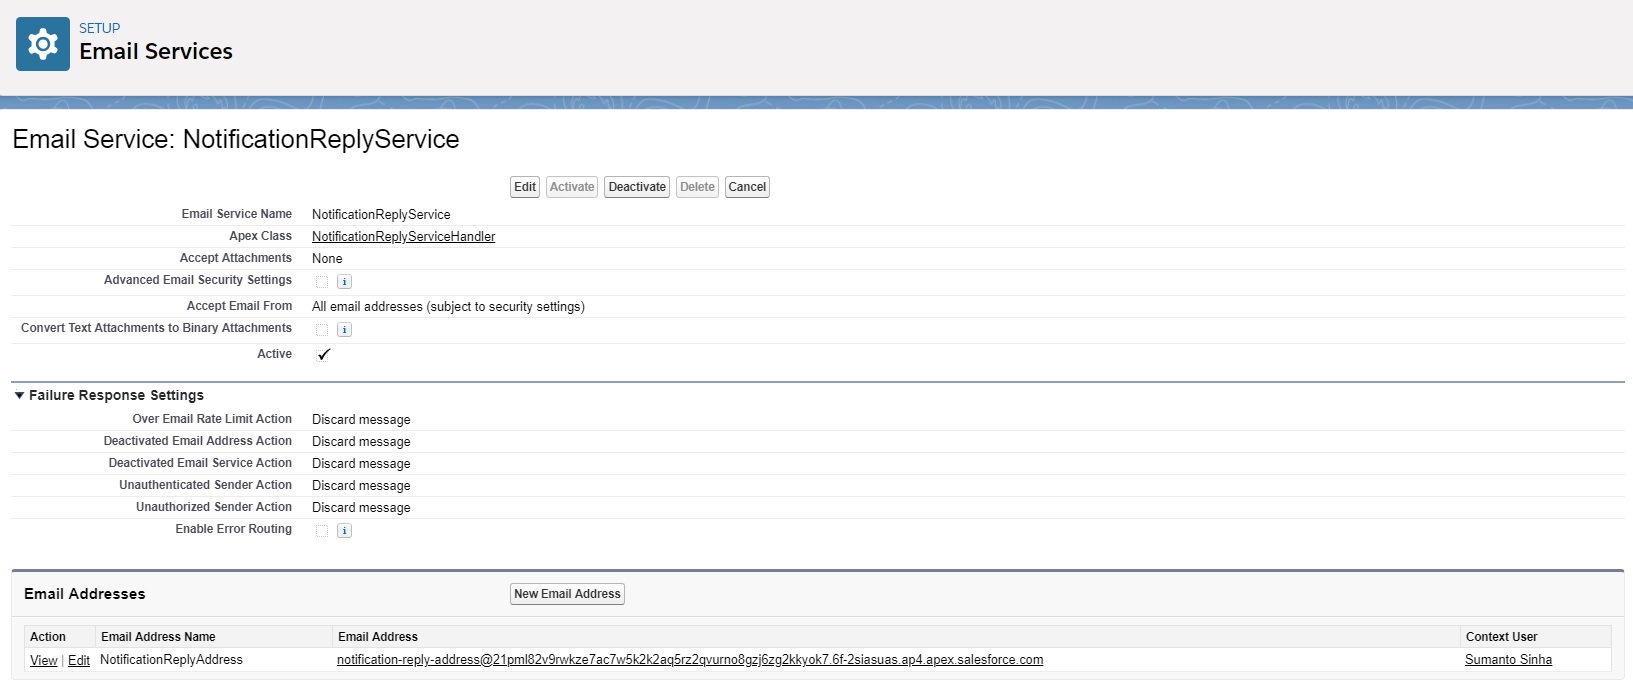
Activating the new Email Service Address
For more information about Email Service Address, click here.
Links
Activate the Email Service Address
Setup Organization-Wide Email Address
Configure the Organization-wide Email Address to forward to Email Service Address
Create a Process Builder to Notify User