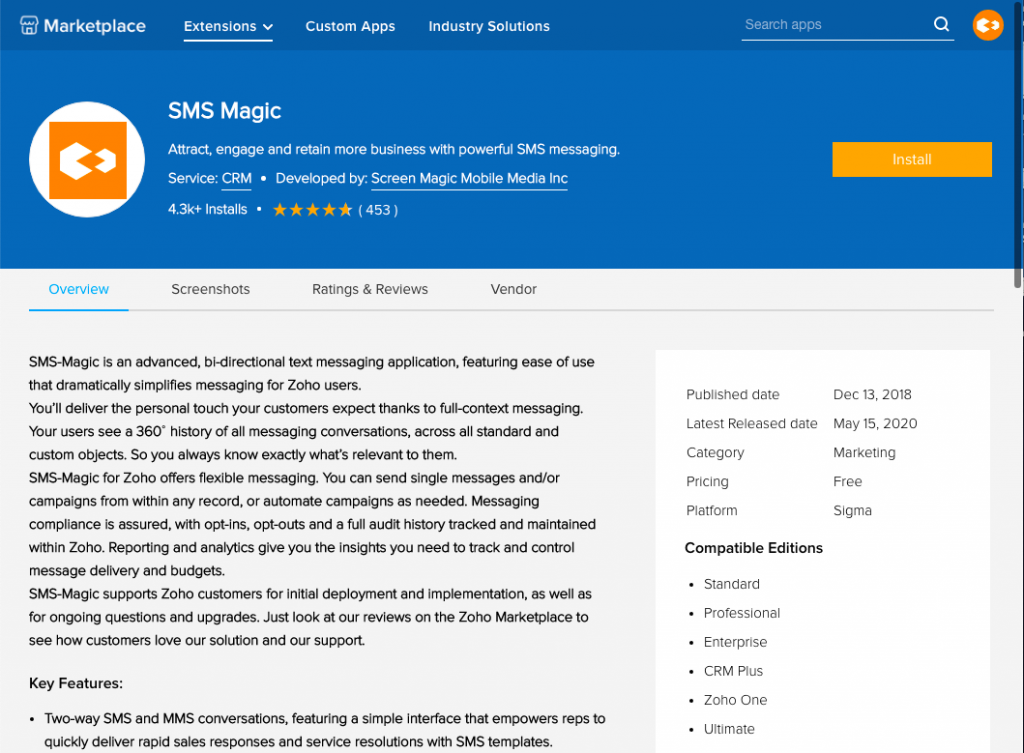
1

About SMS-Magic

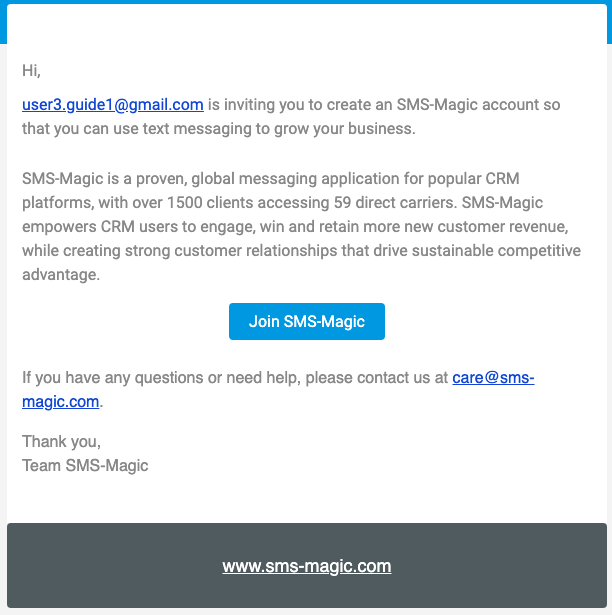
SMS-Magic is a proven, global messaging platform with over 2,500 clients across 59 carriers. SMS-Magic enables Zoho CRM users to engage buyers and win and retain more new customer revenue while creating strong customer relationships that drive sustainable, competitive advantage. SMS-Magic is a popular messaging application on Zoho Marketplace.

Introduction

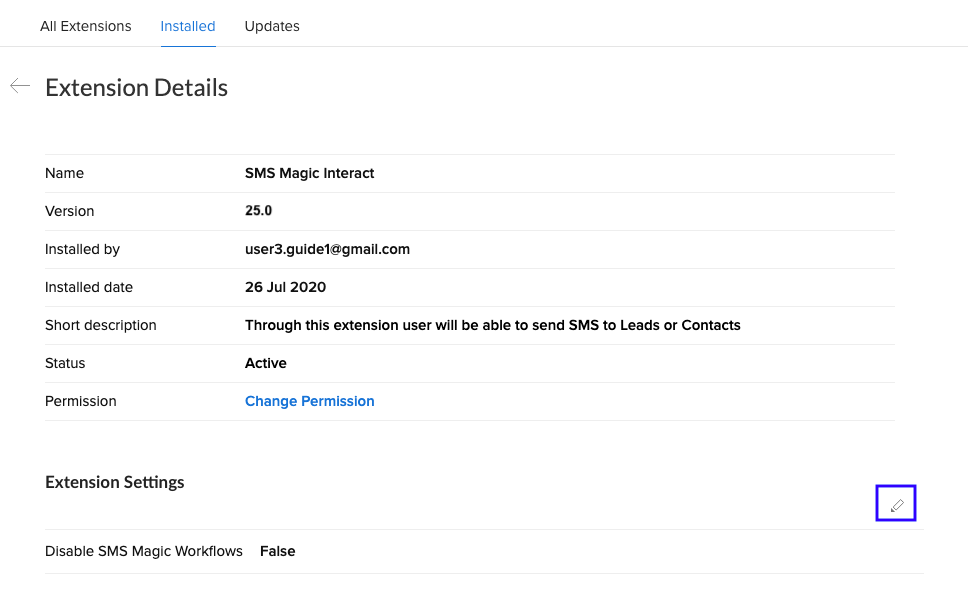
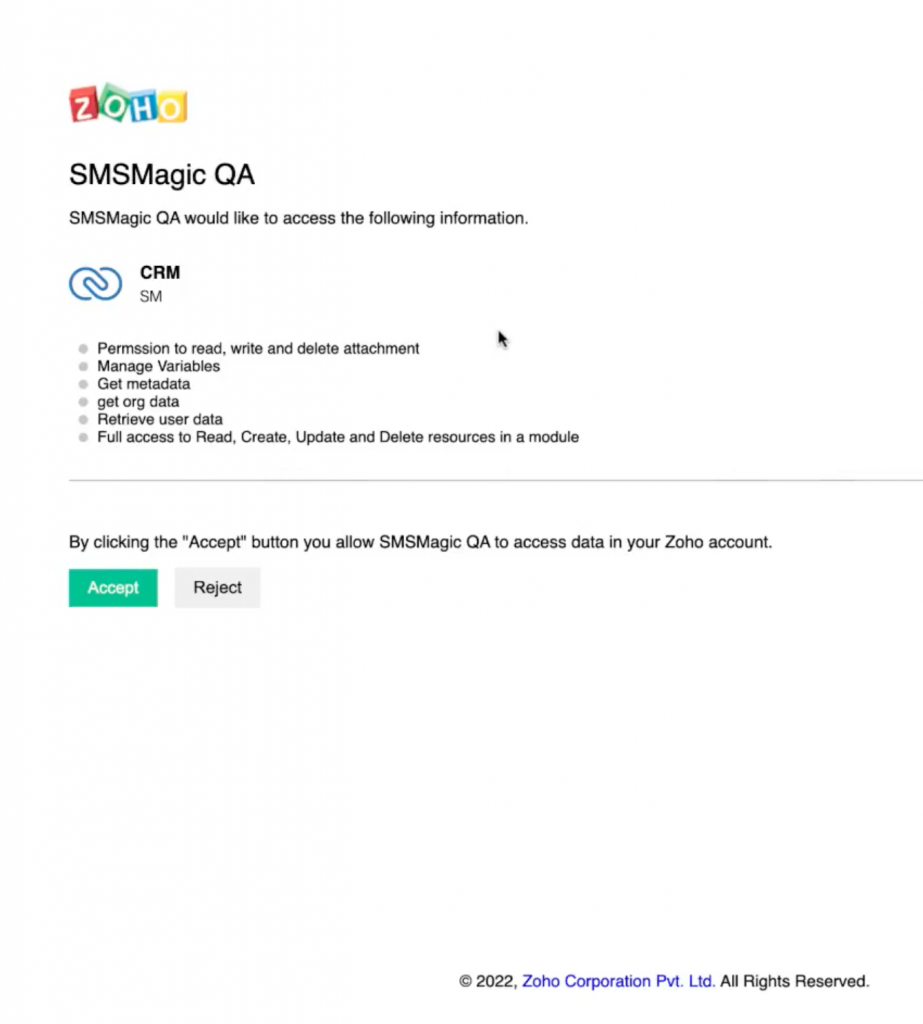
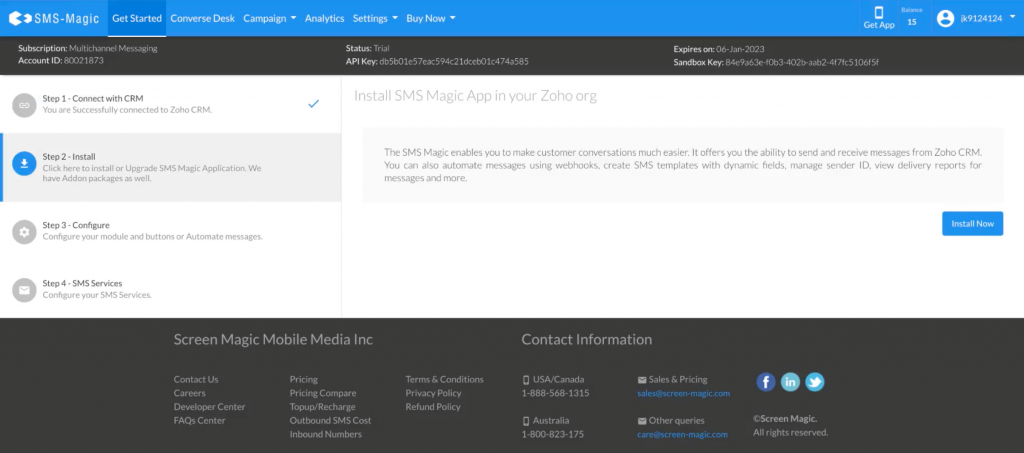
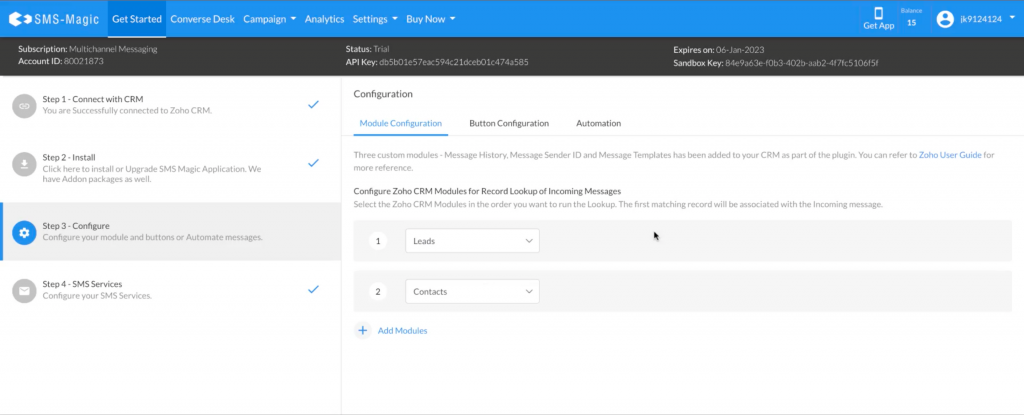
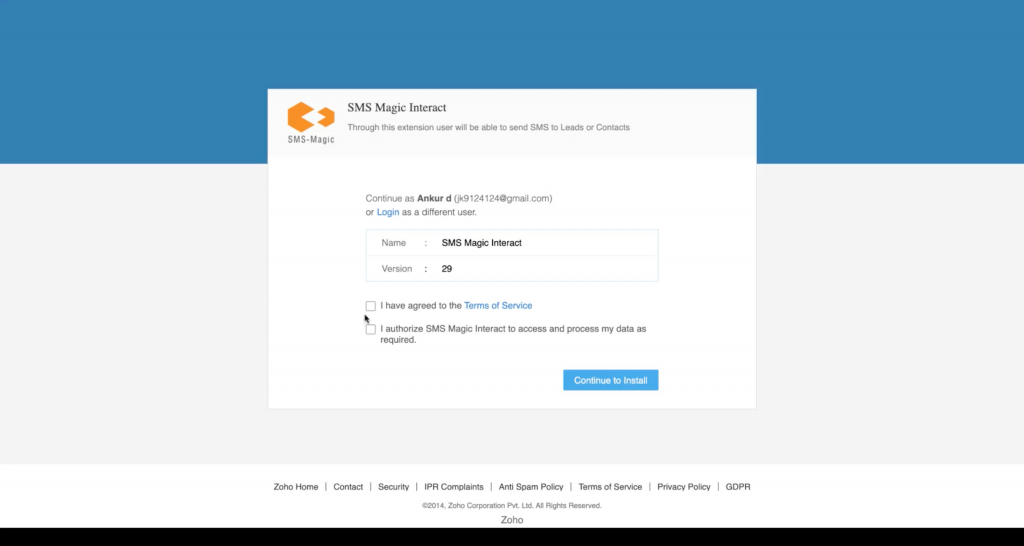
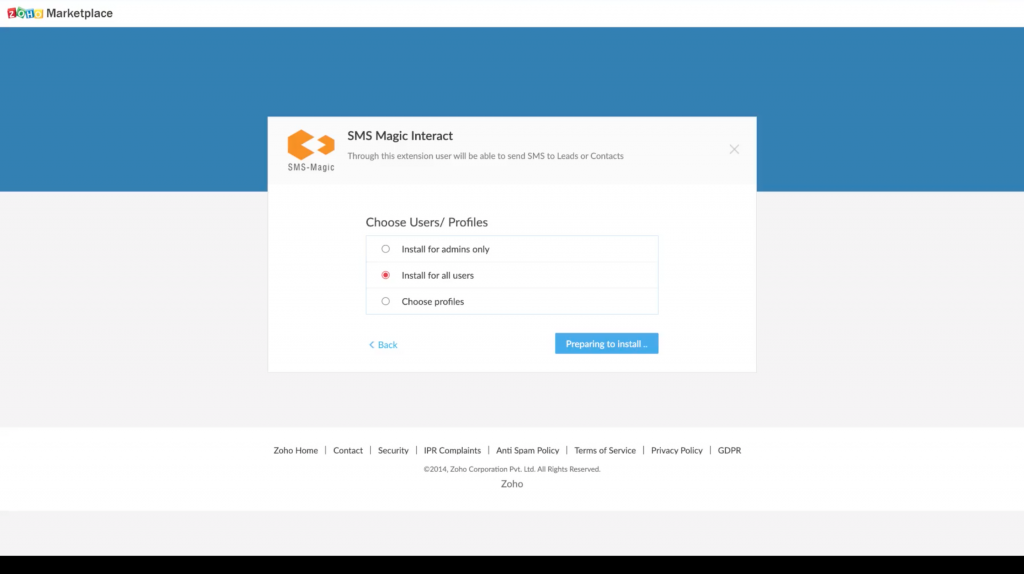
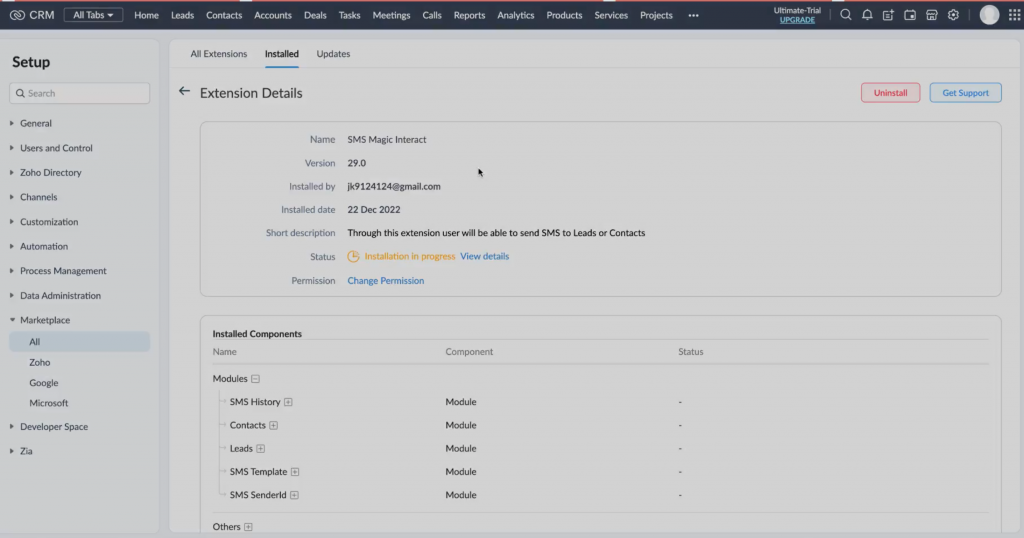
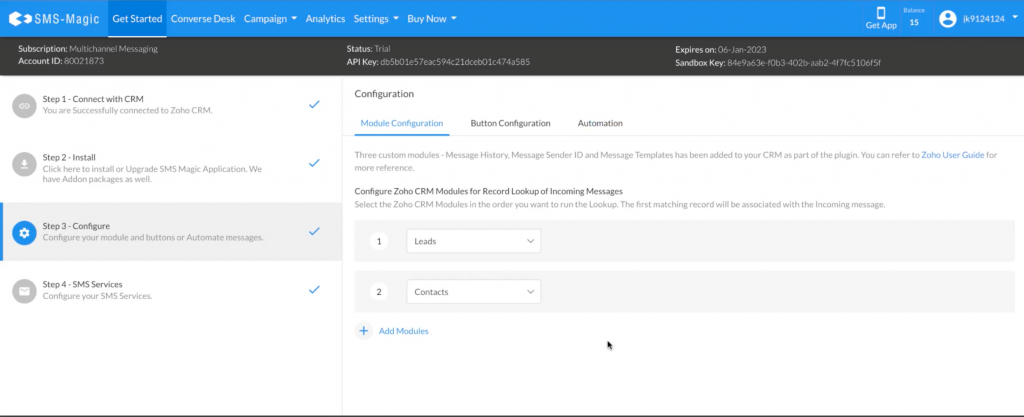
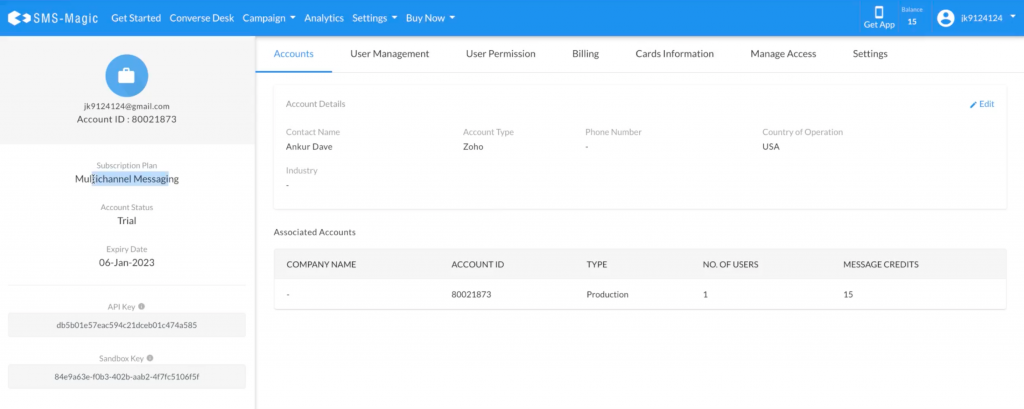
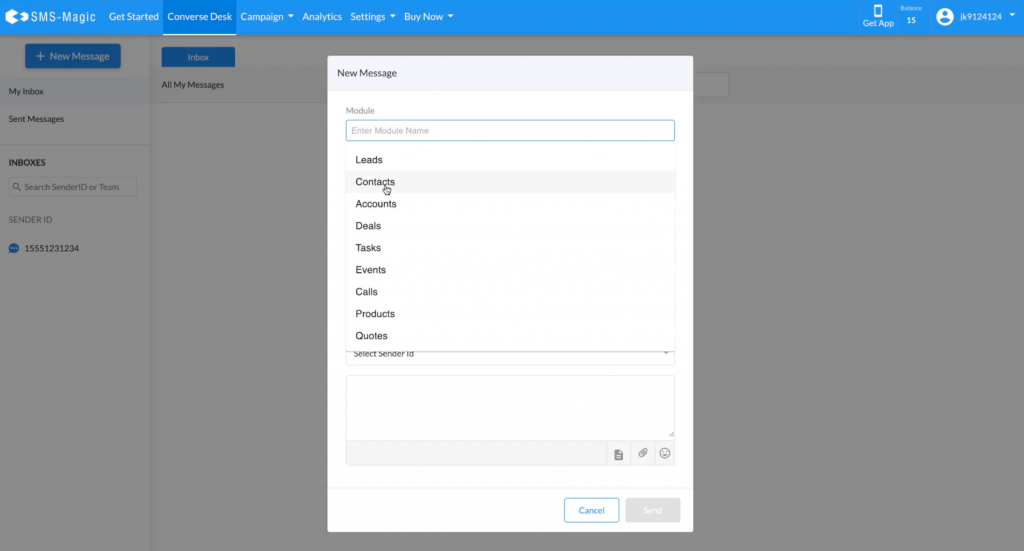
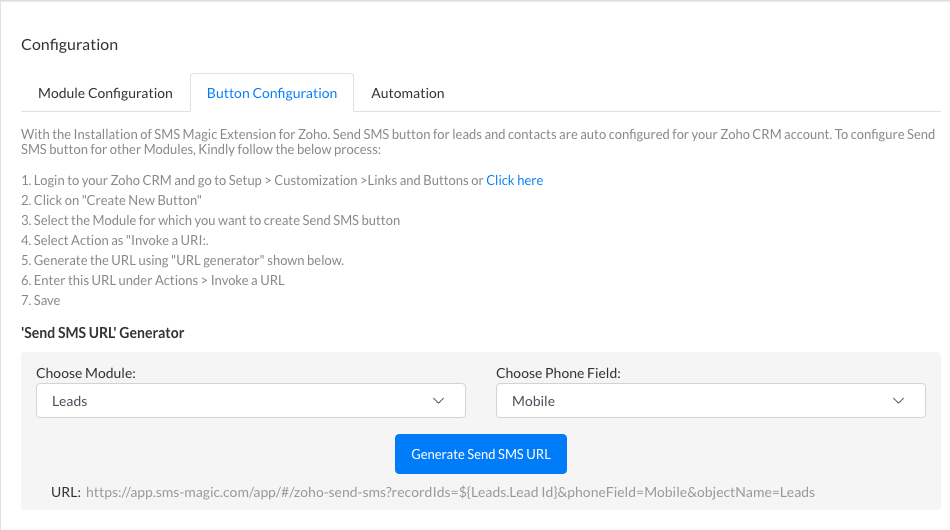
The SMS-Magic Extension for Zoho CRM enables you to converse with prospects and customers easily. It gives you the ability to send and receive SMS messages from Zoho CRM. You can also automate messages using Webhooks, create SMS Templates with Dynamic fields, Manage Sender IDs, and view Delivery Reports for your messages.

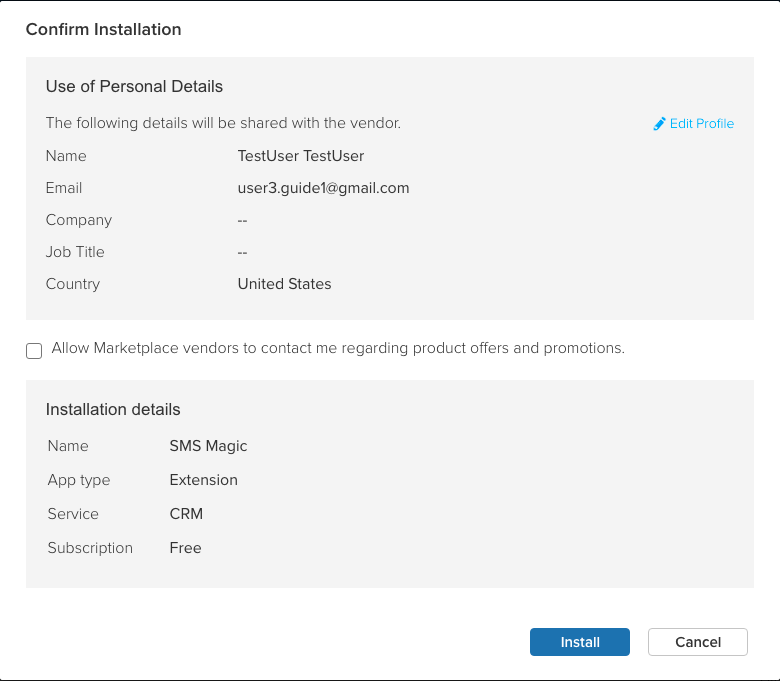
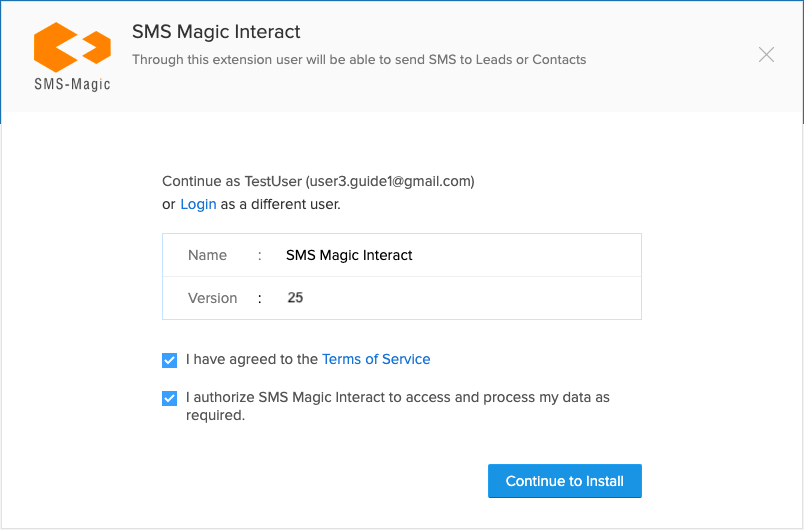
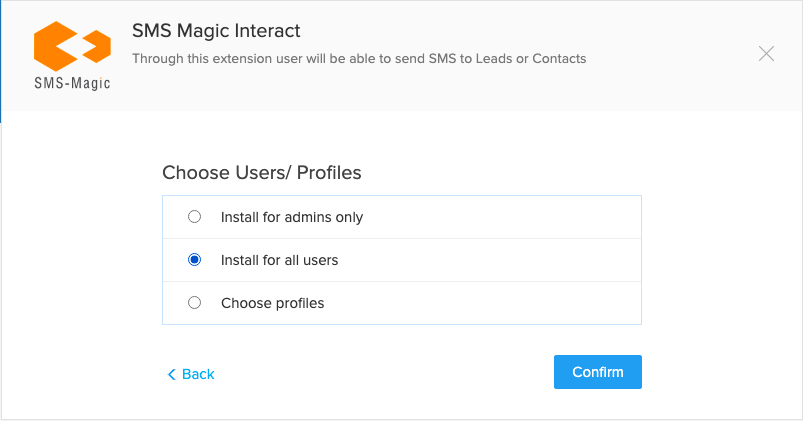
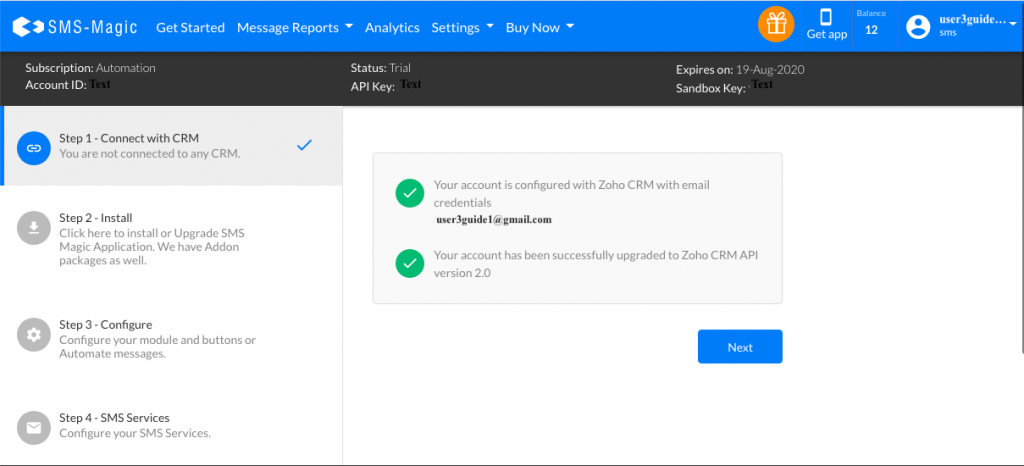
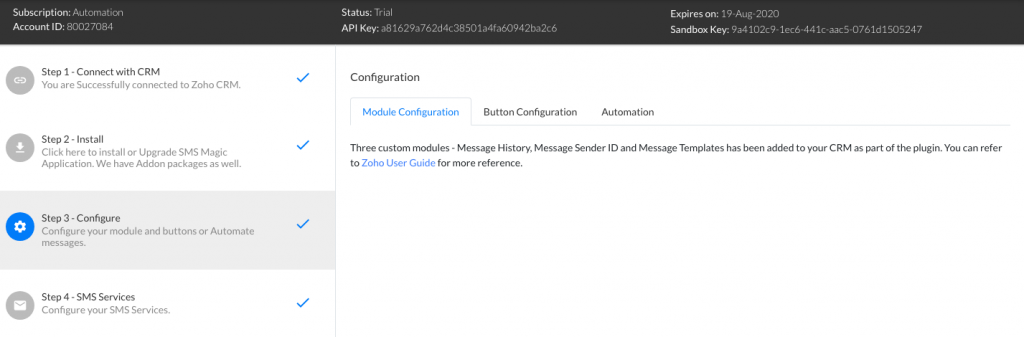
Go through this guide to learn how to install and configure the SMS-Magic Extension on Zoho CRM. You can also contact sales@sms-magic.com for more details and assistance.


Installing SMS-Magic on Zoho CRM

Follow the below steps to install SMS-Magic into your Zoho CRM account.

  1. To install this plugin, go directly to the SMS-Magic page, or visit the Zoho CRM Market place using the URL below and search for “SMS-Magic”:
  1. Click on the Install button. Confirm Installation.
  1. If necessary, log in to your Zoho CRM account, and then enter your valid Zoho CRM credentials 
  2. Go through the Terms of Service, check the box for I have agreed to the Terms of Service.
  3. Check the box for I authorize SMS Magic Interact to access and process my data as required, and click on the Continue to Install button 
  1. Choose the Users and/ or Profiles that you want to provide access to SMS-Magic Extension for. We recommend that you choose the option to ‘Install for all Users’. 
  1. The installation for SMS-Magic Extension on Zoho CRM is now complete, and you may now view the installed app in Zoho CRM Setup.

The SMS-Magic extension creates three Modules: SMS History, SMS Template, and Sender ID. It will also add a Send SMS button on the Leads and Contacts list view for your Zoho Org. Learn more by clicking the Details link in Setup > Customization in your Zoho CRM.

Once the installation process is complete you need to sign-up and configure SMS Magic with Zoho CRM.


Signup to Use SMS-Magic with Zoho

To sign-up for Zoho CRM, follow the simple steps mentioned below:

  • Click on the ‘Try it for Free’ button, and the following sign-up form page will appear:

Here, to sign-up, you need to enter all your details and click on the ‘Start free trial’ button. 

  • Enter your first name in the ‘First name’ field
  • Enter your last name in the ‘Last name’ field
  • Enter your official email address in the ‘Business email address’ field
  • Select the correct option from the ‘Select CRM’ drop-down. As you want to sign-up on Zoho CRM, select the ‘Zoho’ option.
  • Select the country of your location from the ‘Select country’ dropdown
  • Check the Terms of Service check box
  • Validate the captcha and click on the ‘Start free trial’ button 
  • Your account will be created and you will get the following message:
  • You will receive a welcome message on your email ID. Confirm the email address and login to continue using SMS Magic services as shown in the image below:
  • Once you verify your email address, you will be redirected to the following page where you need to set the password:
  • Once your password is set, you can log in to the Zoho CRM and explore all features. To log in, select crm.zoho.in option from the Zoho CRM dropdown, as shown in the image below:
  • Click on the ‘Accept’ button to allow SMS Magic to access data in your Zoho account:
  • Once you complete the login steps, you will be redirected to the home page of Zoho CRM. Here, you need to install SMS Magic App in your Zoho org. Click on the ‘Install Now’ button:
  • Add required modules in the following configuration page:
  • Select the checkboxes to continue the installation of the Zoho plugin in your org:
  • Select the users to continue the installation:
  • Once the app is installed, you can see the extension details and installed components: 
  • Once the Zoho plugin is installed, login back to your org and you will be able to see that all the required four steps are now complete:
  • You can check your profile to see the details of your account. As your account is created with a Multichannel messaging plan, the Converse Desk and Campaign Manager will be enabled by default. You receive 15 messaging credits, one Sender ID, and five licenses with the trial plan.
  • Go to Converse Desk and use the Sender ID/number that is assigned to you, to send your first message.


Configuring SMS-Magic with Zoho

If you have logged in using Zoho CRM SSO, your account will be automatically configured with Zoho CRM.

NOTE: If you have not already installed the SMS-Magic Interact on Zoho CRM, click on Install and follow the steps mentioned in Installing SMS-Magic on Zoho CRM.

Re-login to SMS-Magic Web Portal, In the ‘Get Started’ section, click on the Configure Wizard to view the modules that have been created in your Zoho account.

Notes: Do not delete or modify any of the Zoho Module Names. These names must remain as-is for SMS-Magic to work correctly with Zoho CRM.

  • In the Button Configuration tab, you’ll find instructions on how to create the Send SMS button for Zoho CRM. 
  • The Automation tab provides information on how to use Webhooks to Send SMS Messages from workflows. You may proceed with these steps. 

Setup and configuration is now complete. You are all set to begin using SMS-Magic. To learn more about SMS-Magic Extension, please refer to our User Guide.


Add new user on existing SMS-Magic Account

Add a New User to your existing Zoho CRM account

  1. Login to your Zoho CRM account as an Administrator
  2. Go to Setup and select Users in Users and Control
  1. Add a new user
  1. Verify and activate the new user on Zoho CRM
  2. Login with this newly created user in Zoho CRM.

Add a new user to your existing SMS Magic account

  1. Login to your SMS Magic account as Admin User.
  2. Go to Account Info -> User Management. Click on Invite User.
  3. If you have enough Available licenses, you will be able to invite a new user. If not, kindly contact care@screen-magic.com to purchase more user licenses.
  4. Add the email address of users you wish to invite one by one
  5. The count of Available Licenses will keep on updating as you add users
  6. Click on Invite. All the users invited will be by default Standard Users.
  7. An Invitation email with Subject “You’re invited to join SMS-Magic” will be sent to the entered email addresses
  8. You can keep track of the invite status in the User Details table.

Follow the below steps to Join SMS-Magic on receiving an Invitation –

  1. Click on the Join SMS-Magic link in the Invitation Email.
  2. Fill in the details and Click on Register.
  3. Once registered, Click on Login, and it will take you to Sign In page of SMS-Magic.
  4. Sign In using Zoho CRM Single Sign On and start using SMS-Magic Web Portal services.
  5. Go to Account Info and check if the Account ID is the same as the Account ID for the SMS-Magic account of your business.
Note:
The Account ID should be the same after user addition. If there is a different Account ID in place the user was not added to the existing Account. Reach out to care@screen-magic.com if a new SMS-Magic account gets created.

Request Access to SMS-Magic Account

A Zoho CRM user of your organization can request access to SMS-Magic Account. When this Zoho CRM user logs in to SMS-Magic account using Zoho CRM SSO, if they are already not assigned a Portal License, then they can raise a request to get the license and access the SMS-Magic account. SMS-Magic Admin User can approve this request by assigning a Portal license to this user.


IP Whitelisting

If the Zoho customer has enabled IP restriction, then IP Whitelisting is necessary to access the SMS-Magic application. If the whitelisting is not done for the necessary IPs, then the Zoho customer will not be able to login to the SMS-Magic application.

To whitelist an IP, go to this link –
https://www.zoho.in/crm/help/security/allowed-ips.html#Add_IPs.

The following table shows the complete list of IPs that is to be whitelisted for Zoho customers:

US Customers EU Customers
  52.45.151.171   34.253.11.161
  34.197.69.171   54.77.136.41
  34.197.38.71   54.250.41.120
  34.234.244.188   34.255.49.210