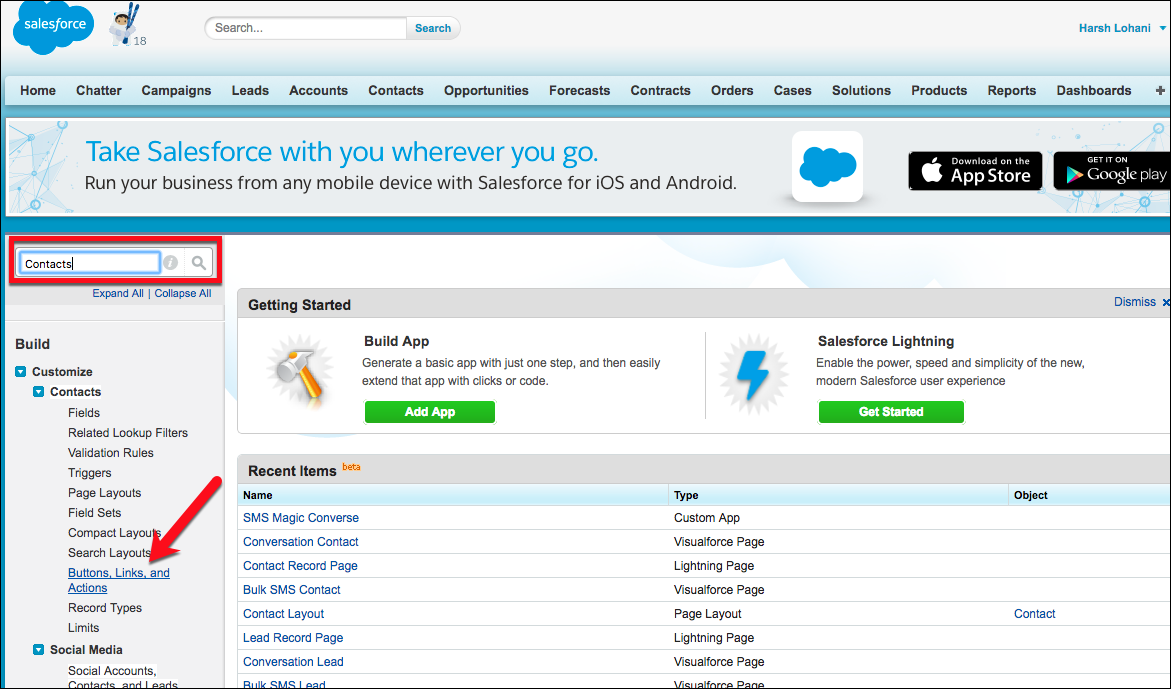
From Salesforce Classic Setup, use Quick Find to search for the Object for which you want to configure the button.
NOTE: Ensure that you have configured Message Configuration for this object. |
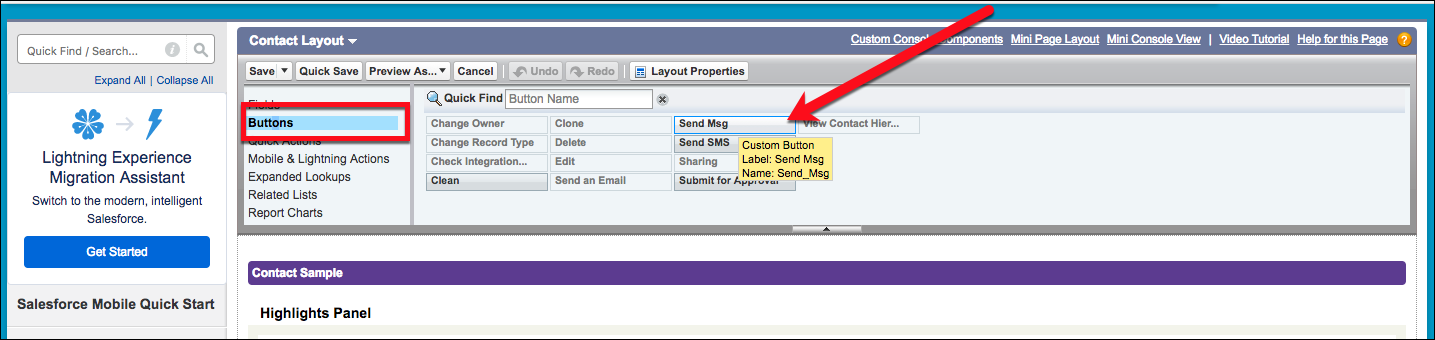
In the left-side menu, click Buttons, Links, and Actions.
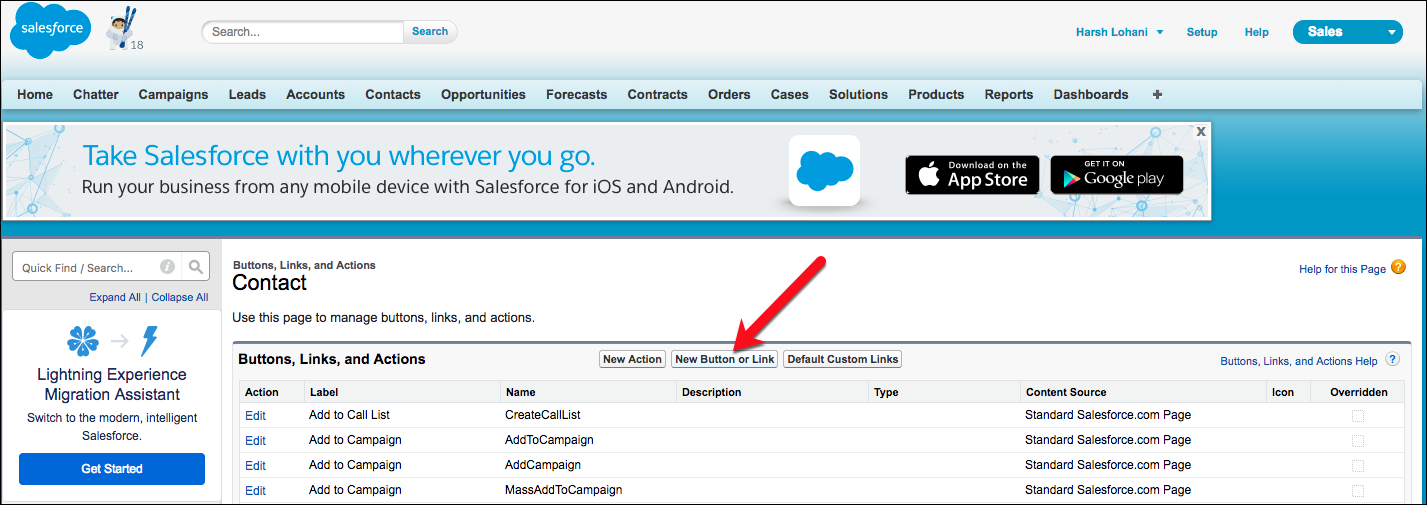
Click New Button or Link.
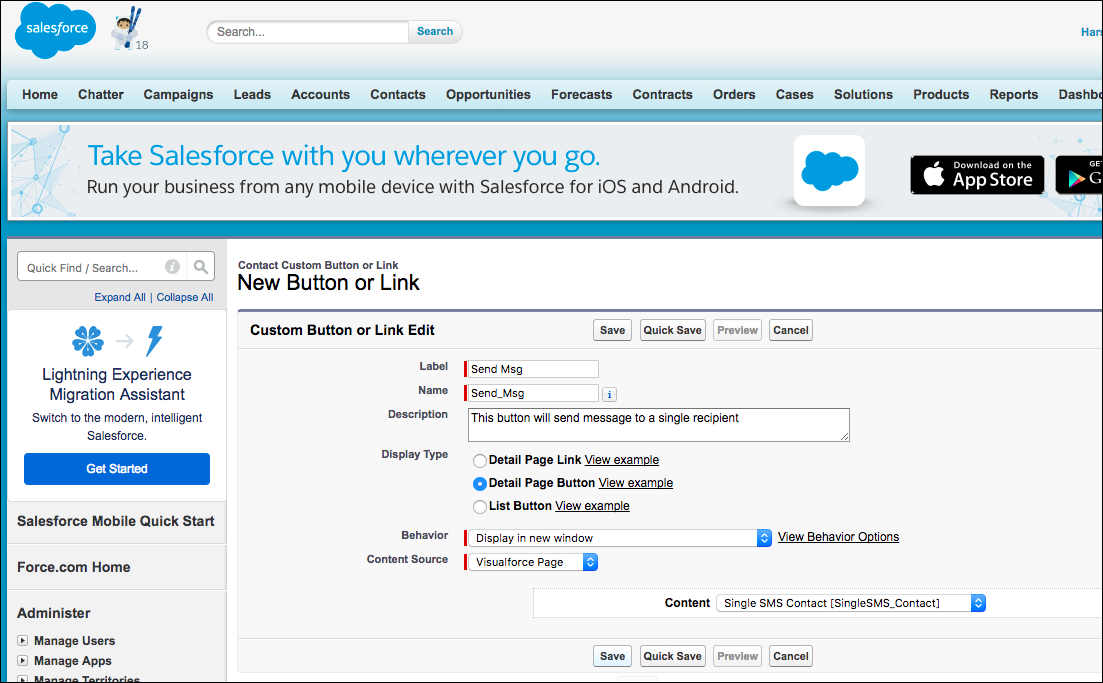
Create a New Button
Enter the details for the button:
•Label — “Send Msg” (Label of the button)
•Name — “Send_Msg” (Auto-populated)
•Description — Description for your reference
•Display Type — Detail Page Button
•Behaviour — Display in new window (According to your organization requirements)
•Content Source — Visualforce Page
•Content — Single SMS Contact (When creating a Message Configuration)
Click Save to commit the changes.
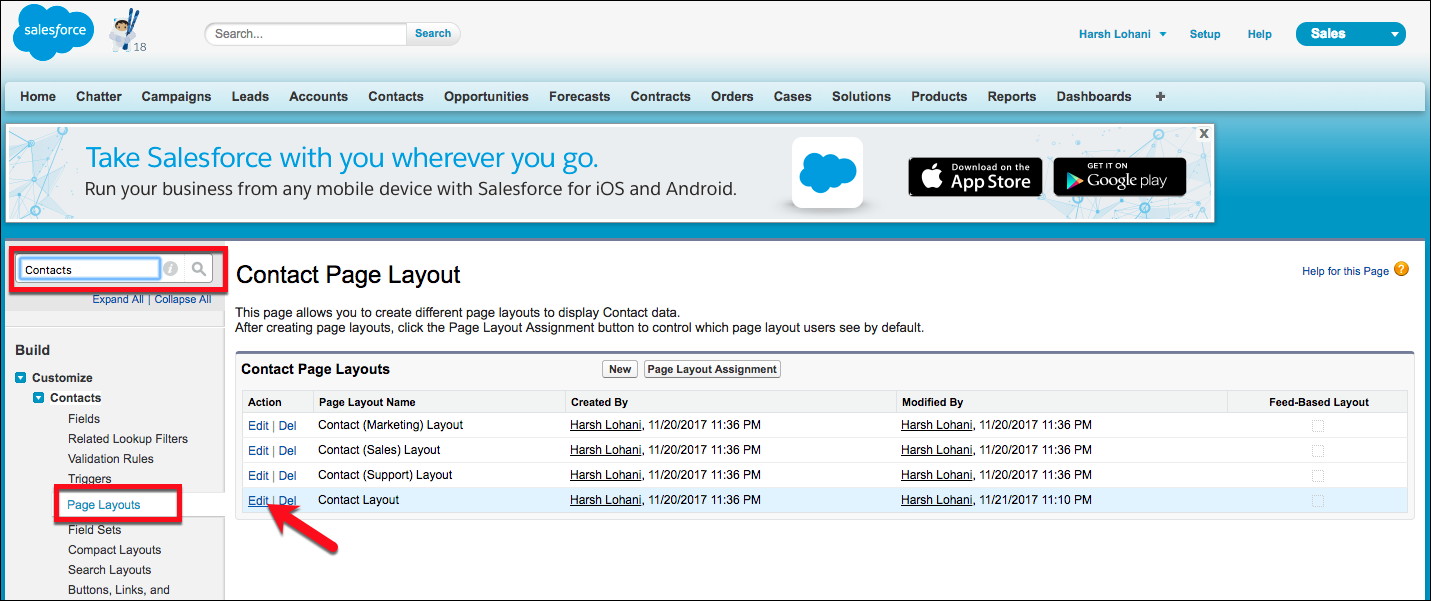
Edit the layout of the object page
Now that the Send Msg button is created, we can add it to the record layout for Contacts. Choose Page Layout and edit the Contact Layout (object name).
Add the button to the layout
Next, move to the Mobile & Lightning Actions section and look for the button created previously. In our case, it is Send Msg.
Simply drag and drop the Send Msg button beneath the Salesforce Mobile and Lightning Experience Actions section, and then click Save.
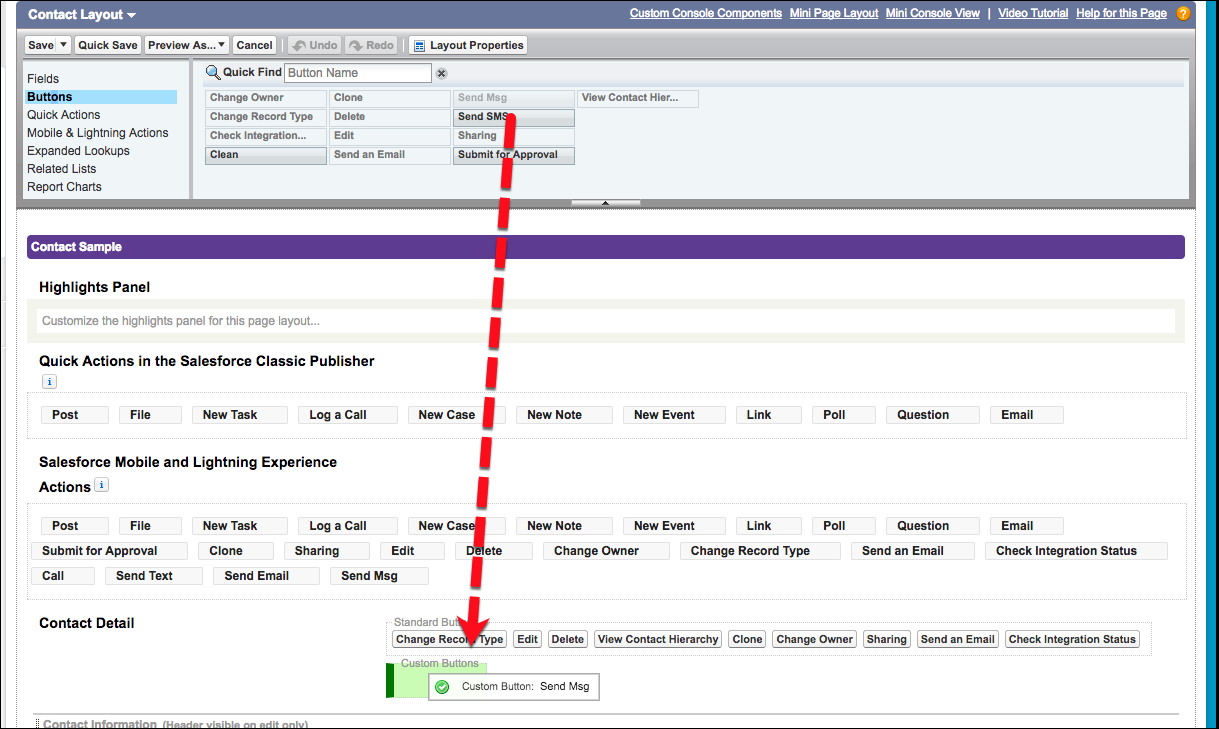
Access the Button
Continuing with our example, the Send Msg button has now been added to the layout of the Contact object. It is now available as a menu item on any Contact object, as shown in the figure here.
