Help and Support
This section redirects users to the SMS-Magic Technical Resource Center, where user guides, FAQs, and all relevant documents can be accessed.
This section redirects users to the SMS-Magic Technical Resource Center, where user guides, FAQs, and all relevant documents can be accessed.
Yes, Sender IDs can be assigned to a user or a profile in the SMS-Magic Converse version. Refer to the Sender Id and assignment section in the SMS-Magic Converse Salesforce Admin Guide.
Yes. SMS-Magic Works with partner community user of Salesforce. You can give the users “SMS-Magic Converse User” Permission Set and grant access to the Visualforce pages for Conversation View.
Refer to the section on SMS-Magic Converse Permission Details in the SMS-Magic Converse Guide for Salesforce Admin for more details on assigning permissions in SMS-Magic Converse.
SMS or messaging compliance is a highly regulated industry. The applicable laws depend on the place of business, destination country of your recipients, and the specific industry you are in. Telecom laws apply uniformly to any SMS sent in that particular country.
Businesses are required to obtain specific consent before messaging their prospects and customers. Each regulation such as Telephone Consumer Protection Act (TCPA), General Data Protection Rights (GDPR), Canada’s Anti-Spam Legislation (CASL), or California Consumer Privacy Act (CCPA), California or the new California law, makes it mandatory for each business to obtain specific consent.
Just like SMS, all other messaging channels such as WhatsApp and Facebook have also defined specific guidelines to capture and manage user consents for driving high-quality conversations between people and businesses. Businesses will have to adhere to region-specific regulations along with channel-specific guidelines. As we may expand our channel support with additional channels such as Line, etc., we will be improving our compliance configurations to be in sync with different channel-specific Business Policies and Terms on managing consents.
Considering all these region-specific messaging regulations as well as channel-specific guidelines, SMS-Magic has created an extensive framework which serves as a guideline for you to define:
We advise you to consult your attorneys before deciding on choosing your consent options.
We advise you to consult your attorneys before deciding on choosing your consent options.
Yes, Sender IDs can be assigned to a user or a profile in the SMS-Magic Converse version. Refer to the Sender Id and assignment section in the SMS-Magic Converse Salesforce Admin Guide.
Yes, last sender incoming alerts can be activated in SMS-Magic Converse. For more details, refer to the Manage Notifications section in the SMS-Magic Converse Guide for Salesforce Admin.
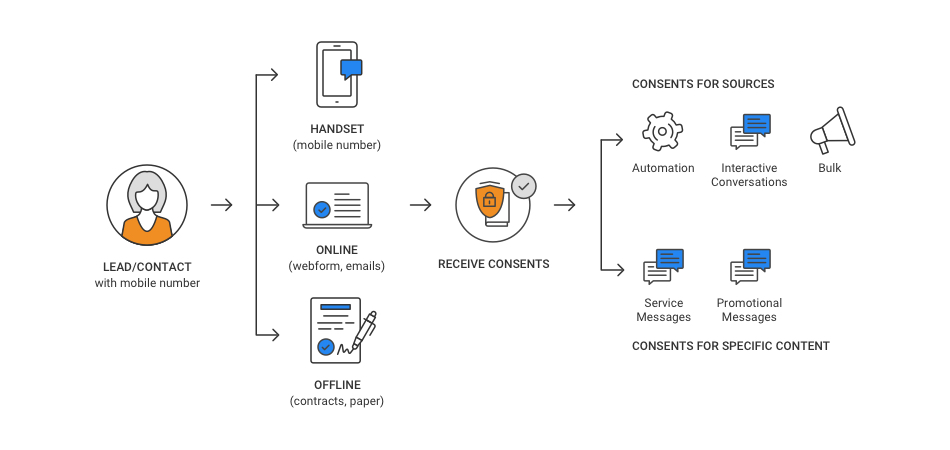
You can initiate and respond to messages from multiple messaging sources. As each message has a specific purpose, the need to ensure that consent is received for those messages prior to sending them, is therefore critical.
For example, while sending automated messages or sending messages to multiple recipients, it is mandatory that you receive an opt-in request first. This helps to ensure that your marketing efforts generate positive results.
While sending one-to-one messages, you will not be able to send messages to customers who have explicitly opted-out of your communication strategies.
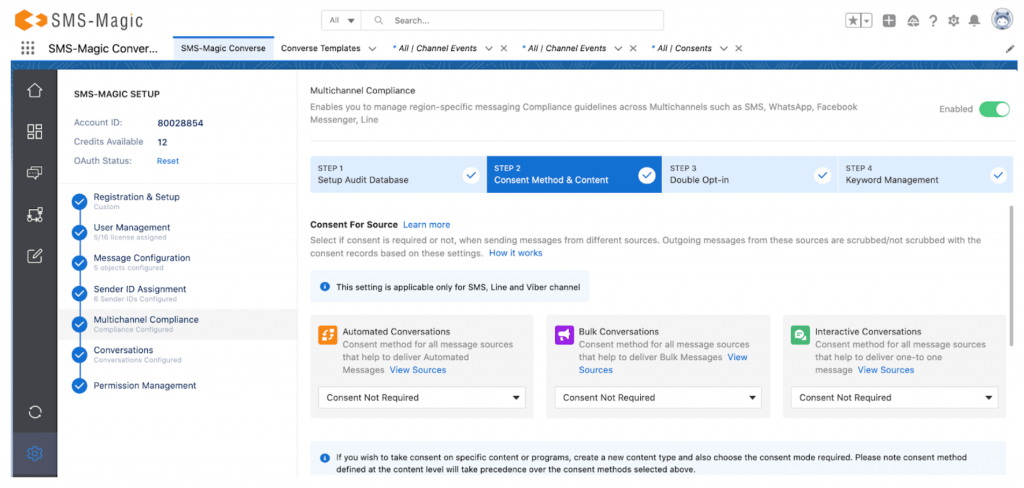
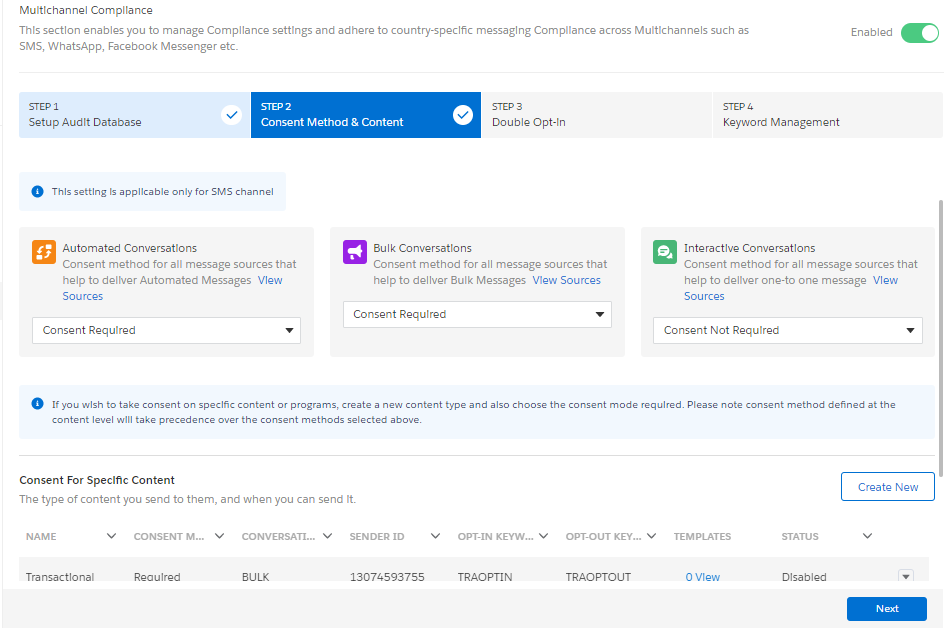
SMS-Magic Converse helps you configure the consent method that is needed to send messages through different interfaces. This is a recommended best practice that all users should follow.
The interfaces that you can configure with these consent methods can be categorized based on the type of messages that they are used for sending. The consent method can be selected from the drop-down list placed below each category name.
These are as follows:
Automated Conversations – All sources such as Converse Apps and Flows help you send automated messages.
Bulk Conversations – All sources such as Record list view, Campaign Managers, reports, and Salesforce Campaigns that help you send bulk messages.
Interactive Conversations – All sources such as the Send Message window in Converse Desk, Converse Inbox, and Record View help you send one-to-one messages to a single customer.
1. Source Type – You can define if the source requires prior consent or not. For example, you might not require consent for sending an emergency message. Another scenario is that you might not be required to use SMS-Magic Compliance Center because you have built your own compliance center. So you can choose, “Consent Not required”.
2. Content Type – Content type opt-ins are useful in ensuring that you can continue sending messages to customers for a specific type of content. Therefore, in case the customer is applying for a blanket opt-out instruction, in the opt-out confirmation message they receive, you specify the content type opt-in they can send if they wish to continue receiving messages for that specific content type.
In Consent for Source, click on the drop-down list beneath the relevant message interface name to select the consent mode.
Refer to the following table for details.
| Field | Description |
| Consent Required | If you select this mode, you can send messages to only those customers who have provided explicit opt-in instructions. This can be used for receiving mobile-initiated consent, consent received through online (web forms), or offline (physical forms) sources. |
| Consent Not Required | If you select this mode, you can send messages to all customers except those who have specifically provided opt-out instructions. This can only be used in countries where compliance guidelines dictate that you can continue sending messages to customers until you receive an opt-out instruction. It is not necessary to receive an opt-in request prior to sending out messages to these businesses. |
| Consent Not Applicable | If you select this mode, you can send messages to all customers without checking for any consent details. This can be used by businesses sending out emergency messages or those who use their own internal compliance guidelines. In all such scenarios, the existing consent status is ignored and the message is sent. |
1. In the Consent For Specific Content section, click on the Create New button
2. Enter the details to create a new content type. Refer to the following table for more details on individual fields.

3. Click on the Next button. The ‘Configure’ section appears to help you add the Sender ID and keyword configurations for the new content type.
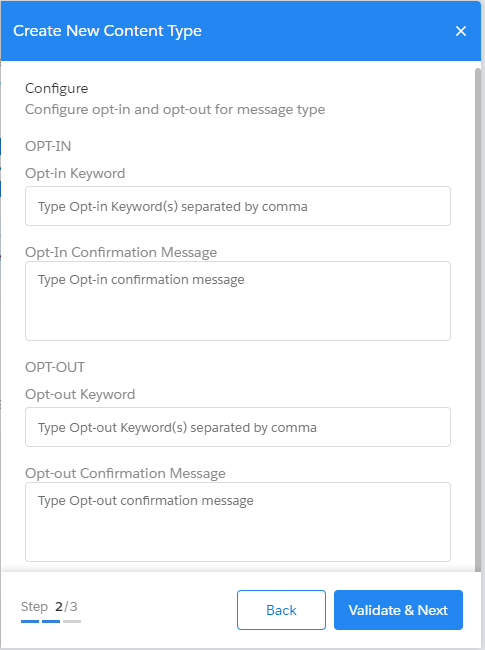
4. Enter the keyword configurations for the new content type. Refer to the following table for more details on individual fields.
5. Click on the Validate & Next button. The opt-out instructions section appears.
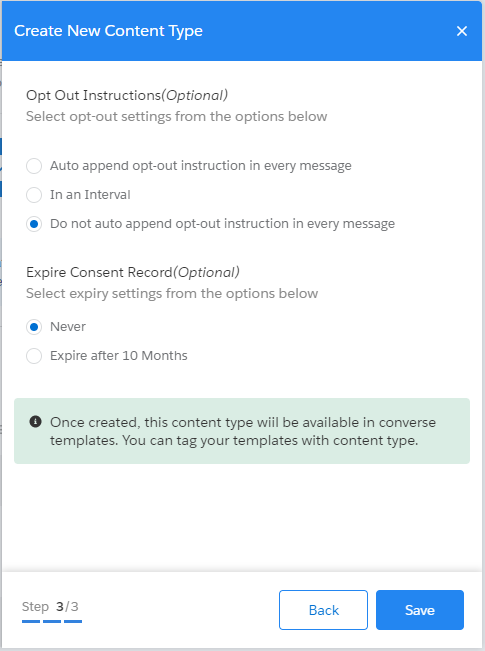
6. Select opt-out settings from the option to add an opt-out instruction to your message. Refer to the table for more details.
7. Select the ‘Consent Expiry’ settings from the options given
8. Click on the Save button. The new message type appears on the ‘Content Type’ table.
9. Once the content type configuration is created, you will have to first update the status of the content type created as ‘Active’.
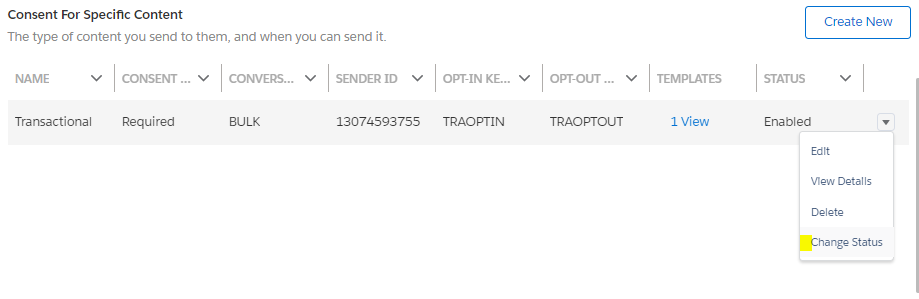
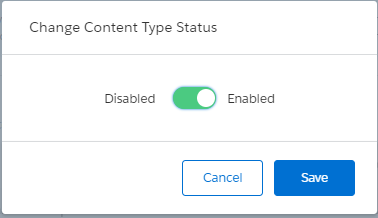
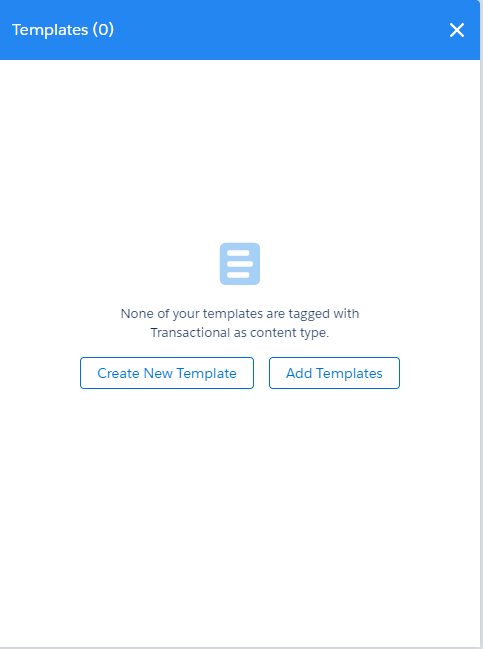
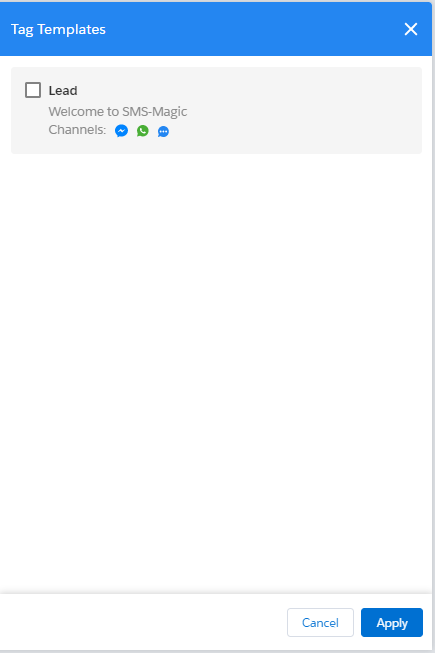
10. Once the content type status is updated to Active, then only you be able to associate templates to it. You can click on the ‘View’ option under the templates column in the Content Type table and add a template to associate it with the content type. Alternatively, you can also associate a template with content type by editing the template in Converse Template.


| Field | Description |
| Content Type Name | Type the content type name. It must follow the given guidelines: A maximum of 40 alphanumeric characters including underscores (_) are allowed. It must start with a letter. It should not include spaces. It must not end with an underscore or contain two consecutive underscore characters. |
| Consent Mode | In the drop-down list select the relevant consent mode for the new content type. This setting is applicable only for channel SMS. |
| Message sending Limits(Per Mobile Number) | This setting will allow you to define the message sending limit per mobile number. You can either keep it as unlimited or define a daily/monthly limit. If you have defined a limit, the system will check for this defined limit along with consent status while enforcing compliance. |
| Applicable Source | Select the conversation source for which the content type will be available. This setting is applicable only for channel SMS. The options provided are:Automated ConversationBulk ConversationInteractive Conversation |
| Sender ID | In the drop-down list, select the Sender ID that will be associated with this Content Type. You can send messages using this content type if you select this defined Sender ID. |
| Opt-In keyword | Type the specific opt-in keywords that you want to associate with this content type. Once configured it will override the manual message keywords created under the Compliance section Basic Settings. |
| Opt-In Confirmation Message | Type the message that will be sent to customers in response to the opt-in request. |
| Auto append opt-out Instruction in every message | Select the option if you want to add an opt-out instruction to every message that is sent out. |
| Do not Auto-append opt-out instructions in every message | Select the option if you do not want to add an opt-out instruction to every message that is sent out. |
| Opt-out Message | Type the message you want to append as an opt-out instruction |


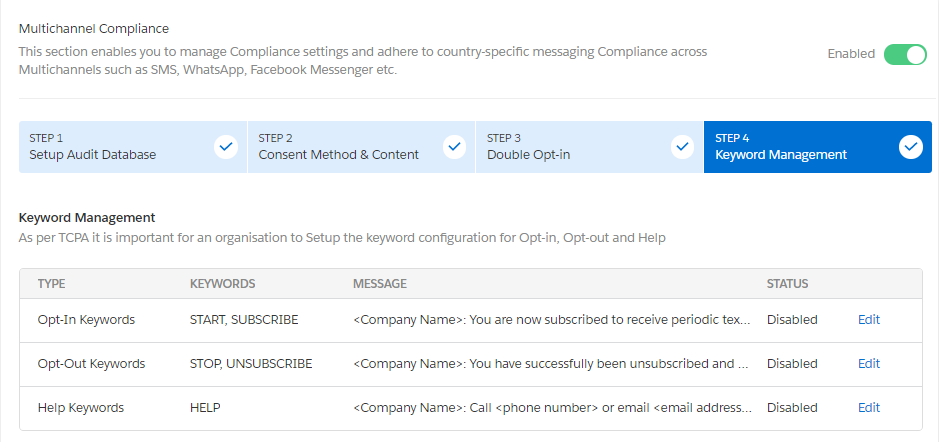
To comply with industry standards, you must respond to keywords for HELP & STOP. Any user who opts-out using the STOP keyword must be added to an opt-out list (blacklist) and must not be sent any further messages until or unless they opt-in again. You can configure mandatory keywords for the three keyword types provided. These are:
For each keyword type, some default keywords have already been pre-defined. You can also create new ones following industry-specific norms.
Create keywords using the following guidelines:
When a customer uses the keywords defined under the opt-out keyword type, they will be opted out or blocked from receiving messages for all campaigns and other activities. You cannot send any more messages to all such customers.
Similarly, when a customer uses the keywords defined under opt-in keyword type, they choose to opt-in for receiving messages from any team within the organization.
You can define separate keywords to help customers opt-in for specific content type messages, for example, notification or promotions. These keywords will be considered for receiving consent for that specific content-type.
Content-type opt-ins are useful in ensuring that you can continue sending messages to customers for a specific content-type. Therefore, in case the customer is applying for a blanket opt-out instruction, in the opt-out confirmation message they receive, you specify the content-type opt-in they can send if they wish to continue receiving messages for that specific content-type.
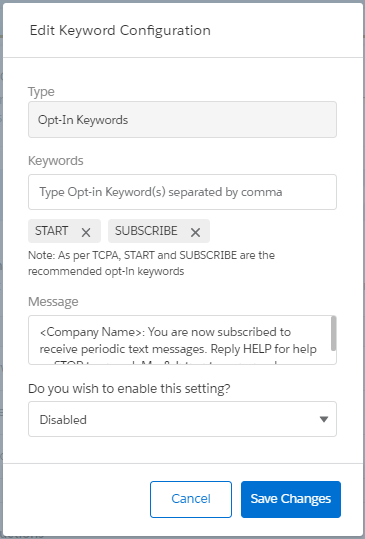
1. Click on the Edit button next to the Keyword type you want to modify. The Edit Keyword Configuration pop-up window appears. Refer to the table below for more details on the keyword options.
| Field | Description |
| Opt-In Keywords | Displays the opt-in keywords that will be used at the organization-wide level. You can define opt-in keywords that are specific to a content type. |
| Opt-Out Keywords | Displays the opt-out keywords that will be used at the organization-wide level. This will opt-out users from all the campaigns/content types. No further messages can be sent to customers from any teams in the organization. |
| Help Keywords | Displays the help keywords that will be used at the organization-wide level. This will redirect customers to request for support based on the keyword you provide |
2. Enter the following details to add keyword configuration
| Field | Description |
| Type | Displays the keyword type that you have selected to edit. For example, Opt-out, Opt-in, Help. |
| Keywords | Type the new keywords that you want to configure for the keyword type. You can type multiple keywords for a single keyword type. The new keywords should not be the same as the default keywords. |
| Message | Type the message that will be sent to customers who have sent the consent details. |
| Do you wish to enable this setting? | In the drop-down, select to indicate whether you want to enable the keyword type. If you disable the keyword type configuration, then customer consent sent for the keyword type will be ignored. For example, customers who wish to opt-out using the defined keywords will continue to receive messages if opt-out keyword type configuration is disabled. Similarly, customers who wish to opt-in with the defined keywords will not be included in the subscription list if opt-in keyword type configuration is disabled. |
3. Click on the Save Changes button. The Keyword Management section appears.
4. In opt-out instructions, click on the Change button next to the pre-configured instruction. The opt-out instructions popup window appears.
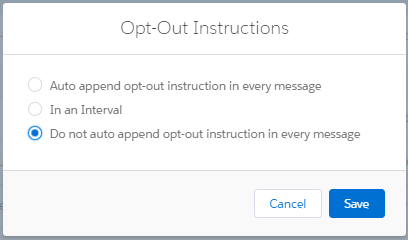
Opt-out instructions are as follows:
| Field | Description |
| Auto append opt-out instruction in every message | Select the option if you want to add an opt-out instruction to every message that is sent out. |
| In an interval | Select this option to send messages only after the defined number of weeks. The recommended practice is to send 1 message every 4 weeks. You can select the interval period in the drop-down list that appears. |
| Do not auto-append opt-out instructions in every message | Select this option if you do not want to add an opt-out instruction to every message that is sent out. |
| Opt-out message | Type the message you want to append as an opt-out instruction. This field appears only if you select the Auto append opt-out Instruction in every message |
5. Click on the Save button. The opt-out instructions, if added, appear as shown.
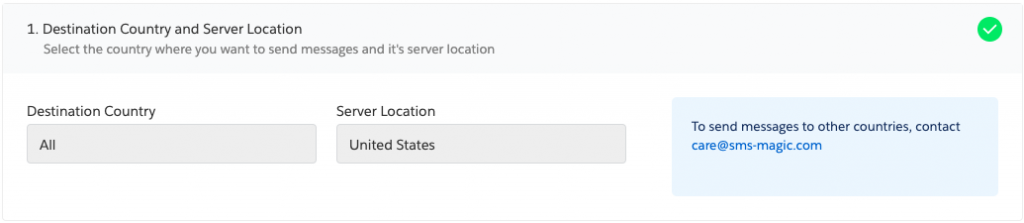
Comprising of 4 basic steps to swiftly guide you to sending your first message. This section helps setup the destination country where you will be sending messages. You will be creating and connecting your SMS-Magic account with Salesforce along with choosing a plan which will help us understand your requirements in a better way. And finally, you will be ready to send your first message.
Select the country where you want to send messages and it’s server location is auto-populated. You can select a different server location if required. To make any changes after the setup is complete related to destination country get in touch with your admin.
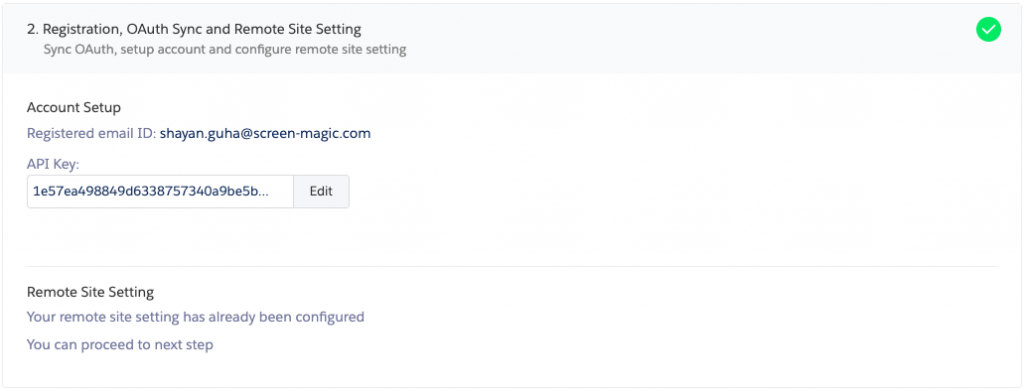
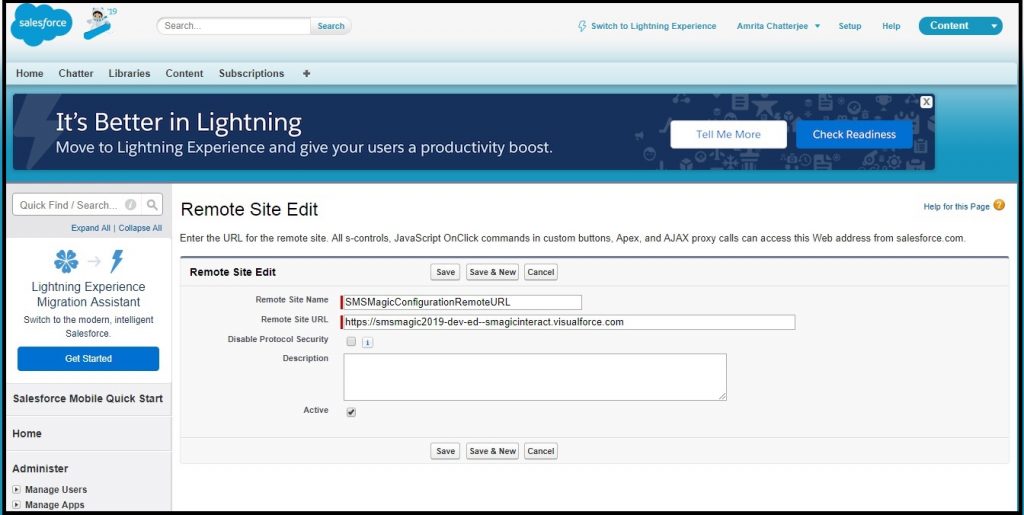
Sync OAuth, setup account and configure remote site setting helps creating your SMS-Magic account and sync with Salesforce using the API key.
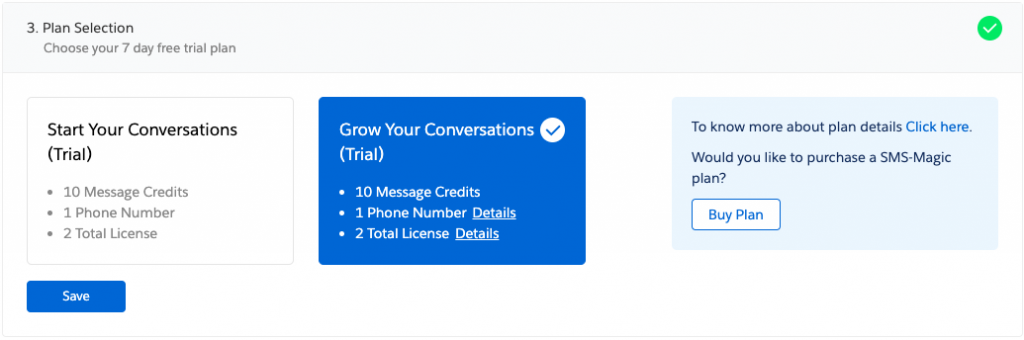
We have added 2 different trial plans for easing into messaging and getting to know the application in a better way.
For more details on the different plans please get in touch with care@sms-magic.com
The default Sender ID will be automatically populated in the ‘From (SenderID) field. This will only be for the Customers who are doing a fresh install of v1.64. In the ‘Registration and Setup’ step of the Converse settings, as soon as you select the plan, a default Sender ID corresponding to the destination country that you selected will be assigned to your account. The Sender ID will be automatically assigned to you from the pool (you cannot choose the Sender ID at this point for this step).
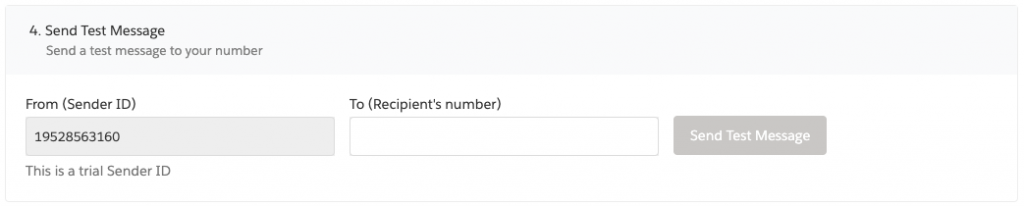
If you are a paid customer, you can change the default allotted number by writing to care@sms-magic.com and choose a number of your choice from the “Sender ID & Assignment” section.
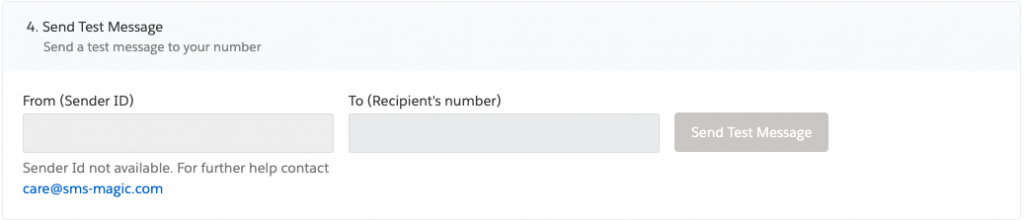
If the Sender ID does not populate in the field, please contact care@sms-magic.com for further help.
Yes, we do work on custom modules. You can create a button to send texts from the custom modules. For more detailed information on how to setup and send SMS please refer to the Zoho User Guide.