Registration and Setup
Overview
Comprising of 4 basic steps to swiftly guide you to sending your first message. This section helps setup the destination country where you will be sending messages. You will be creating and connecting your SMS-Magic account with Salesforce along with choosing a plan which will help us understand your requirements in a better way. And finally, you will be ready to send your first message.
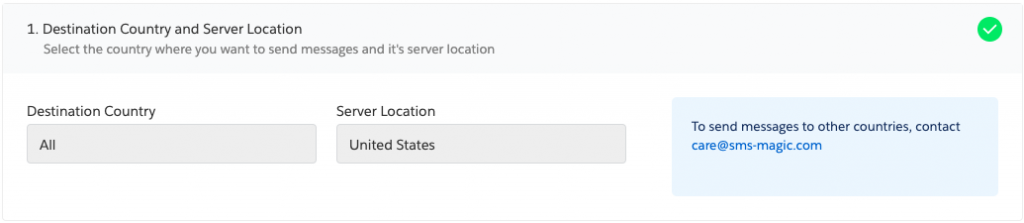
1. Destination Country and Server Location
Select the country where you want to send messages and it’s server location is auto-populated. You can select a different server location if required. To make any changes after the setup is complete related to destination country get in touch with your admin.
- Select Destination Country
- Select Server Location if the default server location doesn’t meet your requirements.
- Click Next
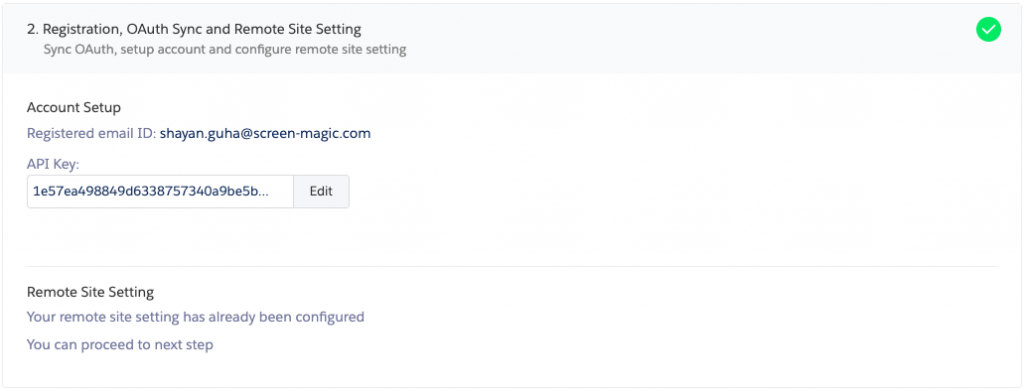
2. Registration, OAuth Sync and Remote Site Setting
Sync OAuth, setup account and configure remote site setting helps creating your SMS-Magic account and sync with Salesforce using the API key.
2.1 Registration and OAuth Sync
- Select the checkbox if the email looks good.
- Click Register. The Salesforce Allow Access? pop-up appears providing further configuration details.
- Click Allow. The Account Configuration Confirmation pop-up appears.
- Click Go Back To Salesforce once the sync is complete.
- The section now displays the API Key assigned to the account.
- Click Save.
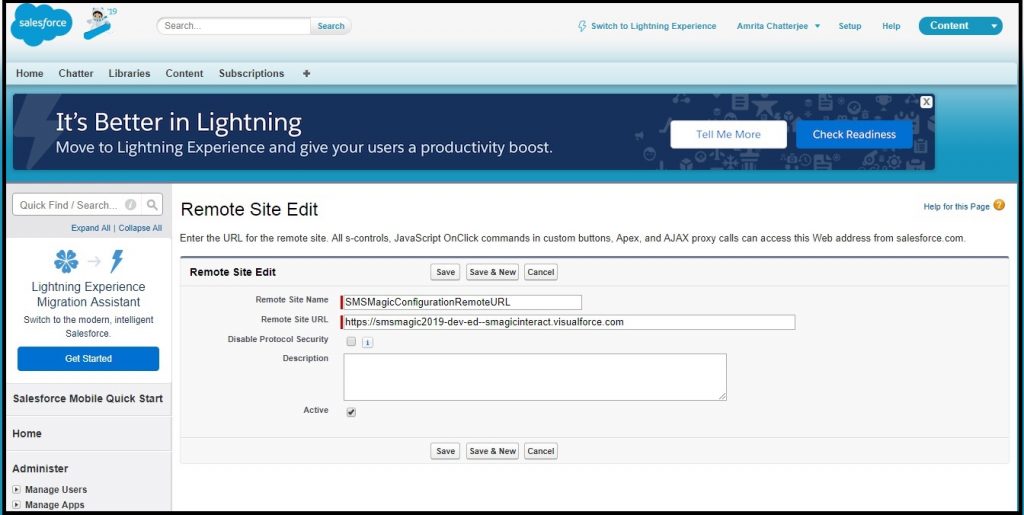
2.2 Setup Remote Site
- Log in to Salesforce and access SMS-Magic Converse.
- Select the Converse Settings tab.
- On the Registration & Remote Site Setting page select Remote Site Settings.
- Click Configure. A new browser window opens displaying pre-filled configuration details.
- Click Save.
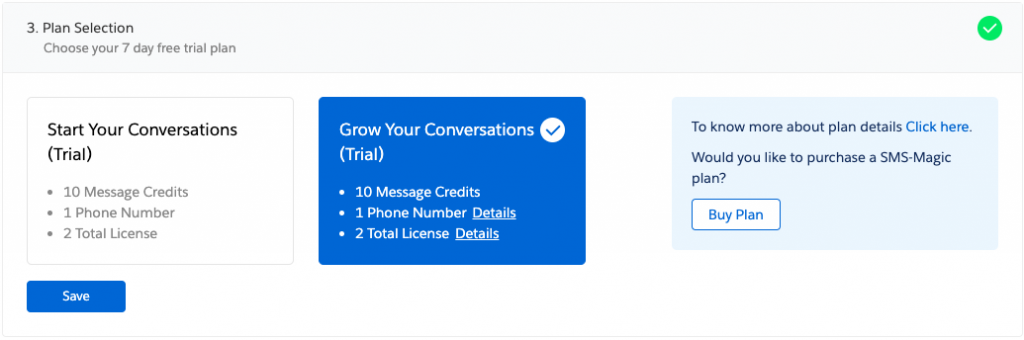
3. Plan Selection
We have added 2 different trial plans for easing into messaging and getting to know the application in a better way.
- Select a plan.
- Click Save.
For more details on the different plans please get in touch with care@sms-magic.com
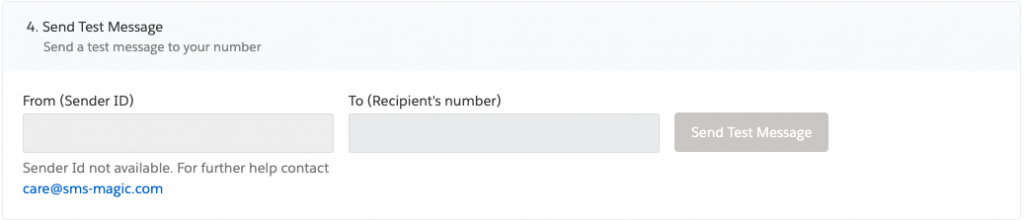
4. Send A Test Message
The default Sender ID will be automatically populated in the ‘From (SenderID) field. This will only be for the Customers who are doing a fresh install of v1.64. In the ‘Registration and Setup’ step of the Converse settings, as soon as you select the plan, a default Sender ID corresponding to the destination country that you selected will be assigned to your account. The Sender ID will be automatically assigned to you from the pool (you cannot choose the Sender ID at this point for this step).
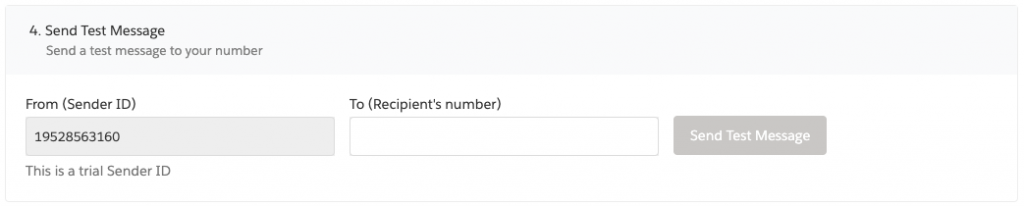
If you are a paid customer, you can change the default allotted number by writing to care@sms-magic.com and choose a number of your choice from the “Sender ID & Assignment” section.
The validity of default Sender ID
- If you select ‘Grow your conversation trail plan’ you get 10 message credits, 1 phone number, and 2 licenses, with a validity of 7 days. So the Sender ID assigned to you will be valid for 7 days.
- If you subscribe to a paid plan, the associated Sender ID will remain active as long as the plan is active. If the plan is purchased with additional Sender ID(s) then the user can select Sender ID(s) from the ‘Add SenderID’ screen.
The allocation of default Sender ID
- If you select the destination country, say the U.S., then the Sender ID allocated to you is from the pool dedicated to the U.S. numbers from the application backend.
- If you select the destination country as ‘All’, then the Sender ID allocated will be from the pool associated with the same criteria for location i.e. available Sender ID(s) will be from the pool that is for destination countries from the application backend.
If the Sender ID does not populate in the field, please contact care@sms-magic.com for further help.
 .
.
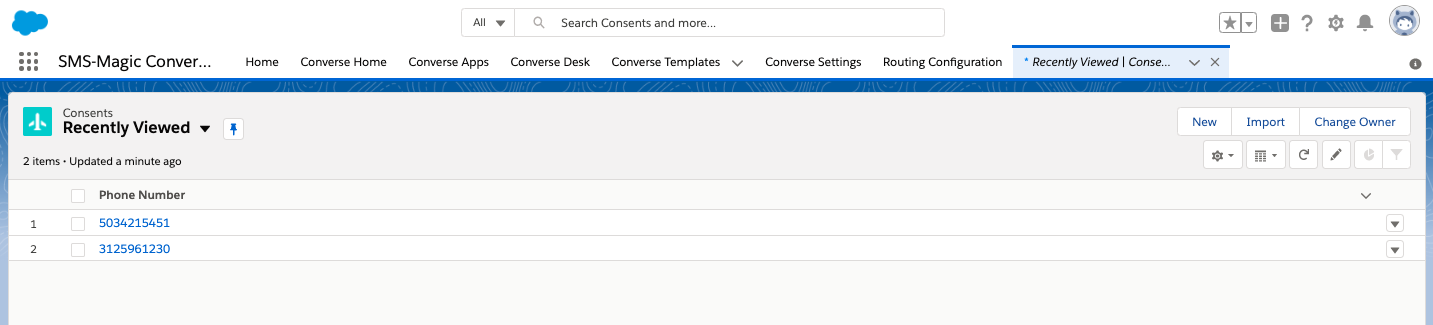


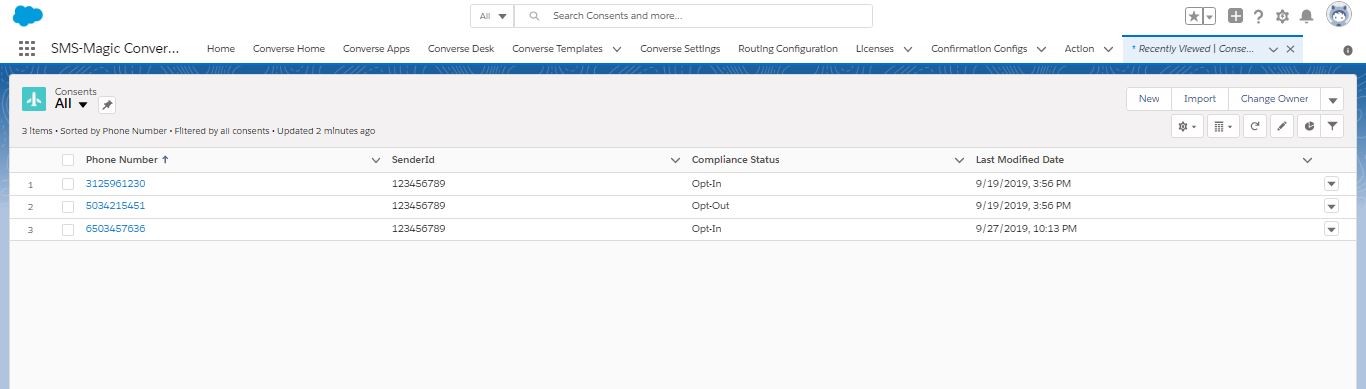
 and select All to remove filters and view all records. The All records view appears.