After completing the configuration of the basic settings of Salesforce Mobile App on the Salesforce platform, you have to launch the Quick Start Wizard to enable Converse Desk on Salesforce1.
To enable the Converse Desk on SF1:
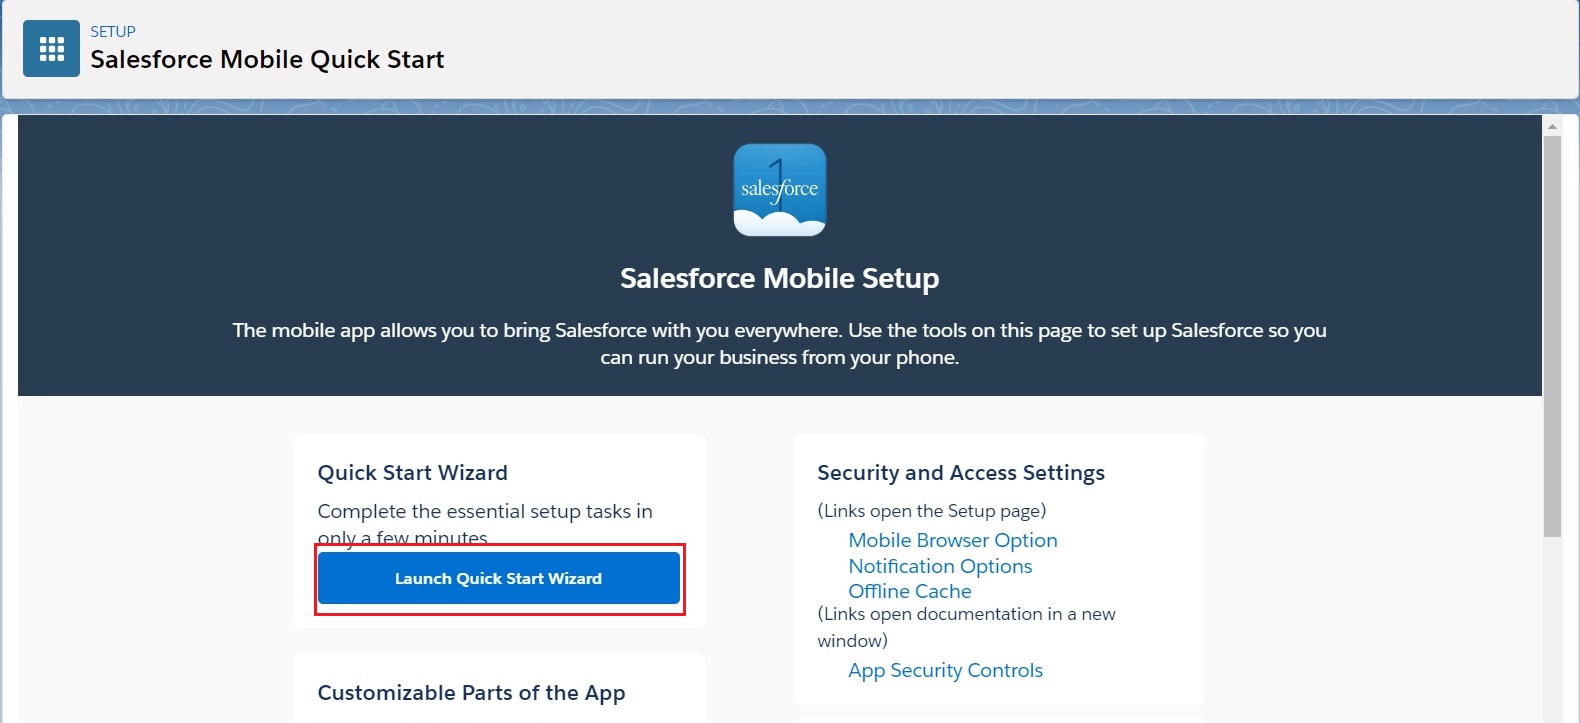
Click on the Salesforce navigation bar and then click Setup.
Select Salesforce Mobile Quick Start by:
Using the Search Setup/Quick Find search field, or
Selecting Platform Tools > Apps > Mobile Apps > Salesforce > Salesforce Mobile Quick Start.
Click Launch Quick Start Wizard.
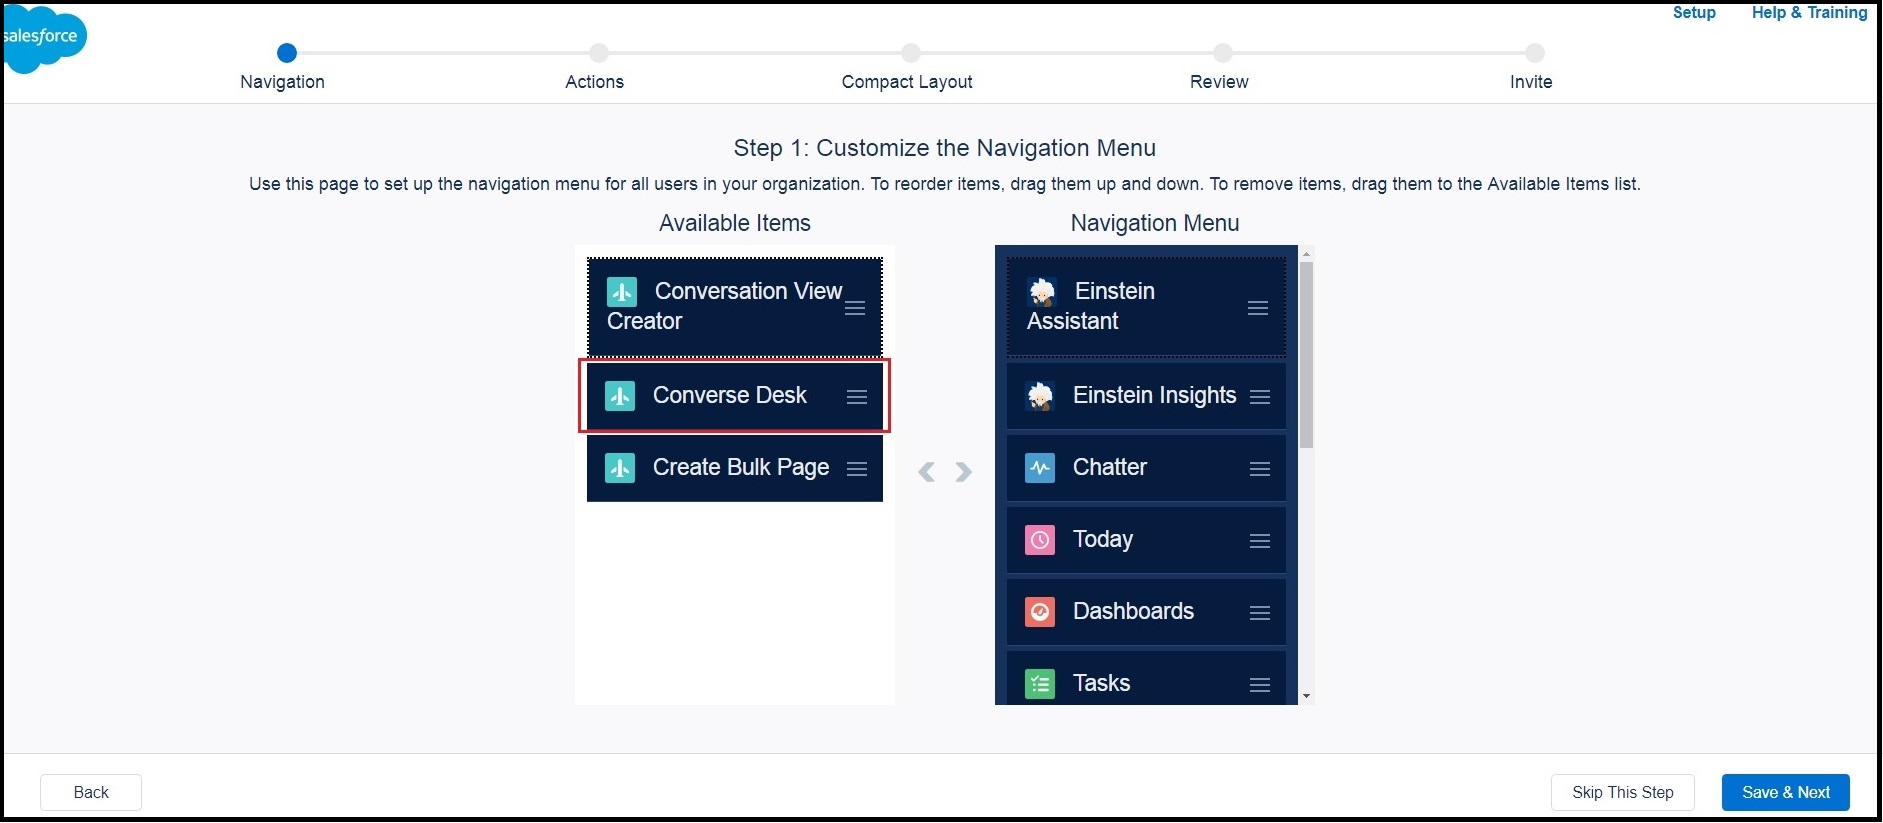
Click Let’s Get Started on the Welcome page and go to Step 1: Customize the Navigation Menu page.
Drag Converse Desk under AvailableItems to NavigationMenu.
Click Save & Next.
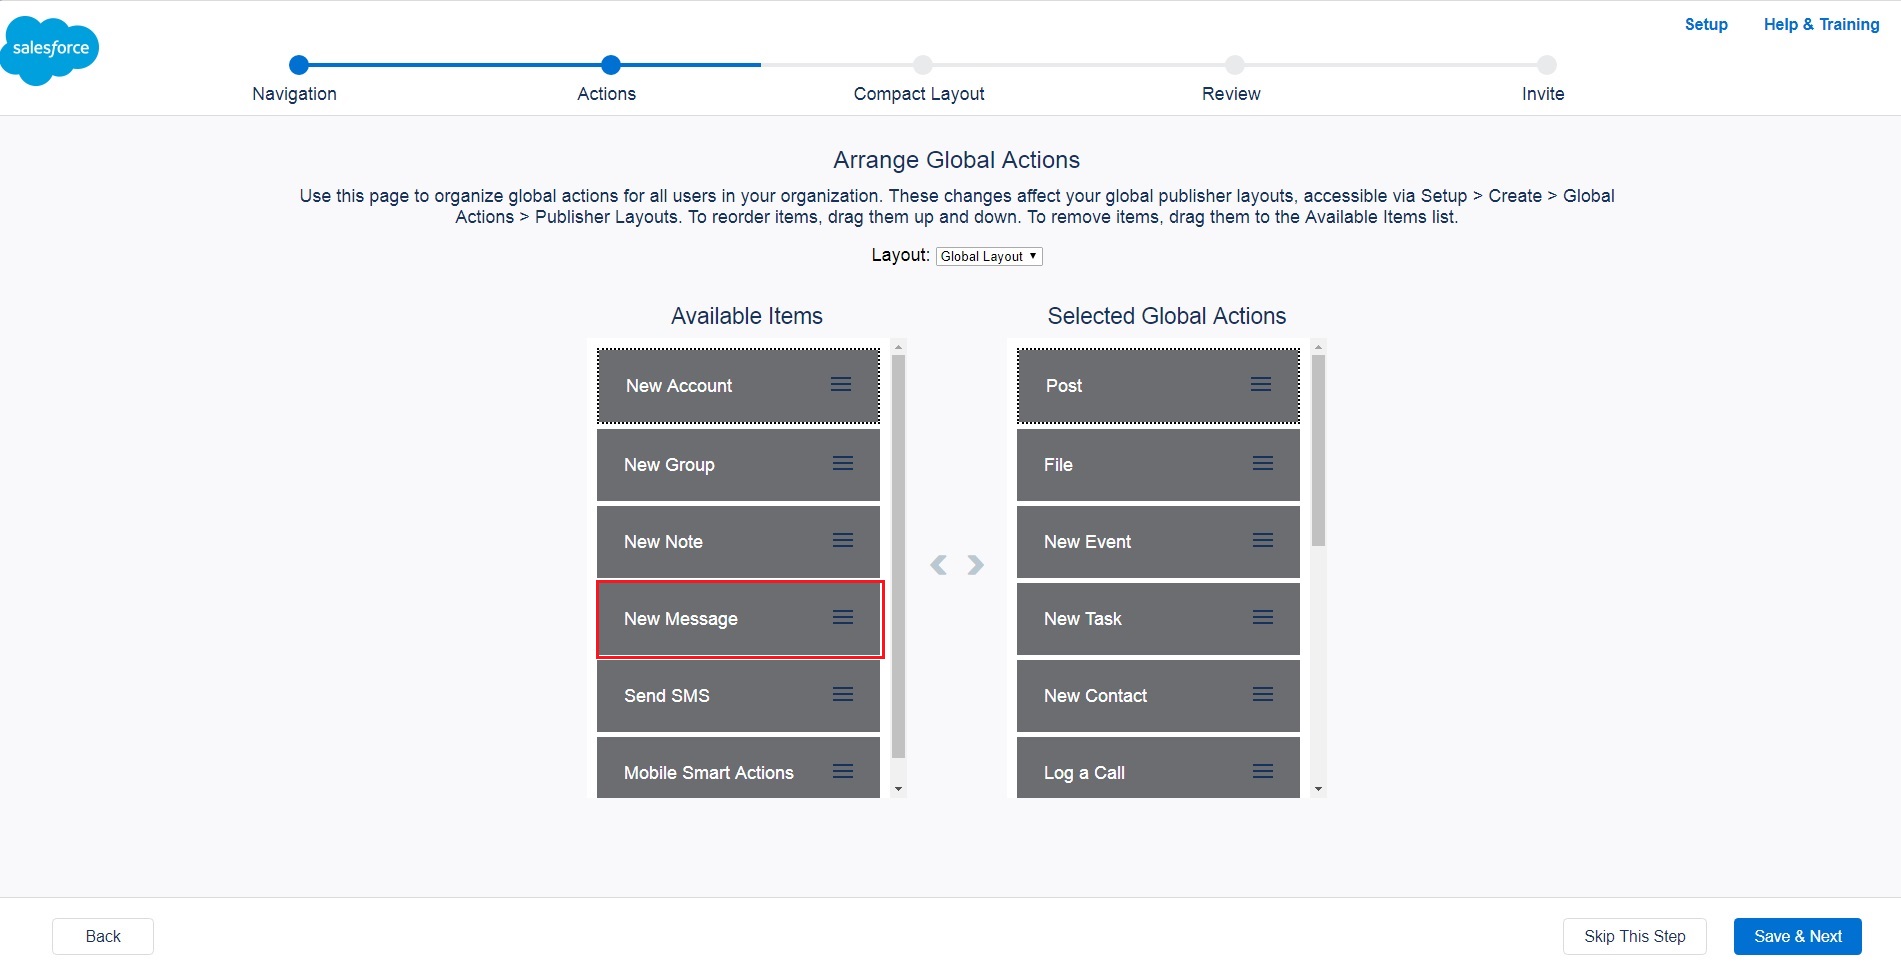
On Step 2: Arrange Global Actions page click Arrange Global Actions.
Drag New Message under Available Items to Selected Global Actions.
Click Save & Next.
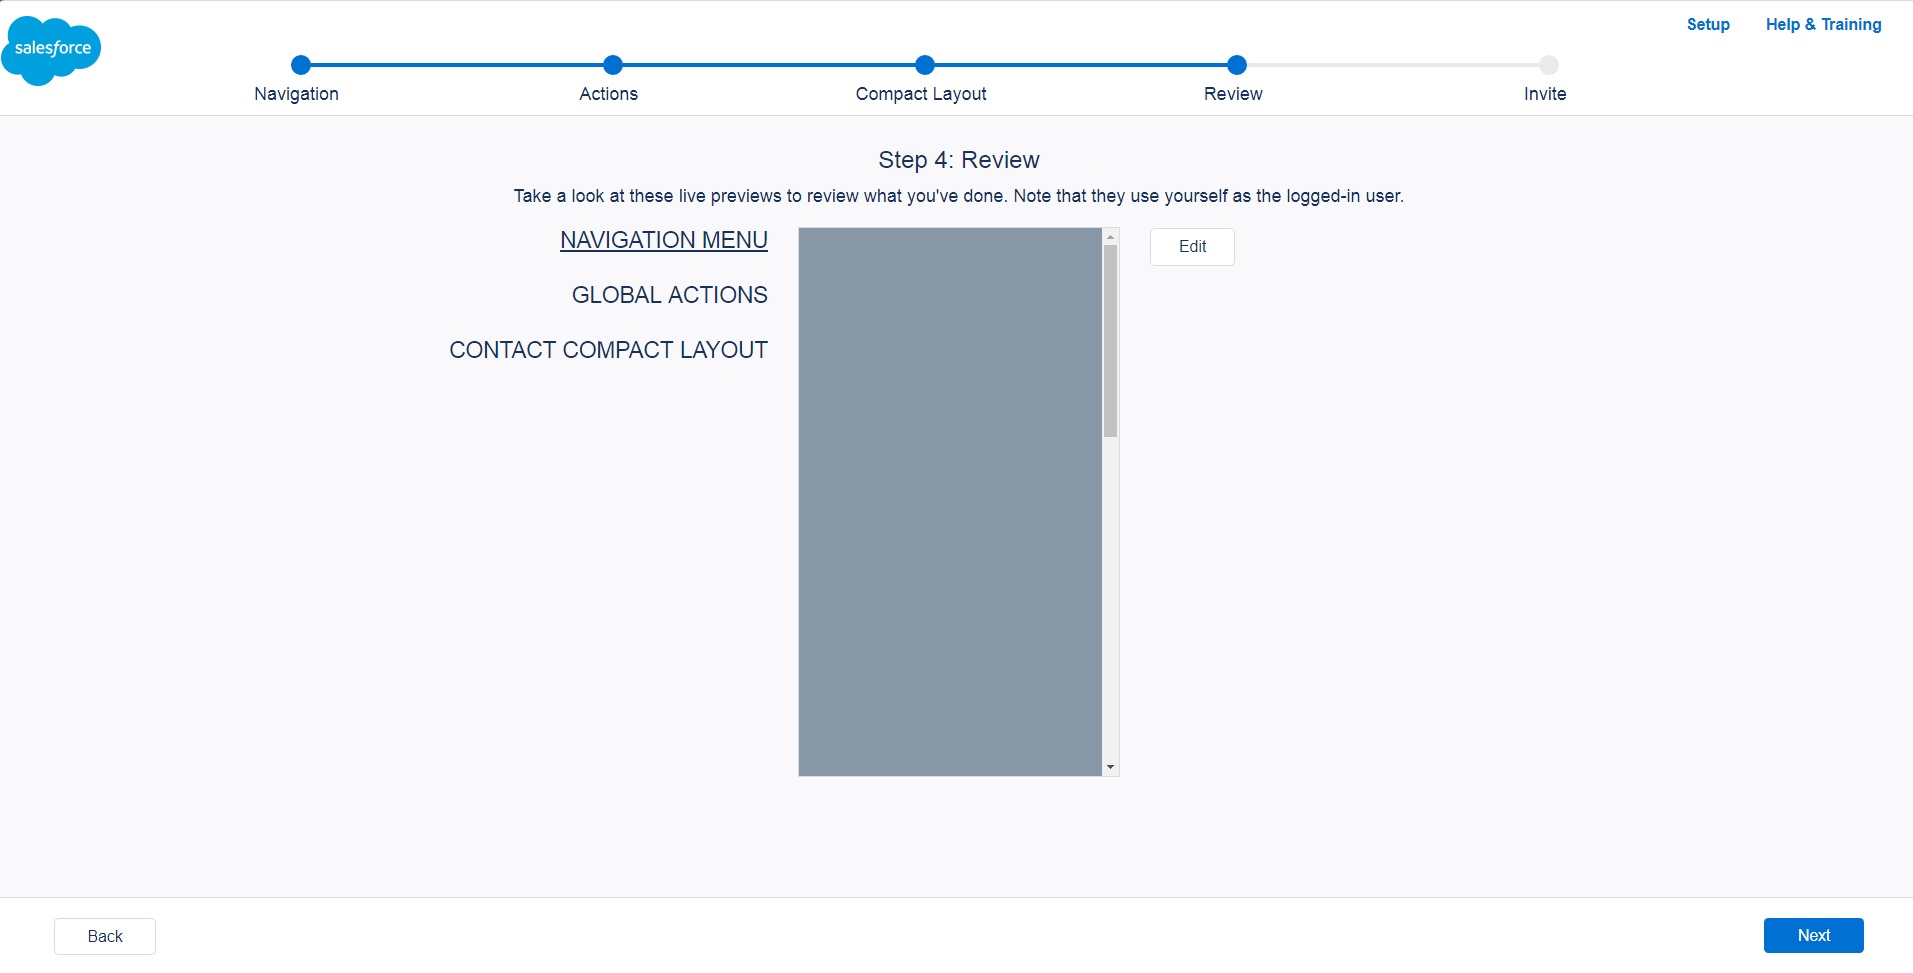
On Step 3: Selected Global Actions page click Next.
On Step 4: Review page review the NavigationMenu and GlobalActions added to SalesforceMobileApplication.
Click Next.
On Step 5: Send Invitations page click Next.
Click Finish and return to the Salesforce Mobile Setup page.
Overview
|
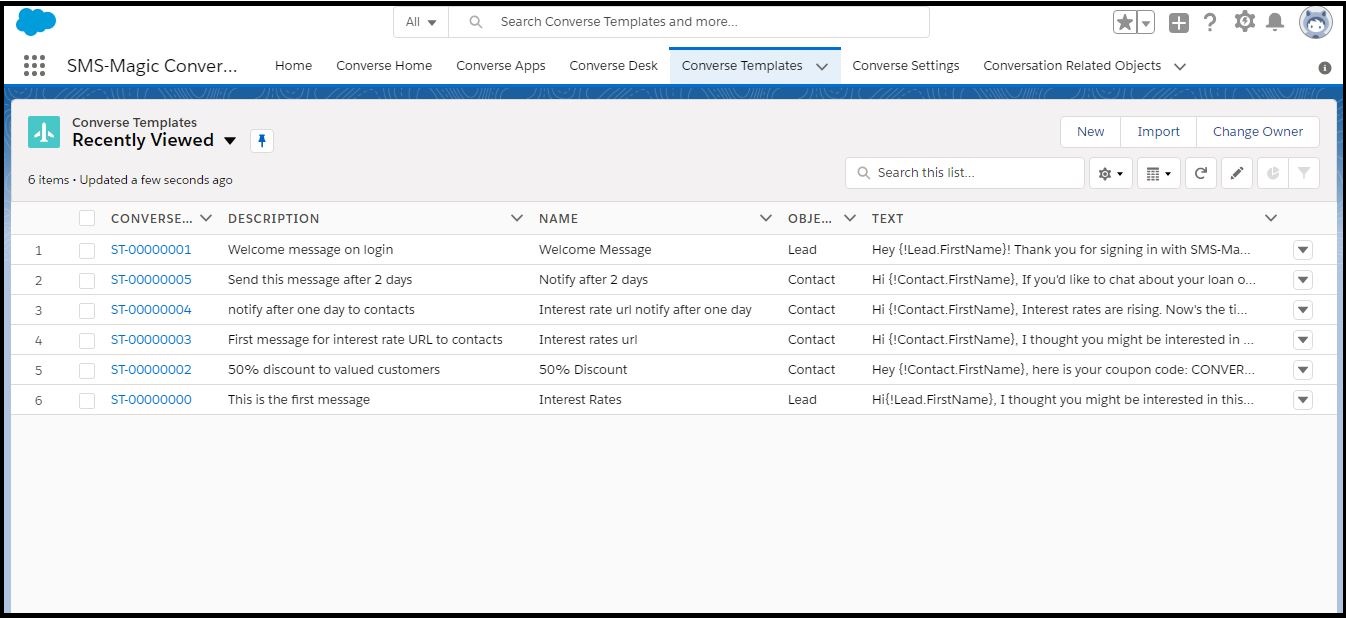
The Converse Template is a library of all the SMS templates created for different purposes. It helps you to easily manage and organize all templates that are necessary to conduct messaging campaigns.
You can create new templates, edit existing templates, change a template owner, and attach a template to an object. Also, it is easy to add merge fields to the templates in order to personalize each of the outgoing messages.
Register and Deploy
|
Register Domain
Overview
Prior to installing the SMS-Magic Converse, consider the following:
For users of Salesforce Lightning, the registering domain is mandatory.
For users of Salesforce Classic, the registering domain is recommended but not mandatory.
The advantages of registering the domain are:
A domain permits the use of several additional features of SMS-Magic Converse.
A domain helps you highlight the organization’s brand.
A domain provides additional security to the organization’s Salesforce.com.
A domain is also a prerequisite to using the Lightning components such as the Lightning pages and the Lightning App Builder.
A domain is necessary to use standalone apps with Salesforce.com.
Procedure to Register A Domain
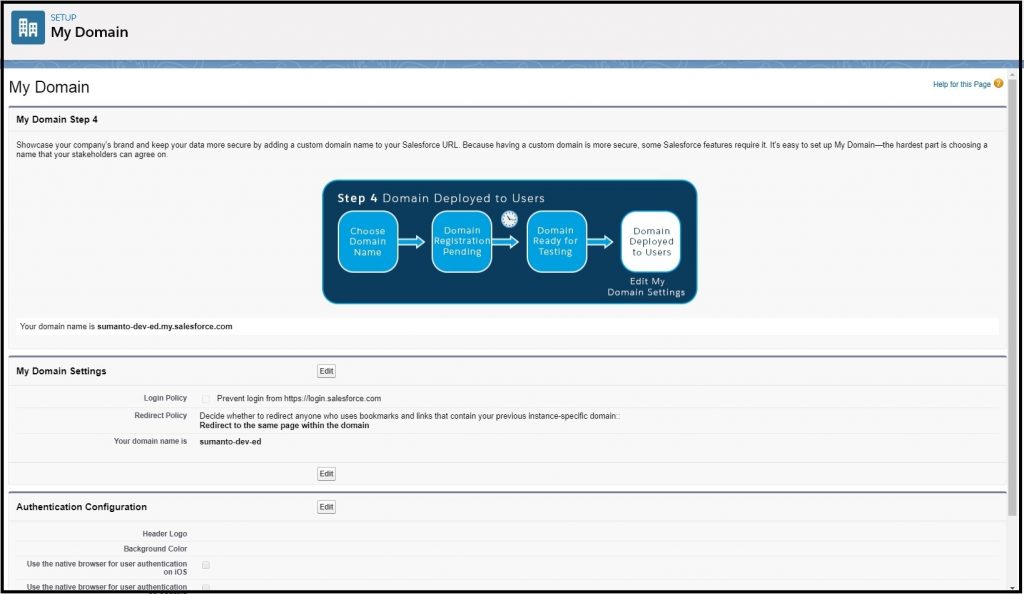
From the Salesforce navigation on the top right click and then click Setup.
Select My Domain by:
Using the Search Setup field, or
Using the Quick Find search field, or
Selecting Computer Settings > My Domain.
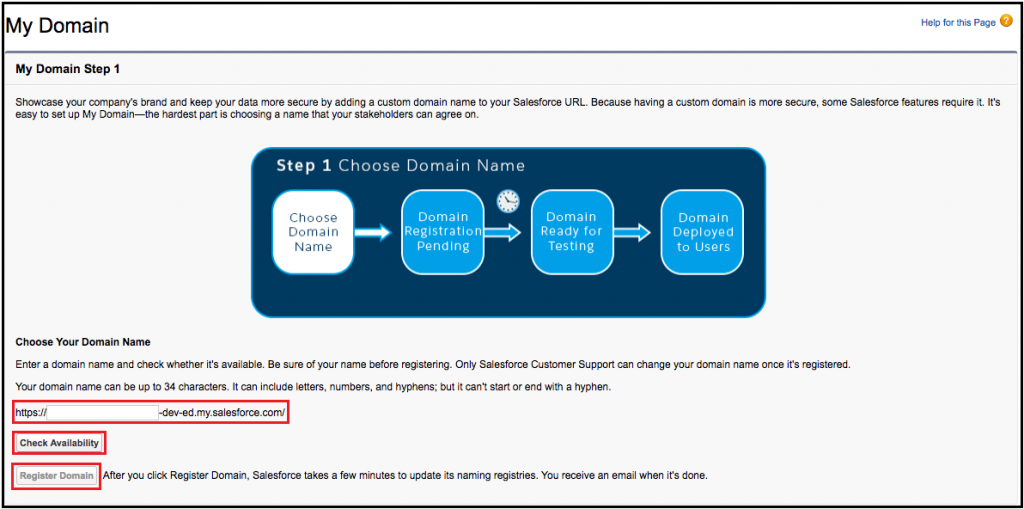
On the My Domain Step 1 page enter the domain name.
Click Check Availability to check the availability of the domain name.
If the domain is available, then click Register Domain. If the domain is unavailable, enter a new domain name and check its availability.
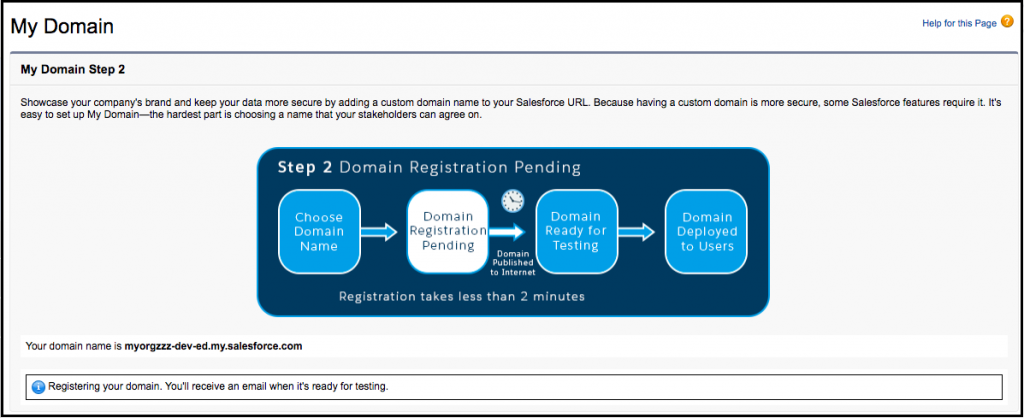
On registering your domain an email is sent from Salesforce.com with the following subject line Your Developer Edition domain ready for testing.
Open the email message and click the link to go to My Domain Step 2.
Refresh the My Domain page. The My Domain Step 3 page appears.
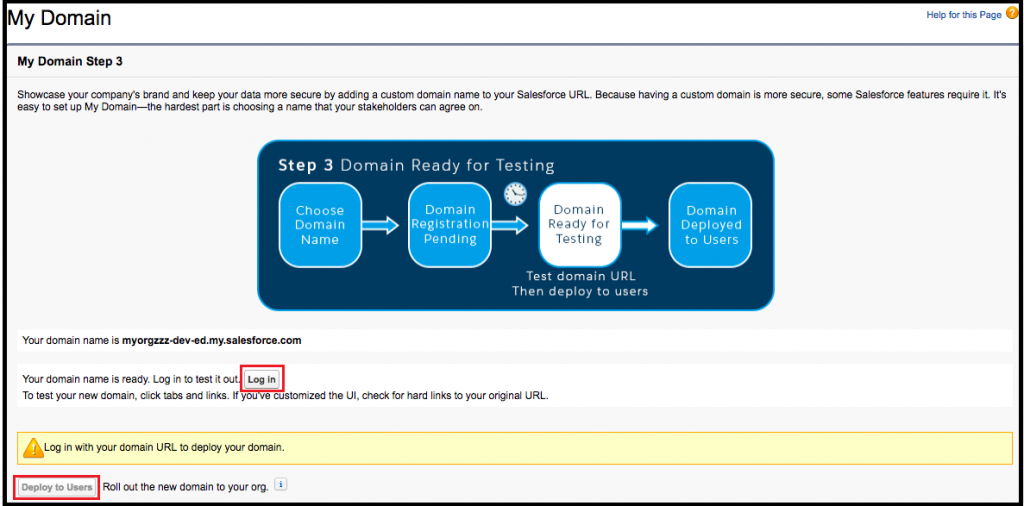
Click Log in. You can now log in to the newly created domain.
Click Deploy to Users.The domain is now registered and available to all users in the organization.
Install SMS-Magic Converse
|
This section describes how to install SMS-Magic Converse in your Salesforce environment. SMS-Magic Converse App is Native Saleforce.com Application that installs into your current Salesforce instance. Someone with a Salesforce administrator profile must install and configure SMS-Magic Converse.
It is recommended you first install and test SMS-Magic Converse in the Salesforce.com sandbox account. Once you complete all the sanity tests, then you can install the SMS-Magic Converse in your production account.
To install SMS Magic from AppExchange,
Navigate to Salesforce’s AppExchange at the top-right of Salesforce as shown in the following image.
2. Search for SMS Magic and download.
Click Get it Now.
Choose to Log in to the AppExchange and use your Salesforce credentials.
Enter your Salesforce credentials and click Log In.
You return to the Appexchange page. Click Get it Now.
Select either Install in a Production Environment, or Install in a Sandbox option.
Note: It is recommended to install in a Sandbox Org to test your installation. You can click Install in Sandbox under the Install in a Sandbox Org.
Review what you are installing and where you are installing. Scroll Down to Confirm installation Details section and click Edit Profile.
Select the Terms and Conditions checkbox and click Confirm and Install.
Select the appropriate option from the ones described below.
There are 3 options to choose from when determining the security level that will be used during installation and when upgrading to new versions of SMS Magic:
Install for Admins Only – Users with your profile get full access
Use this option if you want all SF Admins to have full access to SMS Magic, in the event an SMS Magic License is assigned to that user. When you’re ready to give other users access, you will do so by editing the profile or assigning permission sets.
Install for All Users – All internal custom profiles get full access
Use this option if you want all users who are assigned to a custom profile to have full access to SMS Magic, in the event an SMS Magic License is assigned to that user.
Install for Specific Profiles
Use this option if you want to install SMS Magic to specific profiles.
If this installation is fresh, then click Install. If this installation is an upgrade, then click Upgrade.
On the Approve Third-Party Access pop-up window select the relevant checkbox.
Click Continue.
In some cases, the installation can be delayed and the following screen is displayed. Click Done.
Note: When the installation is complete, you receive an email to confirm the same.
To view the SMS Magic package in your Salesforce org, click Setup > Installed Packages.
This section describes how to install SMS-Magic Converse in your Salesforce environment. SMS-Magic Converse App is a native Saleforce.com application that installs into your current Salesforce instance. Someone with a Salesforce administrator profile must install and configure SMS-Magic Converse. It is recommended you first install and test SMS-Magic Converse in the Salesforce.com sandbox account. Once you complete all the sanity tests, then you can install the SMS-Magic Converse in your production account.
To install SMS Magic from AppExchange:
Navigate to Salesforce’s AppExchange at the top-right of Salesforce as shown in the following image.
Search for SMS Magic and download.
Click Get it Now.
Choose to login to the AppExchange and use your Salesforce credentials.
Enter your Salesforce credentials and click Log In.
You return to the Appexchange page. Click Get it Now.
Select either Install in a Production Environment, or Install in a Sandbox option.
Note: It is recommended to install in a Sandbox Org to test your installation. You can click Install in Sandbox under the Install in a Sandbox Org.
Review what you are installing and where you are installing. Scroll Down to Confirm installation Details section and click Edit Profile.
Select the Terms and Conditions checkbox and click Confirm and Install.
Select the appropriate option from the ones described below.
There are 3 options to choose from when determining the security level that will be used during installation and when upgrading to new versions of SMS Magic:
Install for Admins Only – Users with your profile get full access
Use this option if you want all SF Admins to have full access to SMS Magic, in the event an SMS Magic License is assigned to that user. When you’re ready to give other users access, you will do so by editing the profile or assigning permission sets.
Install for All Users – All internal custom profiles get full access
Use this option if you want all users who are assigned to a custom profile to have full access to SMS Magic, in the event an SMS Magic License is assigned to that user.
Install for Specific Profiles
Use this option if you want to install SMS Magic to specific profiles.
If this installation is fresh, then click Install. If this installation is an upgrade, then click Upgrade.
On the Approve Third-Party Access pop-up window select the relevant checkbox.
Click Continue.
In some cases, the installation can be delayed and the following screen is displayed. Click Done.
Note: When the installation is complete, you receive an email to confirm the same.
To view the SMS Magic package in your Salesforce org, click Setup > Installed Packages.
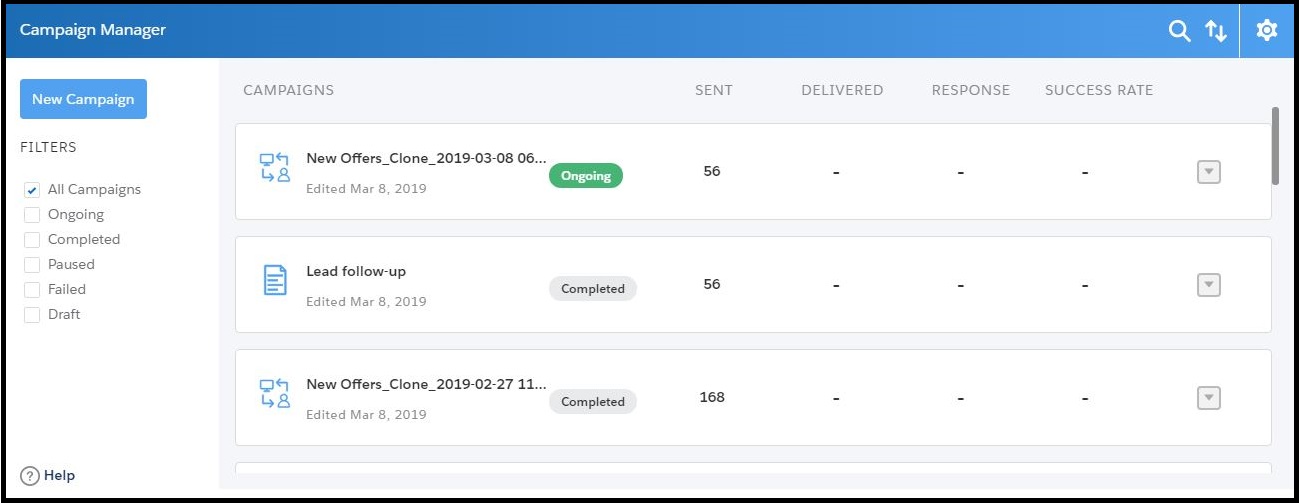
The Campaign Manager combines messaging capabilities with bulk automation. You can create campaigns using stand-alone templates or even associate pre-designed apps, designed in the Converse Apps
As an administrator you can launch and manage Converse Apps through the Campaign Manager.
Contact care@sms-magic.com to install Campaign Manager in your version of SMS-Magic Converse.
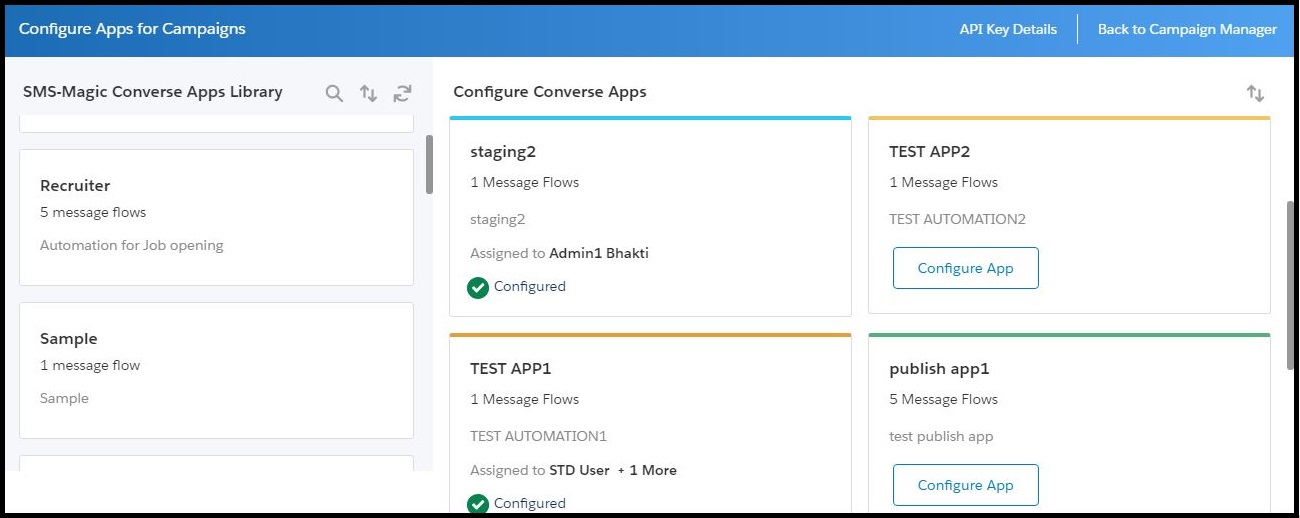
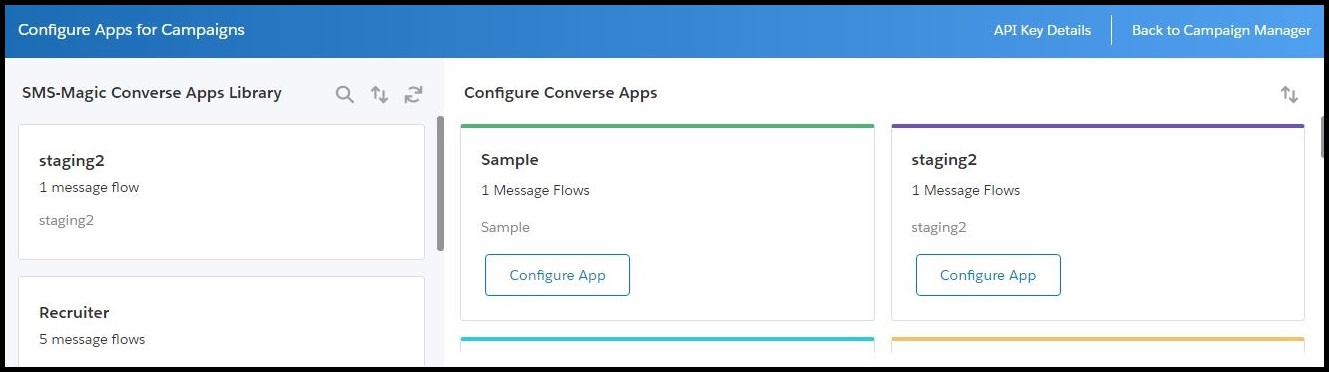
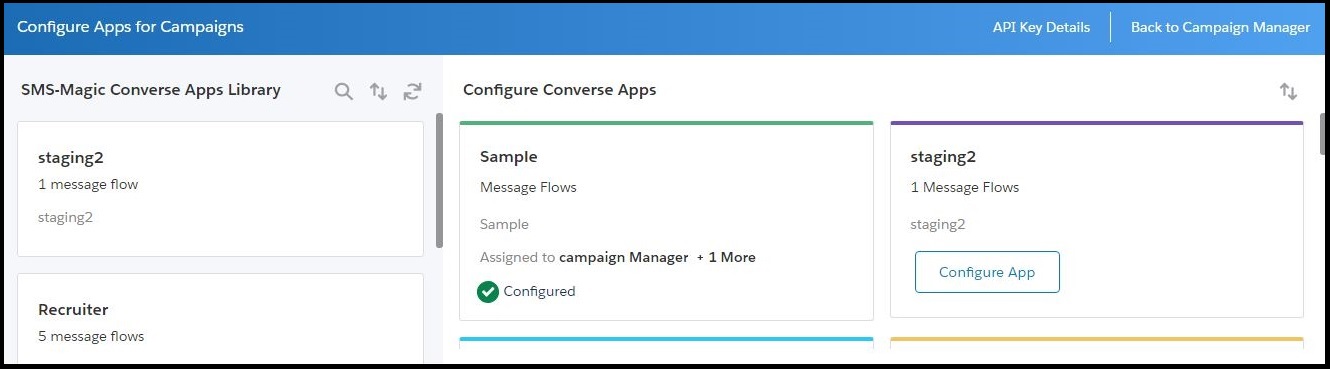
Configure Apps for Campaigns
All published apps are available in the App library. As the System Administrator you must install the app and then configure it for business users. App Configuration involves the following steps:
Install all published apps from the app library
Configure users for the installed apps.
The right to configure apps is available only with the Converse Admin and cannot be shared with any other user.
Log in to Salesforce and click the Campaign Manager tab on the header row. The Campaign Manager home page appears.
Click on the top right corner. The Configure Apps for Campaigns page appears.
he SMS-Magic Converse App Library displays only apps that are published and active.
For additional apps not in the library, contact the SMS-Magic Administrator.
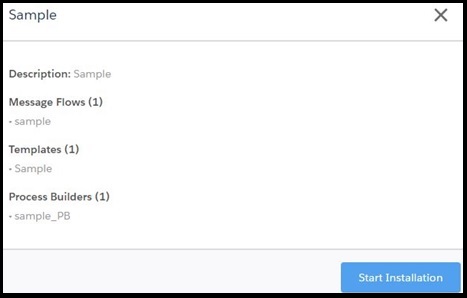
Hover over the name and click Install. The Installation pop-up window appears.
Click Start Installation. The installation process begins.
On completion, the App appears under app library view as well as under Configure Converse App.
Click Configure App under the relevant app you want to configure. The Configure for Campaign pop-up window appears.
Type the app name and description.
Under Assign Users, click within the field and select the users you want to assign to the app, from the drop-down list that appears.
Click Save. The configured app appears under the Campaign Manager home page.
ICON
DESCRIPTION
To search for an app.
To sort the app list.
To refresh the list.
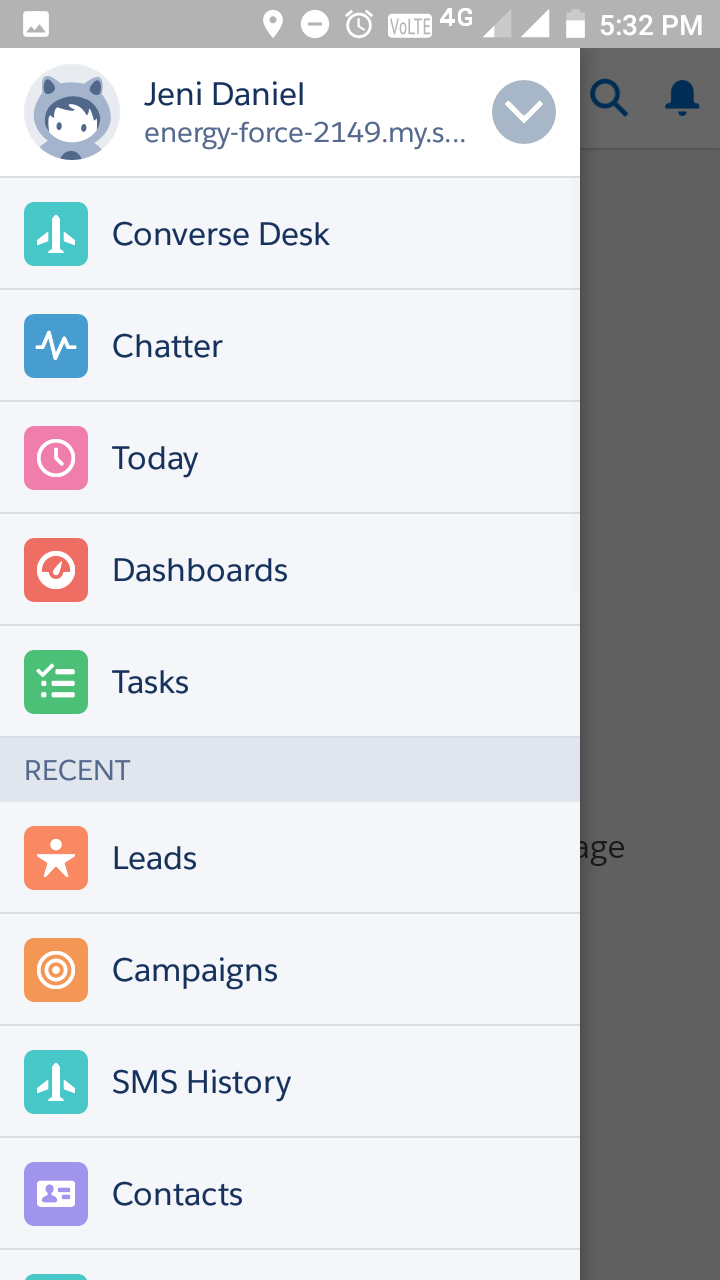
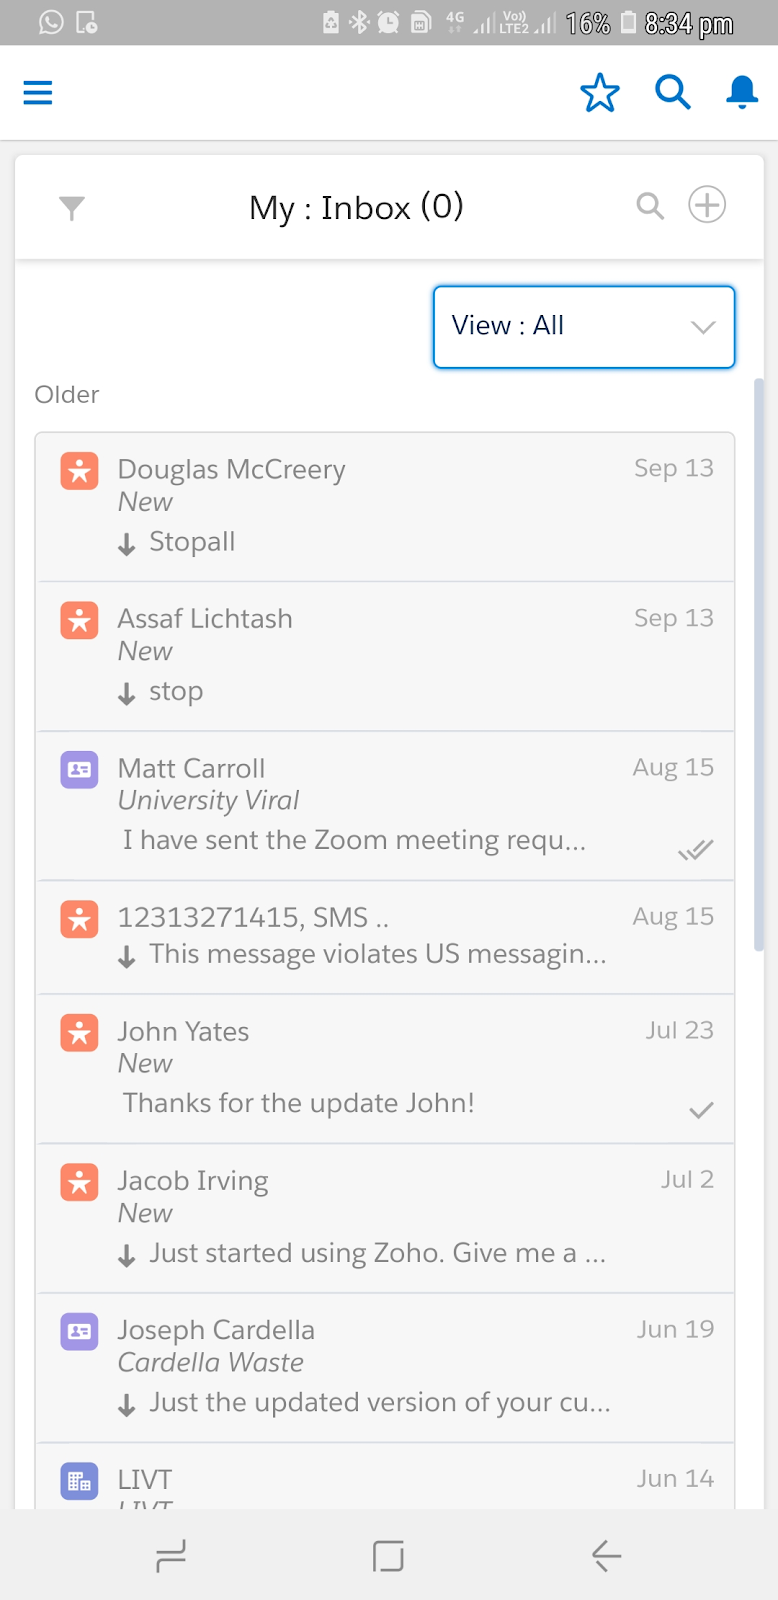
View Converse Desk on Salesforce1
|
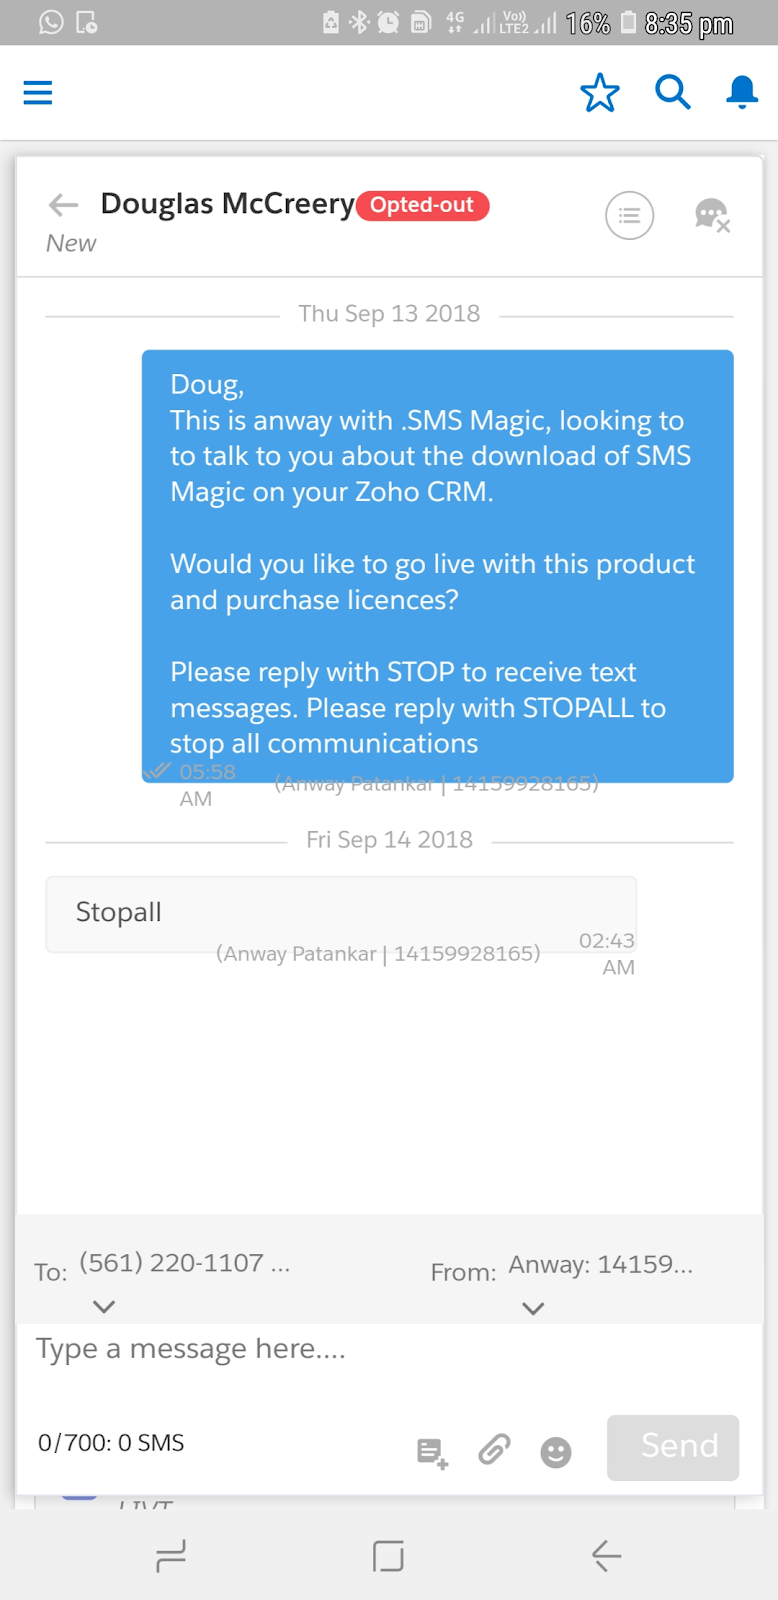
After enabling the Converse Desk on Salesforce1, you can access Converse Desk on SF1 through your mobile device. You can see all the conversations in the Inbox of Converse Desk.
To Access Converse Desk from SF1 on the Mobile:
Open SF1 on the mobile.
Open the navigation menu and select ConverseDesk.
Select the conversations that you want to see.
You can open any conversation in the Converse Desk and reply accordingly.
 on the Salesforce navigation bar and then click Setup.