Message notifications are an important functionality that keeps you updated on all incoming messages. SMS-Magic Converse provides multiple ways in which you can be notified when you receive a new message.
To create a notification to users message flow, do the following:
1. Go to the App detail page and click Setup.
2. From the list select Automation.
3. From the Setup Automation Campaign dialog, select the number of steps that are part of the message flow.
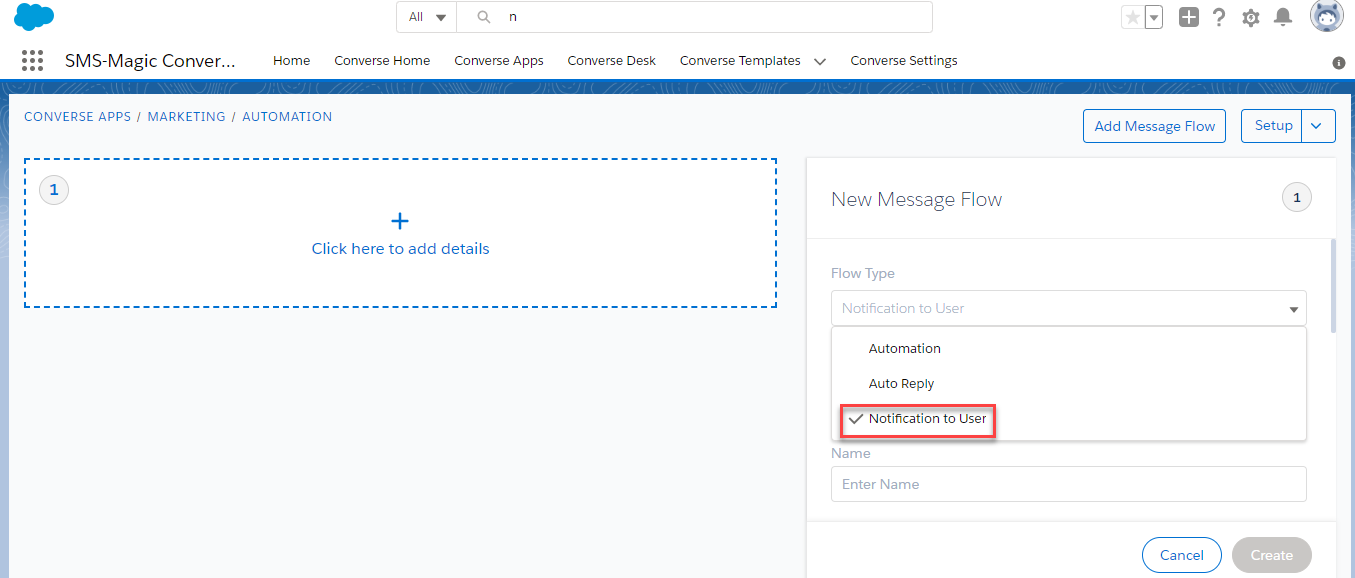
4. On the Message Flow configuration page, select the Notification to Users flow type.
5. Enter the keyword for the message flow in the Keyword field. The keyword is decided by the user.
6. Enter the name of the message flow in the Name field.
7. Enter a short description of the message flow in the Description field.
8. Select the sender ID in the Sender ID field.
9. Select the action trigger in the Message Flow Trigger field.
10. Select the template in the Template field. The text of the template is displayed.
11. Click Create.
Access Campaign Manager
|
You can access the Campaign Manager from the Salesforce Classic header tab row. The Campaign Manager is well-integrated with the SMS-Magic Converse modules and helps you create and execute campaigns efficiently.
Log in to Salesforce.
On the header tab row click Campaign Manager. The Campaign Manager list view page appears.
If you are unable to view the Campaign Manager tab, click and select Campaign Manager from the All Tabs view page.
Clone Campaigns
|
You can clone a campaign to retain and reuse some of its settings for a new campaign. For example, you may need to retain the same template in a campaign but for a new recipient list. Therefore, in order to save time in recreating the campaign all over again, you can clone the existing campaign and update the parameters in the new cloned version.
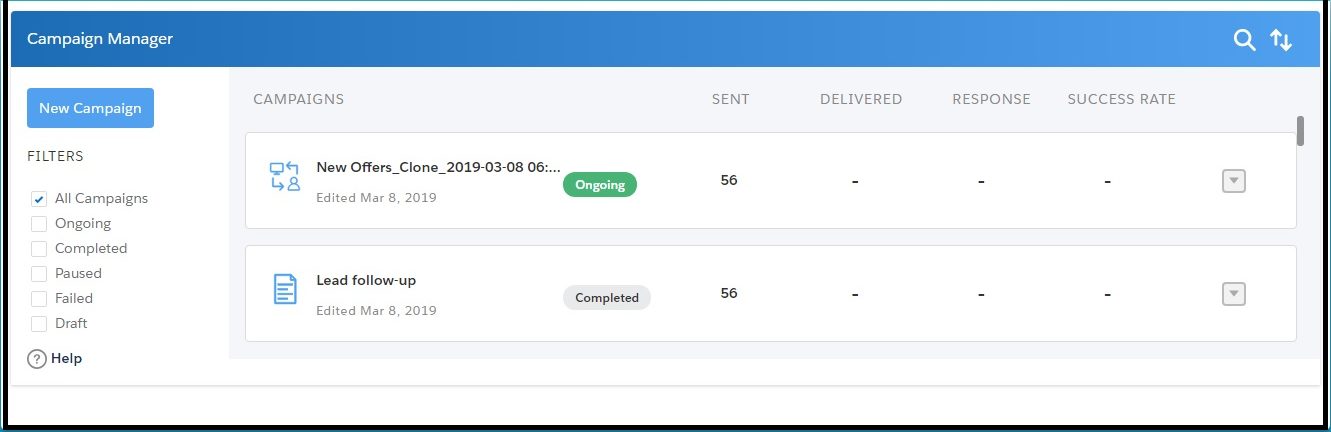
1. Search for the campaign you wish to clone. The campaign appears in your search result. You can even clone campaigns that have completed their run.
2. Click next to the draft campaign and click on the ‘Clone Campaign’ option from the drop-down menu that appears. The confirmation pop-up window appears.
3. Click on the ‘Yes’ button. The cloned campaign appears on the campaign manager page with a timestamp of when it was cloned included in its name.
4. Click next to the cloned campaign and click on the ‘Edit Campaign’ option from the drop-down menu that appears if you wish to modify the campaign configurations. The Cloned campaign appears in the edit mode.
Add Message Flow
|
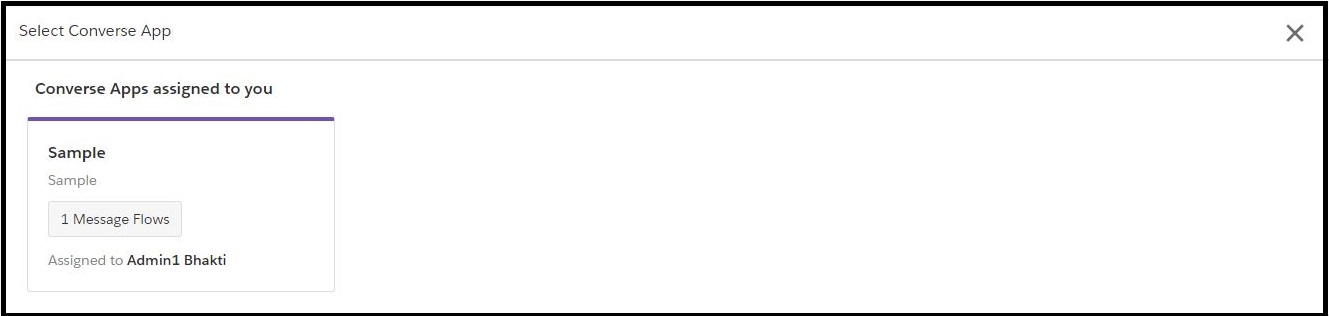
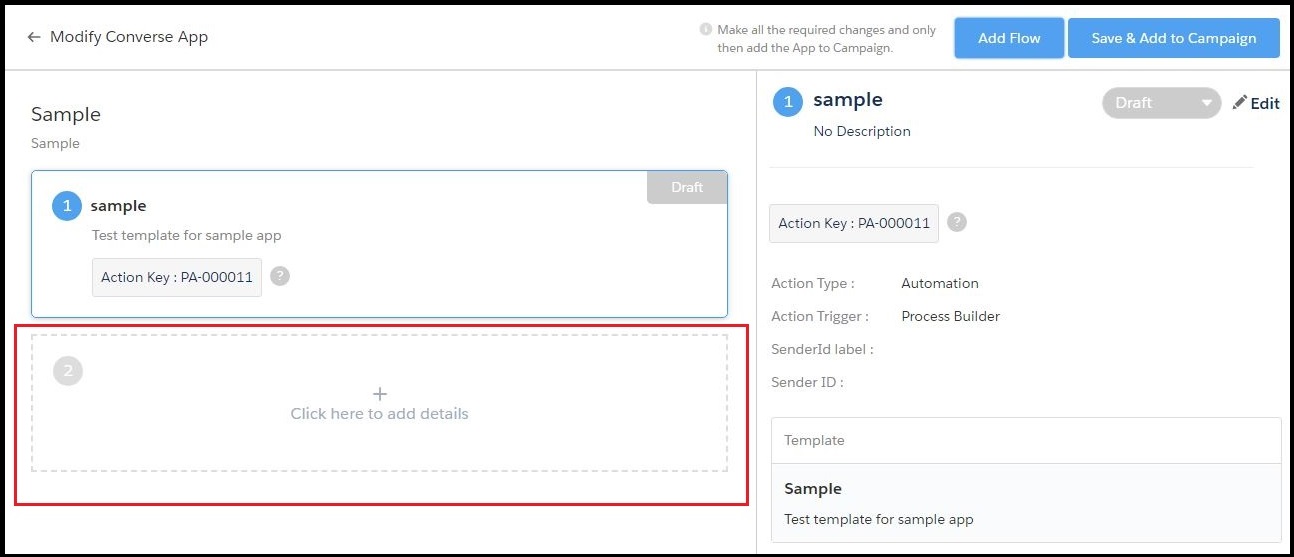
On the Campaign Builder page, under Converse App, click Select. The Converse apps assigned to your Organization appears.
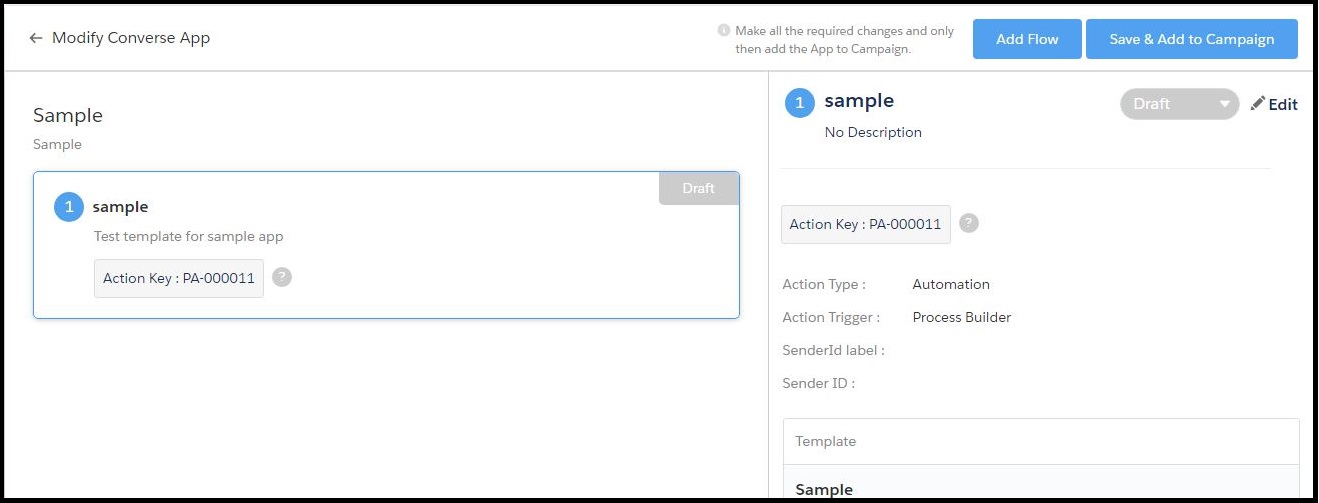
Hover over the Converse App and then click Modify. The Modify Converse App page appears.
Click Add Flow to add another message flow. The new message flow edit area appears.
Click the edit area. The New Message Flow section appears.
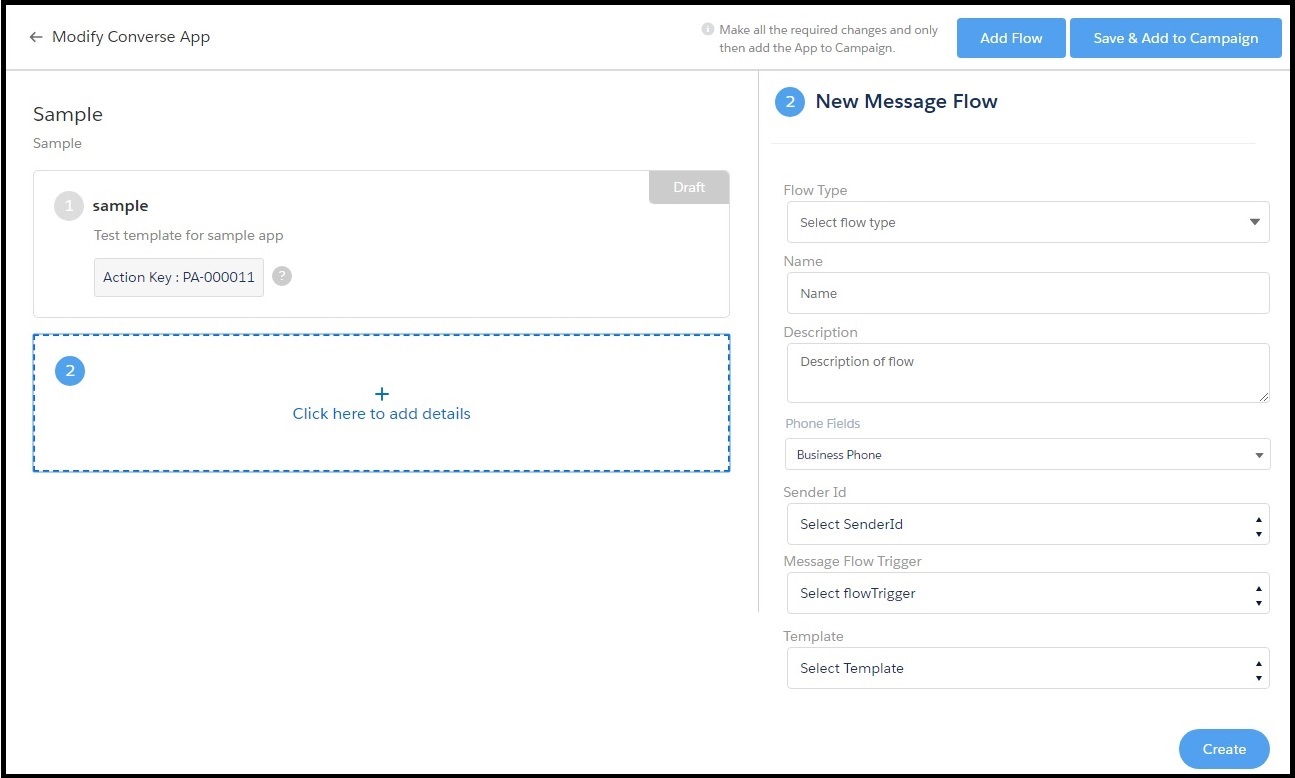
Enter the details to create a new message flow. Refer to the following table for more details on the individual field descriptions.
FIELD
DESCRIPTION
Flow type
In the drop-down list, select the type of message flow you want.
Keyword
Enter the keyword for the message flow.This is required only for the Auto-Reply and Notification to User flow type.
Name
Enter the name of the flow.
Description
Enter a short description of the flow.
Phone Fields
Select the mobile phone number.This is required for the Automation flow type.
Sender ID
Click to add the Sender ID from the drop-down list that appears.
Message Flow Trigger
Click to define the message flow trigger.
Template
Click to select the template for the message flow.
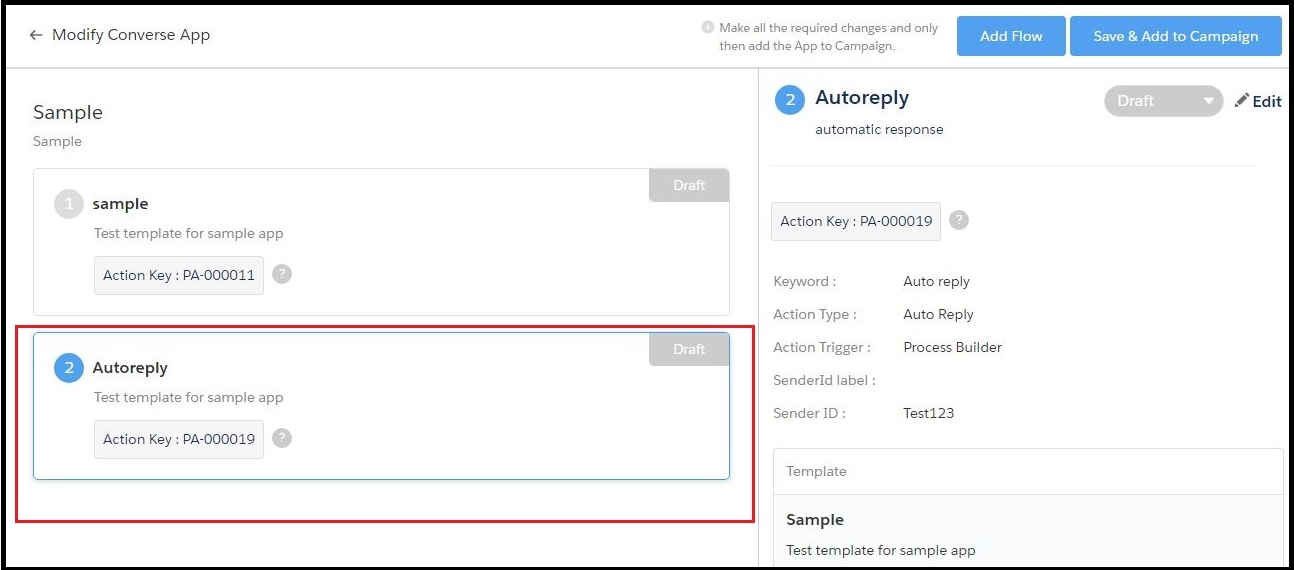
Click Create. The new flow is added to the app and appears as shown.
You can modify the message flow status defined in Converse Apps from the Campaign Manager interface. Click Draft and select the appropriate status from the drop-down list to update the message flow status. The available options are:
Draft – This is the default status when you save a message flow.
Paused – This will pause the actions before completion.
Archive – This will archive all actions in the message flow.
Schedule Campaigns
|
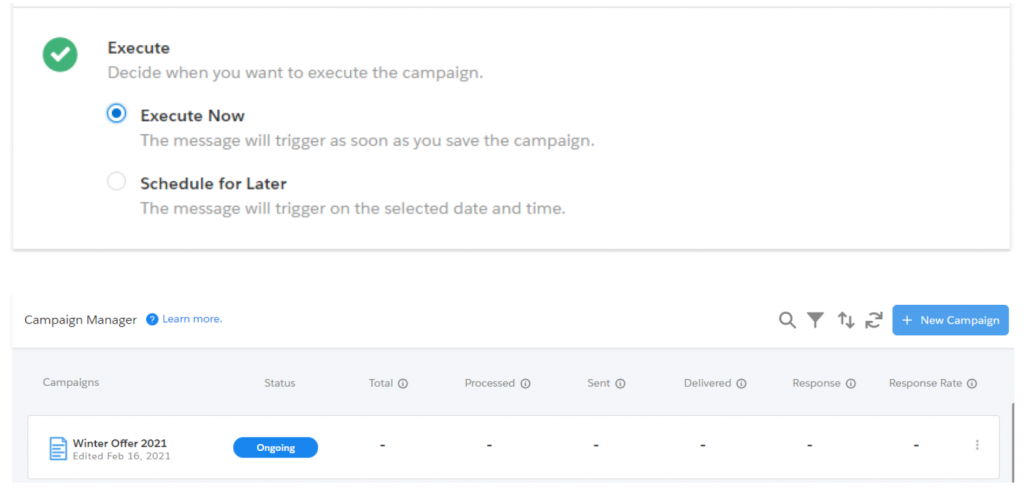
You can define a schedule for running a campaign. Campaign schedules can be configured for single runs or for recurring frequency. You can either choose to execute the campaign right away or you can schedule it for execution at a future time.
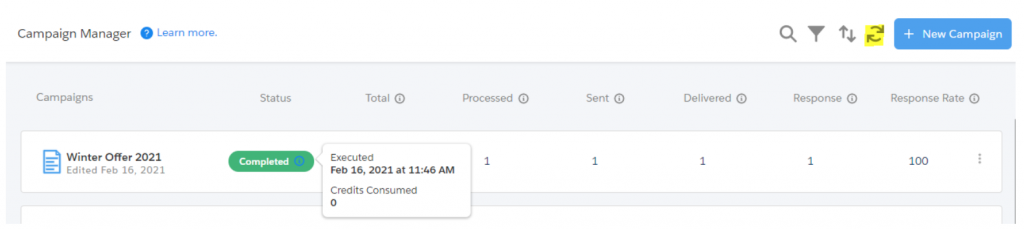
1. If you choose to execute right away, on clicking on ‘Start Campaign’, you will see your campaign getting into ongoing status.
2. You can click on the refresh icon on the dashboard to see the updated status of your campaign. You will also see an info icon beside campaign status. You can get to know the executed date and timestamp information on the hover of this info icon.
3. If you choose to schedule for later, a popup will appear in which you can choose to schedule it for a single time or on a recurring basis as per your requirement.
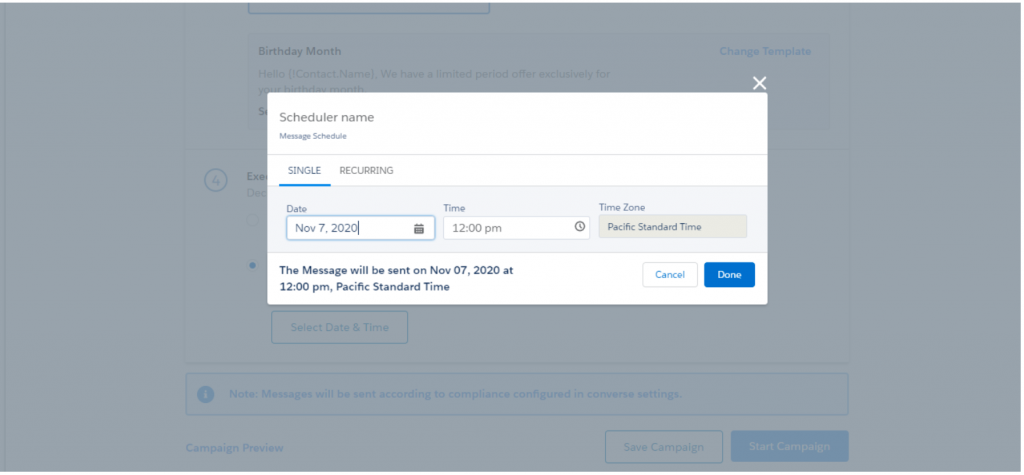
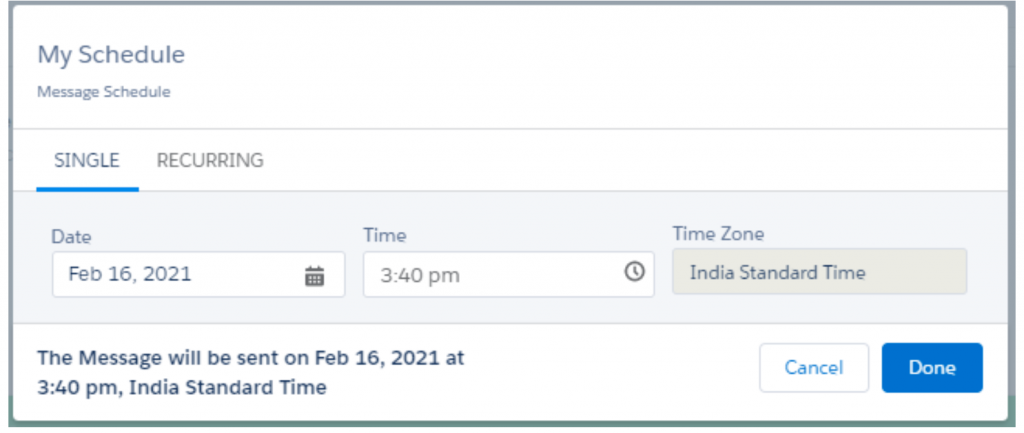
One time schedule
Click on the Single tab to configure a one-time schedule
Click to enter the date
Under Time, click to configure the start time for the campaign
Under Time Zone the default time zone is displayed. Click on the ‘Done’ button to set the schedule.
Note – Time zones can be configured from Profile > My Settings > Language and Timezones. Contact your System Administrator to change your time zone if required.
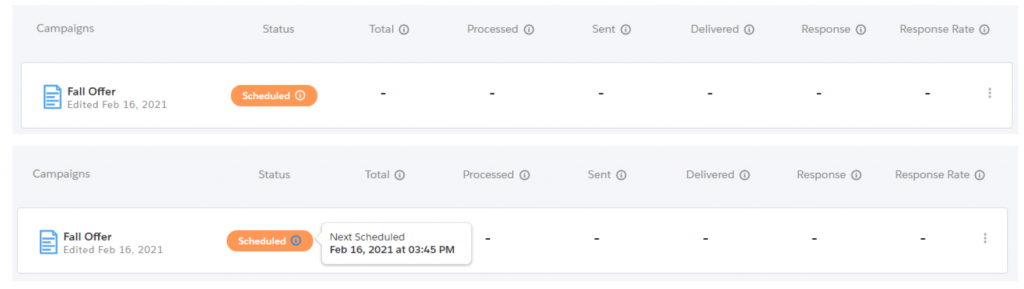
5. Once you click on ‘Start Campaign’, you will also see an info icon beside the campaign status ‘Scheduled’.
6. You can get to know the scheduled date and timestamp information on the hover of this info icon.
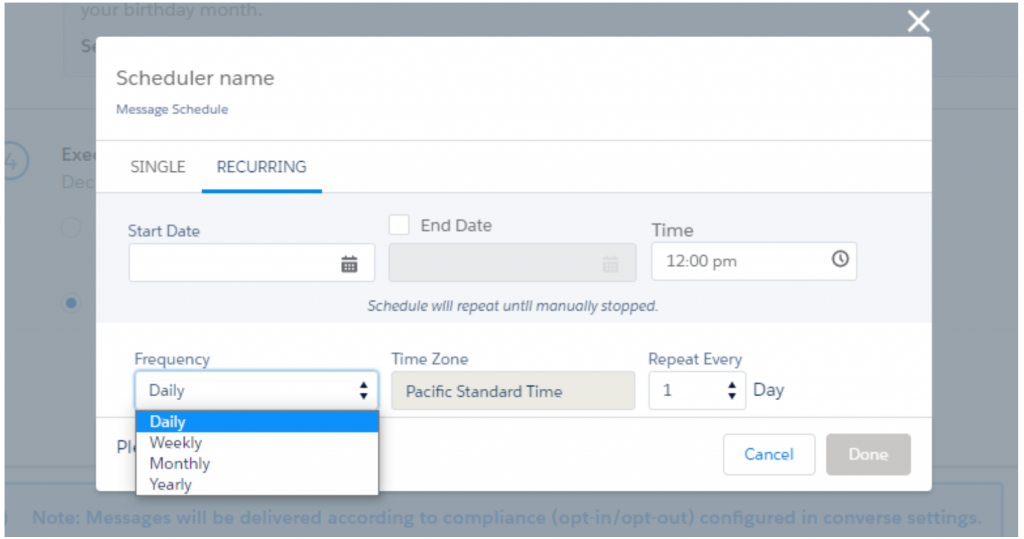
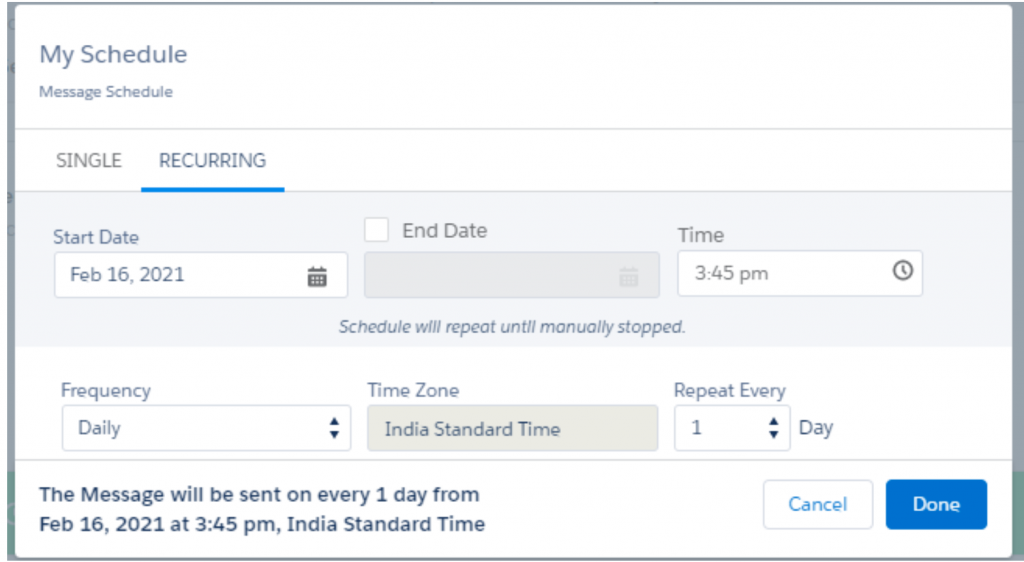
Recurring schedule
1. Click on the ‘Recurring’ tab to configure a recurring campaign. The following parameters appear:
2. Click to enter the start date
3. Select the End Date to configure the date when you want the campaign to end
Note- -If you do not provide an end date for the campaign, it will continue uninterrupted unless you manually cancel it. However, even if you provide an end date, you can still stop the campaign while it is ongoing. Select the relevant action from the drop-down list on the Campaign Manager page.
4. Under Time, click to configure the start time for the campaign
5. Under Frequency, select the schedule frequency. The available options are:
Daily – Select the number of days after which you want the campaign to run
Weekly – Select the day of the week when you want the campaign to run. You can also select ‘All Days’ to run the campaign on all days of the week.
Monthly – Select the Month and the day of the month when you want the campaign to repeat. You can also select ‘All Months’ to run the campaign on the selected day of every month.
Yearly – Select the number of years after which you want the campaign to repeat. When you select the yearly frequency, you also need to specify the day and the month in the year when you want the campaign to recur. You can also select ‘All Months’ to run the campaign every month. For example, if Repeat Every = 1 year; Day = 2nd; Every Month checkbox = Selected then the campaign is scheduled to run on the second day of every month on every alternate year.
6. Under Time Zone the default time zone is displayed
Note – Time zones can be configured from Profile > My Settings > Language and Timezones. Contact your System Administrator to change your time zone if required. Click on the ‘Done’ button to set the schedule.
7. Once you click on the ‘Start Campaign’ button, you will also see an info icon beside the campaign status ‘Scheduled’. You can get to know the details about the next scheduled date and timestamp information on the hover of this info icon.
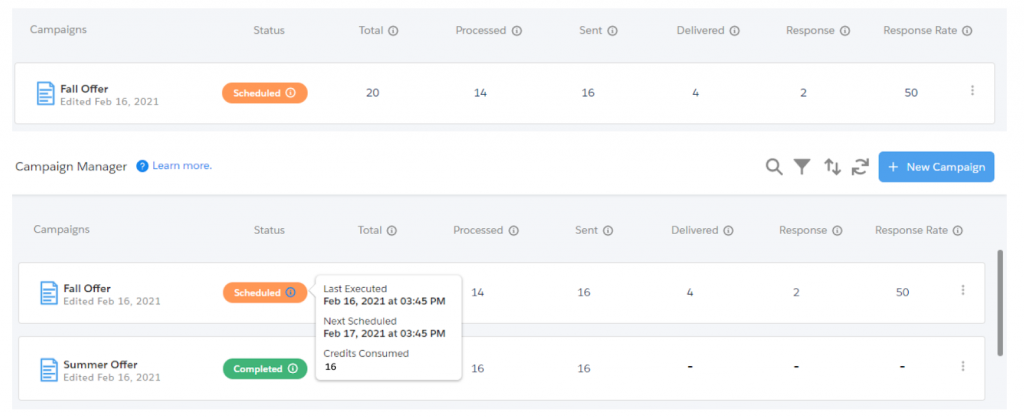
8. Once the campaign gets executed for one time, the campaign status will remain as ‘Scheduled’ considering this is a recurring campaign. After one-time execution, the info icon will show the ‘Last Executed date and time-stamp’ along with the ‘Next scheduled date and time-stamp’.
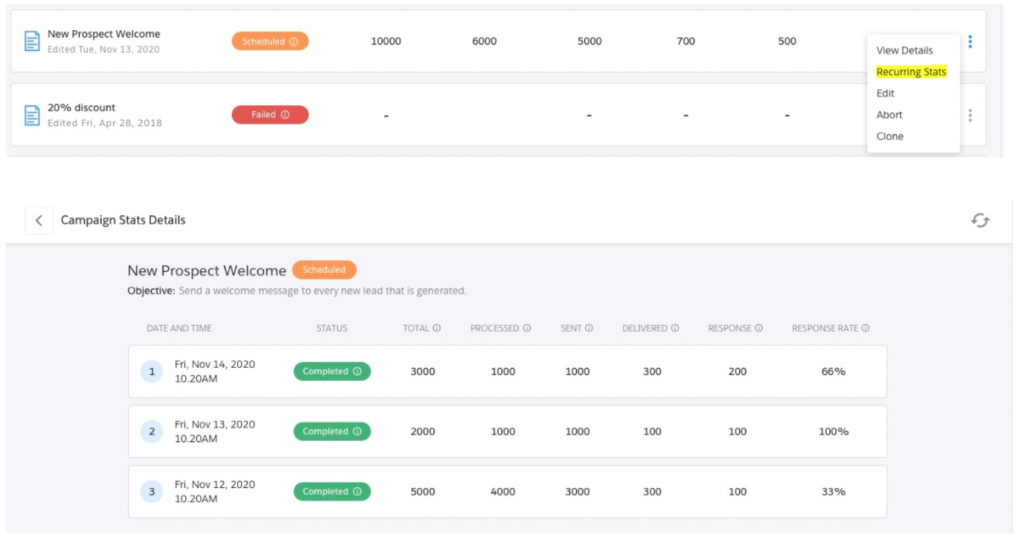
9. For recurring campaigns, you have an option to check the per execution specific campaign statistics. Search for any recurring campaigns and from the more options, click on the ‘Recurring Stats’
Assign Conversations
|
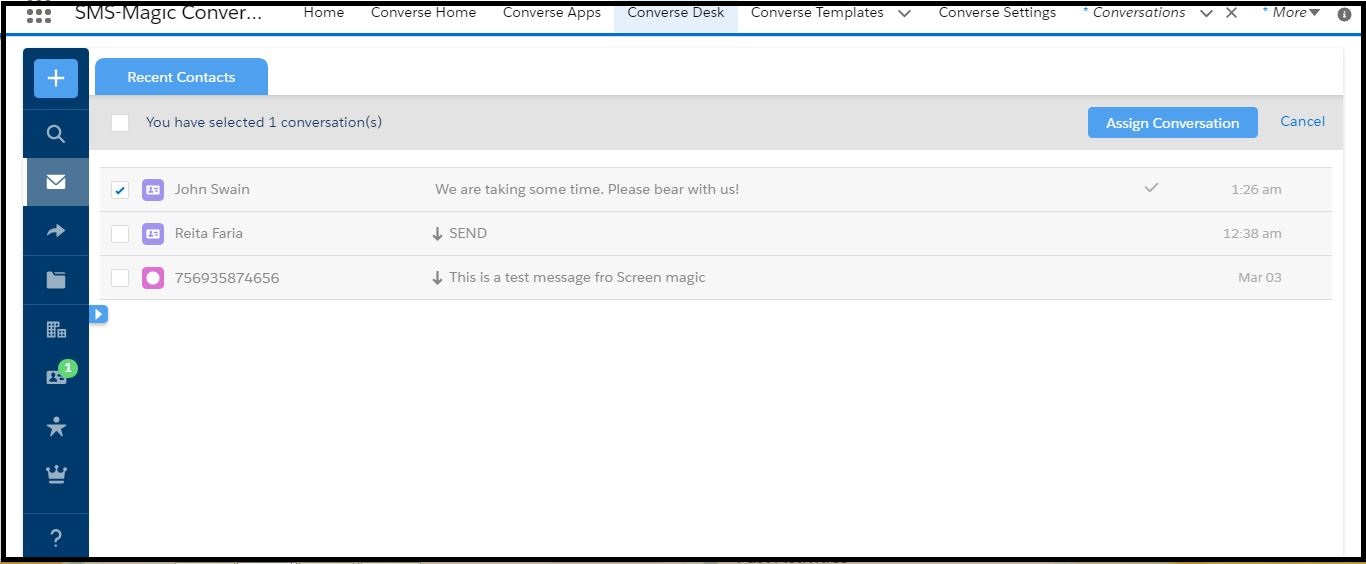
On the Converse Desk, select a filter. The conversation list appears.
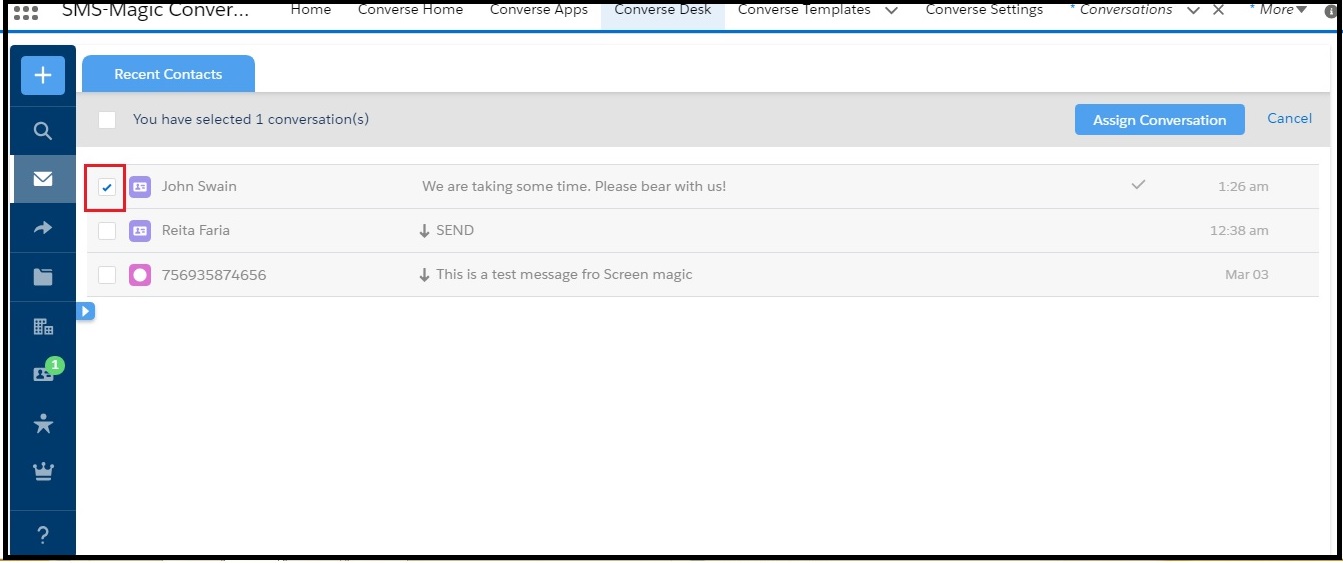
Click on the conversation row you want to assign and then click Assign Conversation from the drop-down menu that appears. A selected check box appears next to the conversation.
You can also click the icon on the individual message reply panel and then select assign conversations from the drop-down menu that appears to assign single conversations.
All users to whom you assign conversations need to have full read permissions. Contact your System Administrator to understand the permission status of individual users.
Select all the conversations that you want to assign.
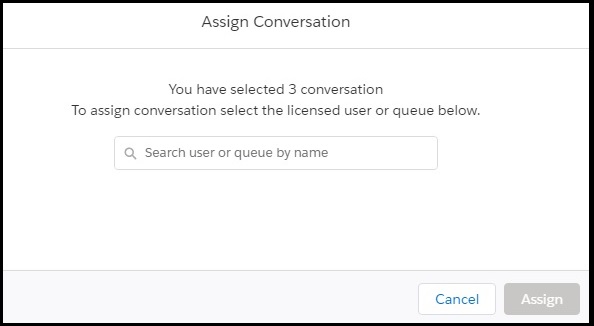
Click Assign Conversation. The Assign Conversation dialog box appears displaying the number of conversations you have selected for assigning.
In the search box, enter the first three initials of the user to whom you want to assign the conversations.
Select the user name.
Click Assign. The selected conversations are assigned to the user.
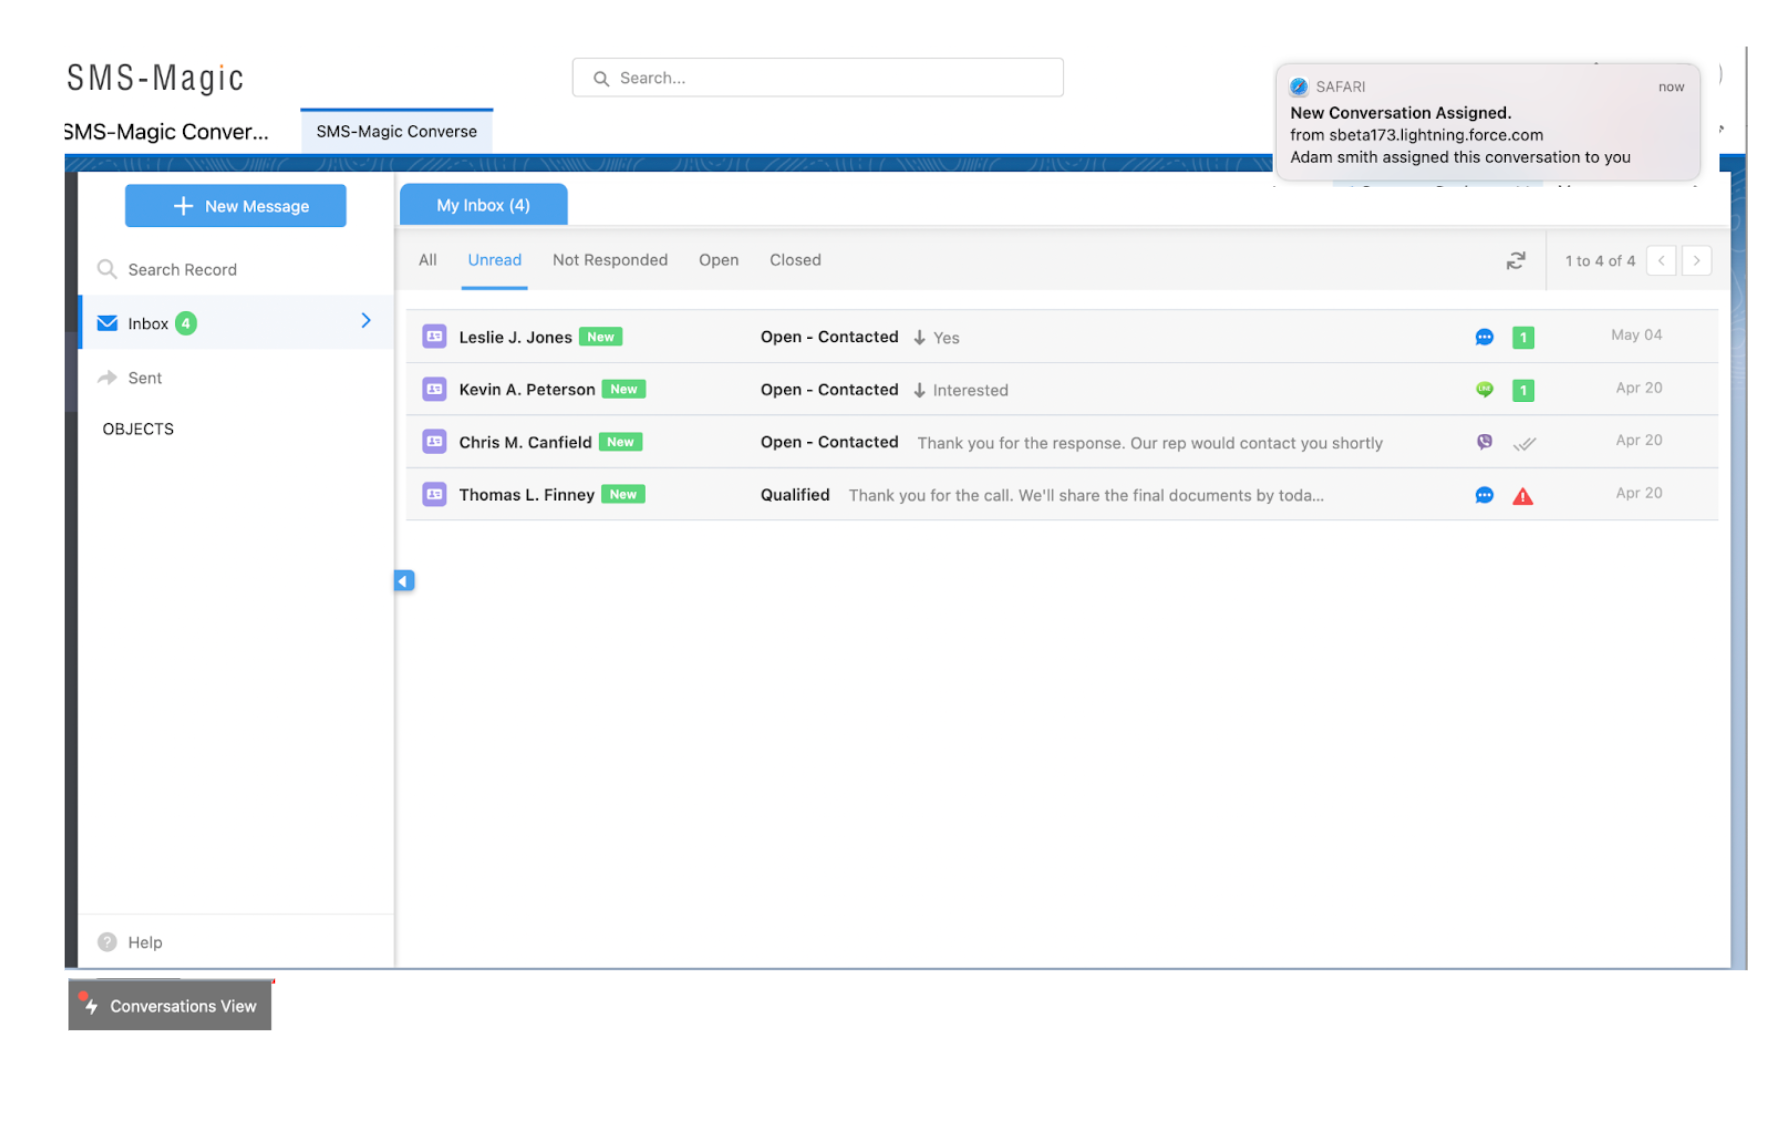
The user to whom the conversation is assigned will receive an email notification.
Conversation Reassignment Notification.
Here on the top right-hand side of the page, you can see a notification with a message (New Conversation Assigned). The users will be notified that new conversation has been reassigned.
View Related Conversations
|
On the Converse Desk, select a filter to view conversation lists. The list appears.
Click a conversation for which you want to view the related conversations. The Message Reply panel appears.
Click located on the top right corner and then click Related Conversation from the drop-down menu that appears. The Related Conversations appear.
Click any one conversation in the timeline and view the conversation thread.
Click Back to Related Conversations to return to the related conversations window.
On the Related Conversations window, click to return to the message reply panel.
Save an Unknown Number as a New Lead
|
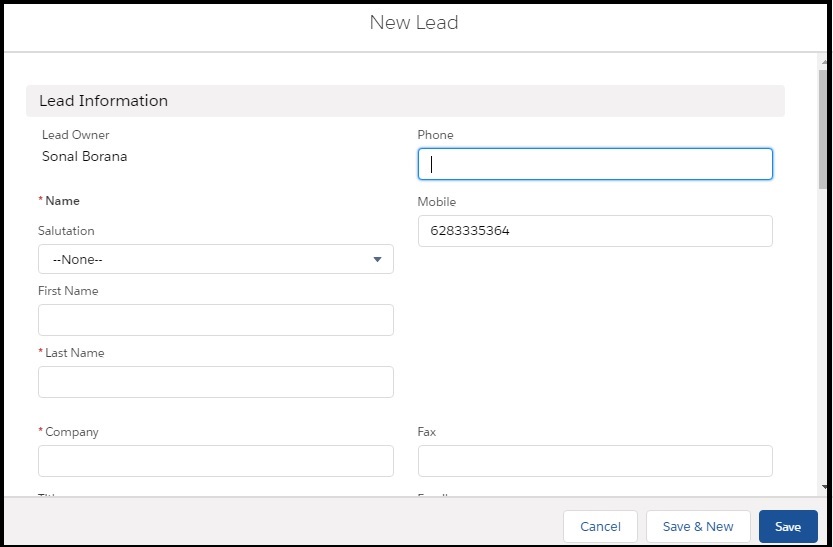
On the Converse Desk, click a conversation with an unknown phone number. The message reply pane appears.
Click on the reply panel header and click New Lead. The New Lead pop-up window appears.
The mobile number is pre-filled in the mobile field.
Enter the details for the new lead.
Click Save.
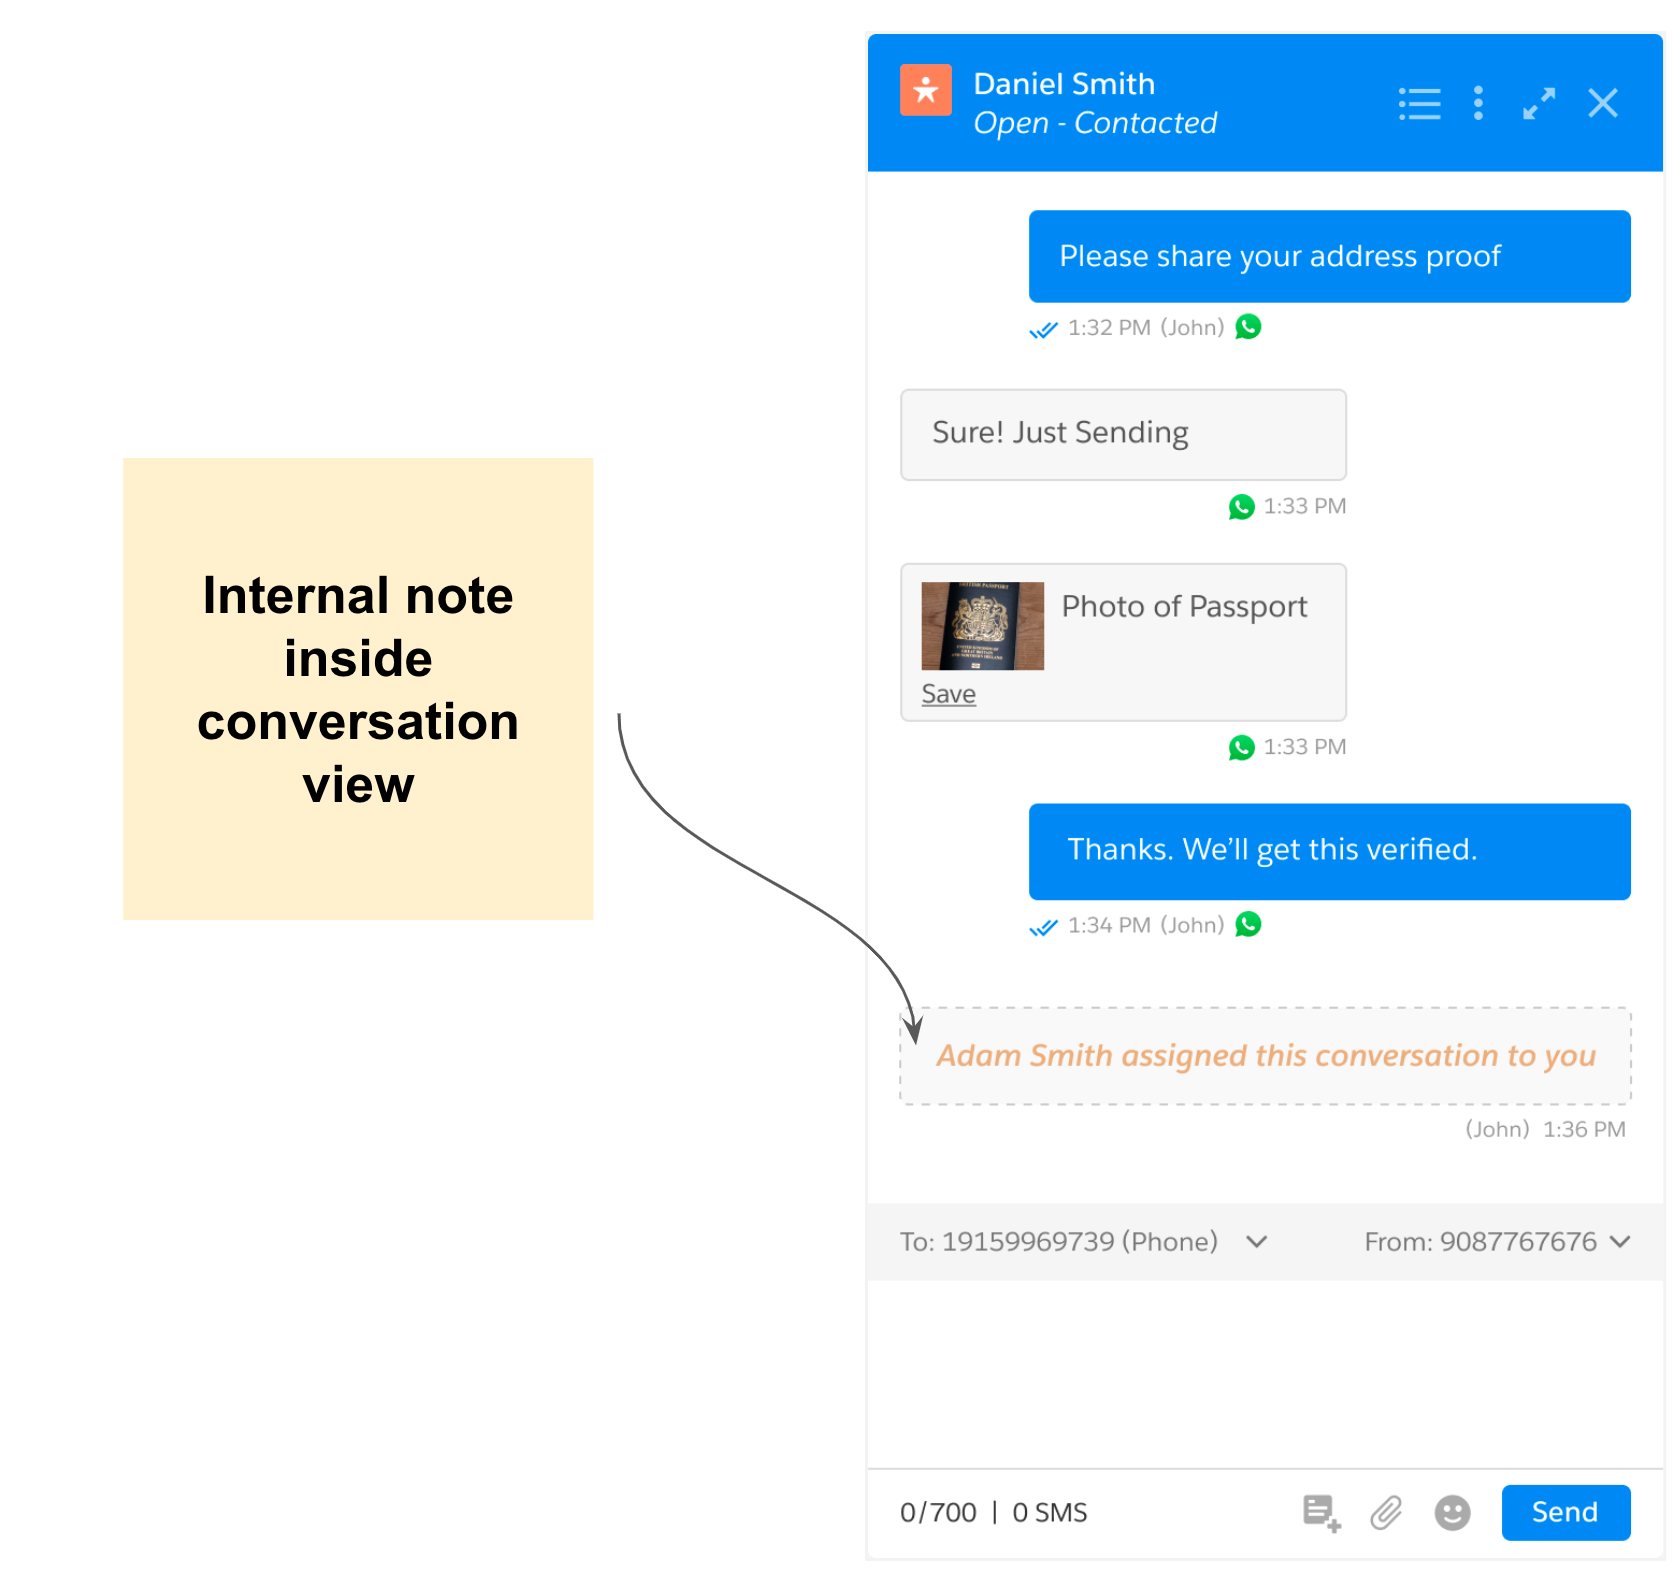
Create an Internal Note
|
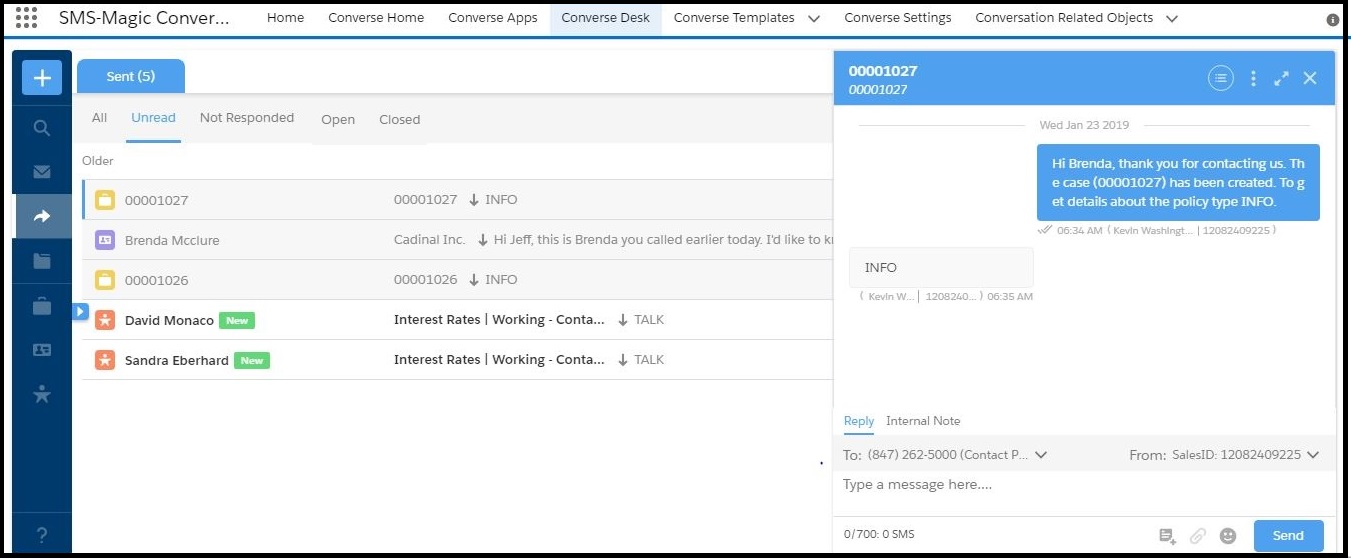
On the Converse Desk, select a filter to view conversation lists. The list appears.
Click a conversation to view it in the Reply panel.
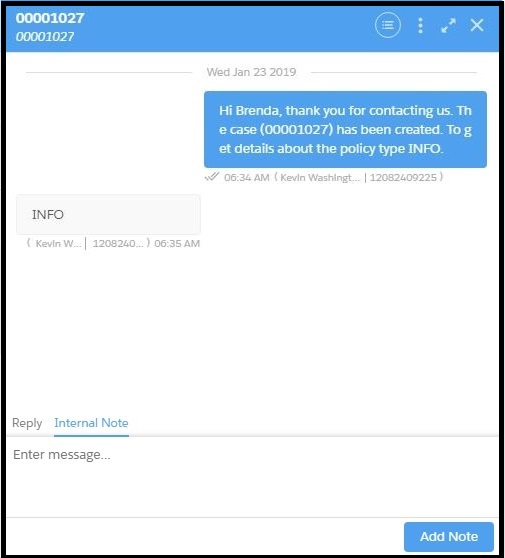
Click Internal Note located above the message area. The Internal Note area appears.
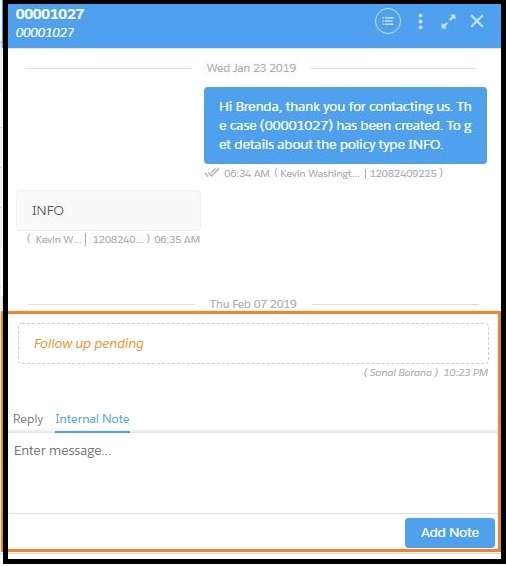
Enter the message you wish to add as a note.
Click Add Note. The message appears within the reply panel as shown.
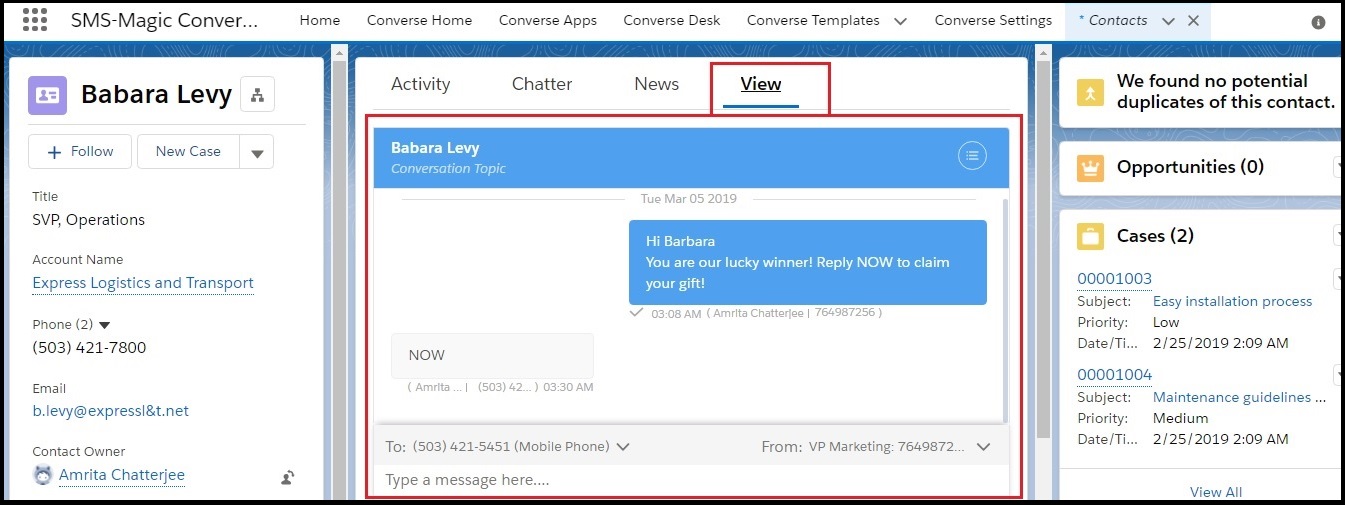
Send a Message from Conversation View on a Record Page
|
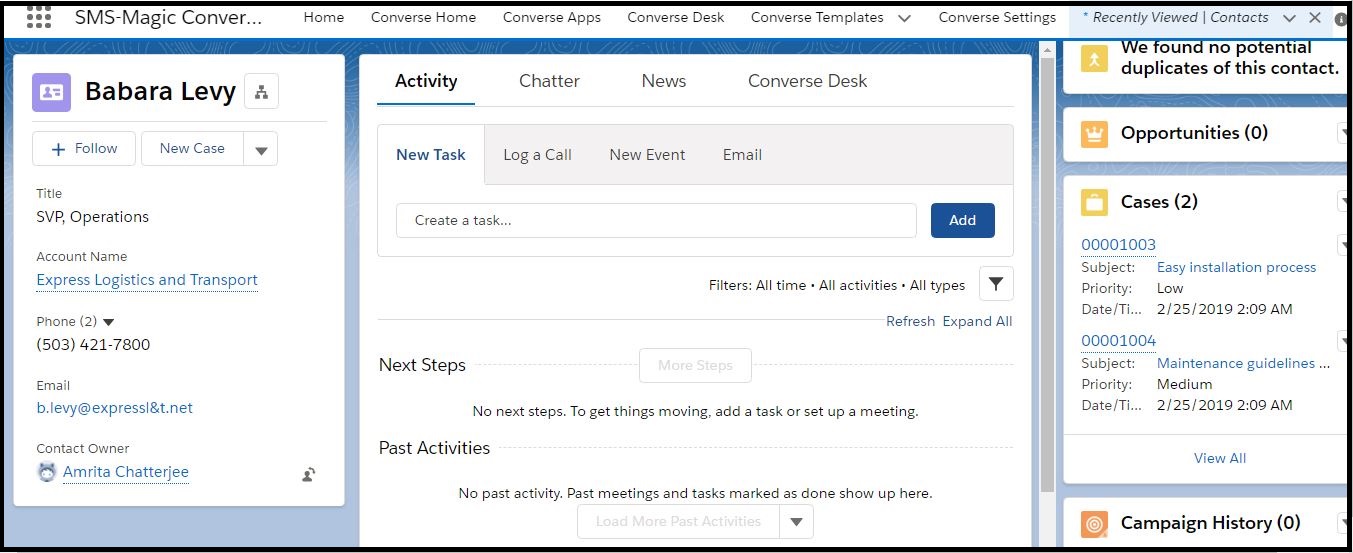
On the Contact Details page, click the contact record whose conversations you want to access. The Contact Details page appears.
Click the section in which you have added the Converse Inbox. The Message reply panel appears.
Refer to the section on Work with Converse Desk for more details on adding the Converse Inbox.
In the message text area, type your response.
The sender ID and recipient phone number displayed are retrieved from the details used when the message was last sent. You can edit this information if required. 
Click Send.
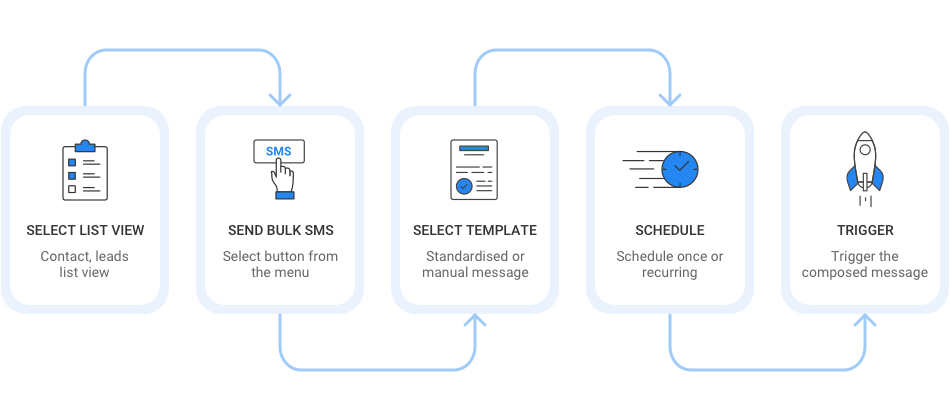
Send Bulk SMS
|
Every text messaging initiative geared to drive sales typically would begin with a Bulk messaging activity. You may need to address a group of people within a geographic region or community and send out a bulk message to all or a few of them from the list.
The messages can be text (SMS) or Multimedia (MMS) based and follow the same mechanisms to set up and send as a single SMS.
For sending MMS from Salesforce, make sure that your Org is setup for MMS. Contact your Org admin for the details.
You can send the bulk messages from the List View of the Salesforce for Contacts or Leads.
Similarly, you can send bulk messages from Campaign Manager, Salesforce Campaign, and Reports.
To send bulk messages from the List View of Salesforce:
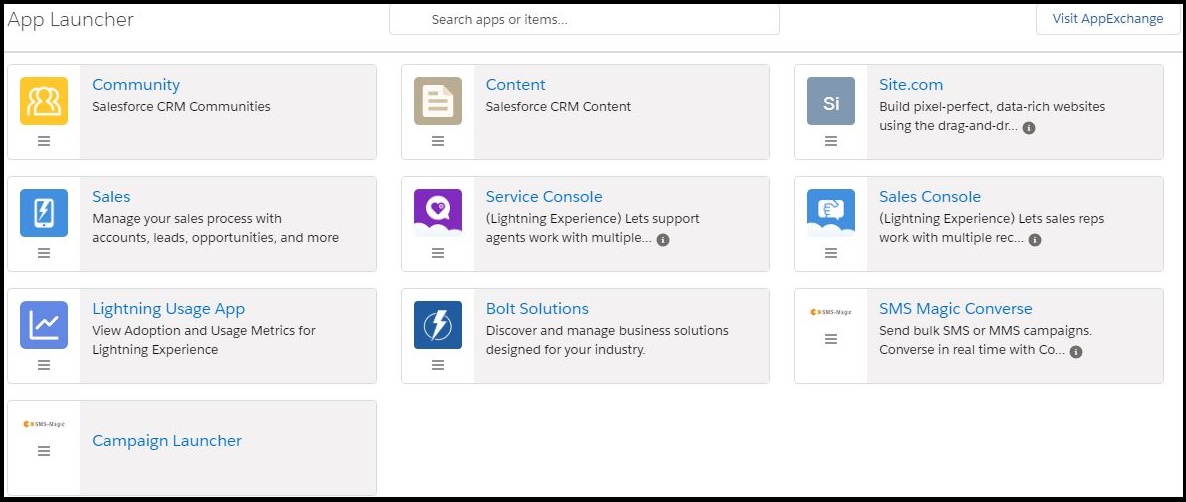
On the Salesforce Home page, click . The App Launcher page appears.
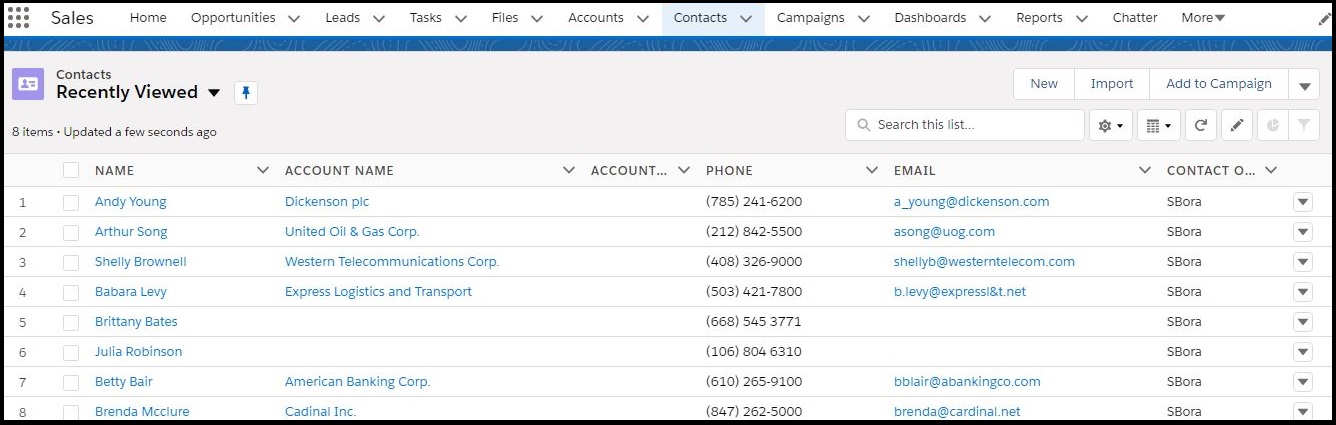
Click the object name. The object record list appears.
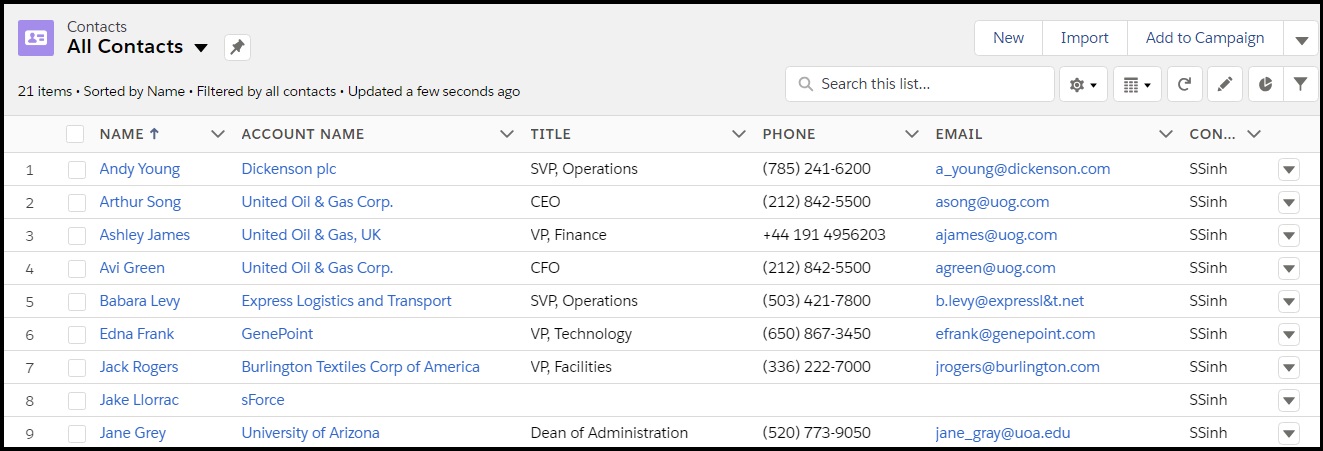
Under Contacts click and then select All Contacts from the drop-down menu to view the complete contact record list.
Select multiple records from the list.
Click on the top right corner and then click Send Bulk SMS. The Send Bulk SMS page appears.
Prior to selecting records to whom you wish to send the SMS, ensure that valid phone numbers are displayed in the phone fields. Moreover, the phone fields selected for the record should be the same ones that are configured in the message object settings. For example, if you select mobile as a phone field for the record, the same should also be configured in the message settings with a valid phone number as its value. Contact your System Administrator for more details on the phone fields that have been configured for that record.
Under Sender ID, select the ID from which you want to send the SMS.
Under Use Template select from the list of default templates.
Under Message Text, type the message you want to send as the SMS message. This field is already populated if you select a predefined template in the previous step.
Under Schedule, you can schedule when you want to send the message.
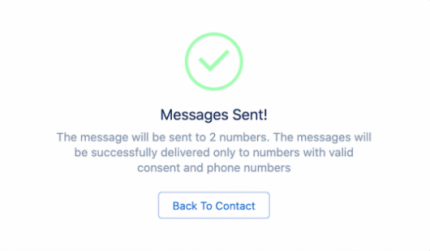
Click Send.
The SMS will be sent and following message will appear.
Schedule Bulk SMS
|
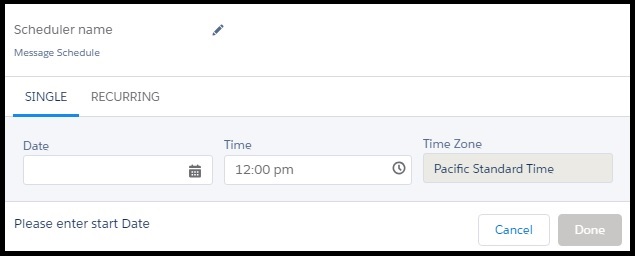
On the Bulk SMS page, click Schedule. The Schedule page appears.
Under the Single tab, click to select the start date.
Under Time, click to select the time when you wish the SMS schedule to start.
Under Time Zone the default time zone is displayed.
You can configure your Timezone from Profile > My Settings > Language and Timezones. Get in touch with your System Administrator to change your timezone, if required.
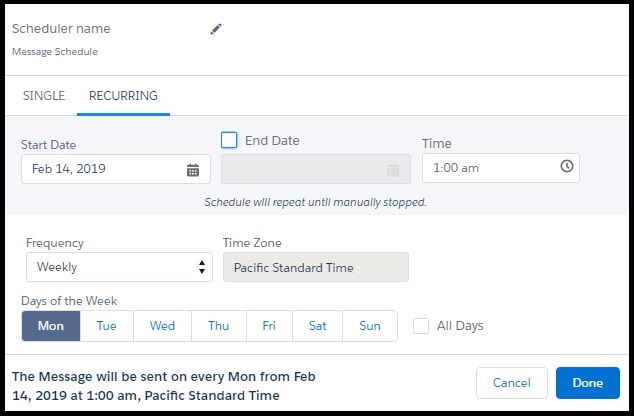
If you wish to configure a recurring schedule, click Recurring. The schedule parameters appear.
Click to enter the start date.
Select the End Date check-box to configure the date when you want the campaign to end.
Under Time, click to configure the start time for the campaign.
Under Frequency, select the schedule frequency. The available options are:
Daily – Select the number of days after which you want the campaign to run.
Weekly – Select the day of the week in which you want the schedule to run. You can also select the All Days check-box to run the campaign on all days of the week.
Monthly – Select the month and the day of the month when you want the campaign to repeat. You can also select the All Months check-box to run the campaign on the selected day of every month.
Yearly – Select the number of years after which you want the campaign to repeat. When you select the yearly frequency, you also need to specify the day and the month in the year when you want the campaign to recur. You can also select the All Months check-box to run the campaign every month. For example, if Repeat every = 5 years; Day = 2nd; Every Month check-box = Selected then the campaign is scheduled to run after every 5 years on the second day of every month.
Under Time Zone the default time zone is displayed.
Click Done to set the schedule.
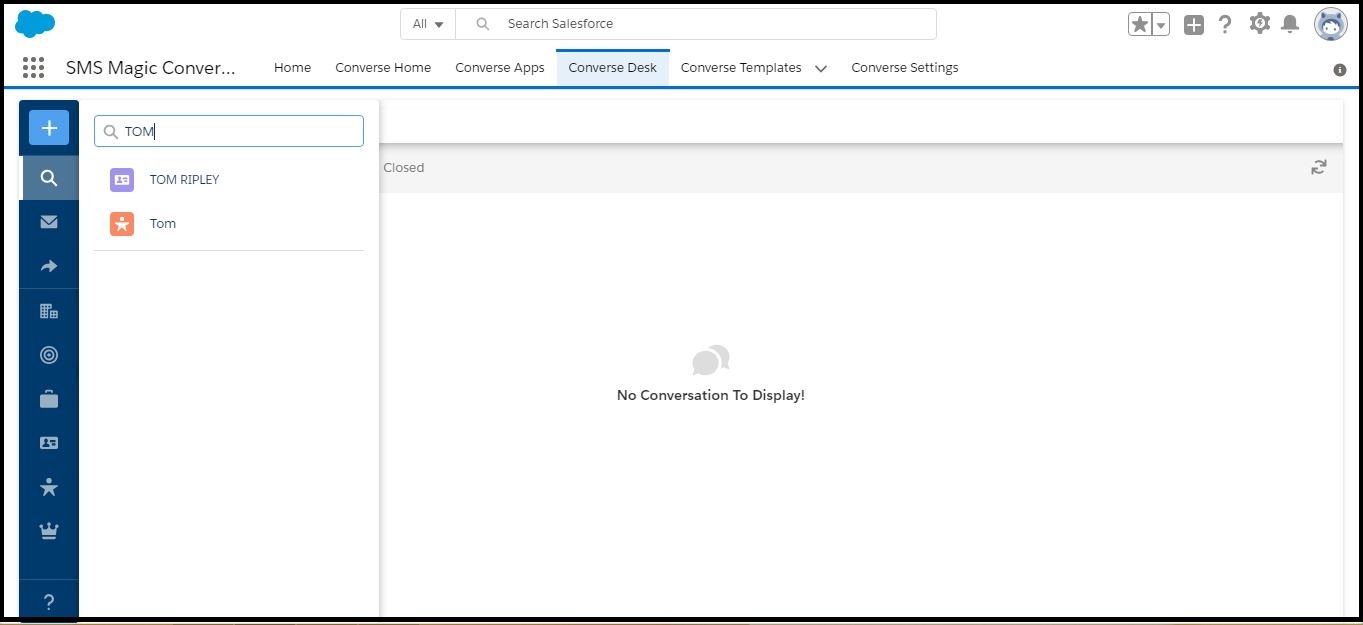
Conversation Filters
|
The Global Search field helps you filter all the conversations available within Converse Desk to find a specific conversation. You can type in a minimum of three letters or any three digits of a record’s phone number in the field to display possible matches to choose from.
View Conversations in Converse Inbox
|
In addition to the default Converse Desk tab that helps you view and manage conversations, SMS-Magic Converse provides another option to view and edit conversations. The Converse Inbox provides a smaller and more compact view of all conversations.
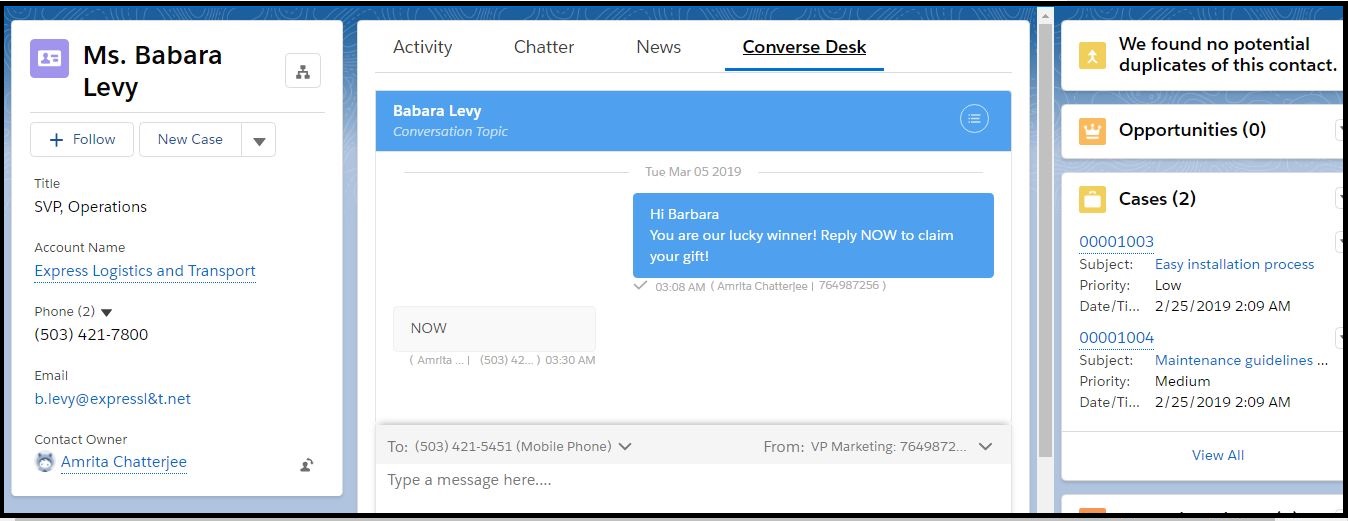
View from Record Details
If you have added Converse Inbox to a record page such as lead or contacts as a tab, then you can view the converstions in the tab that you have added. See the SMS-Magic Converse Admin Guide for information about configuring Converse Inbox.
For example, if you have added Converse Inbox to the Contact page, then to view conversations with that contact, perform the following steps:
On the Salesforce Home page, click. TheApp Launcherpage appears.
UnderAll Items, clickContacts. The Contact record details page appears.
Under Contacts click and then select All Contacts to view the complete contact record list.
Click a contact record. The record details page appears.
Click the Converse Desk tab to see the conversation view under the record detail.
View from Home Page
On the Salesforce Home page, click. TheApp Launcherpage appears.
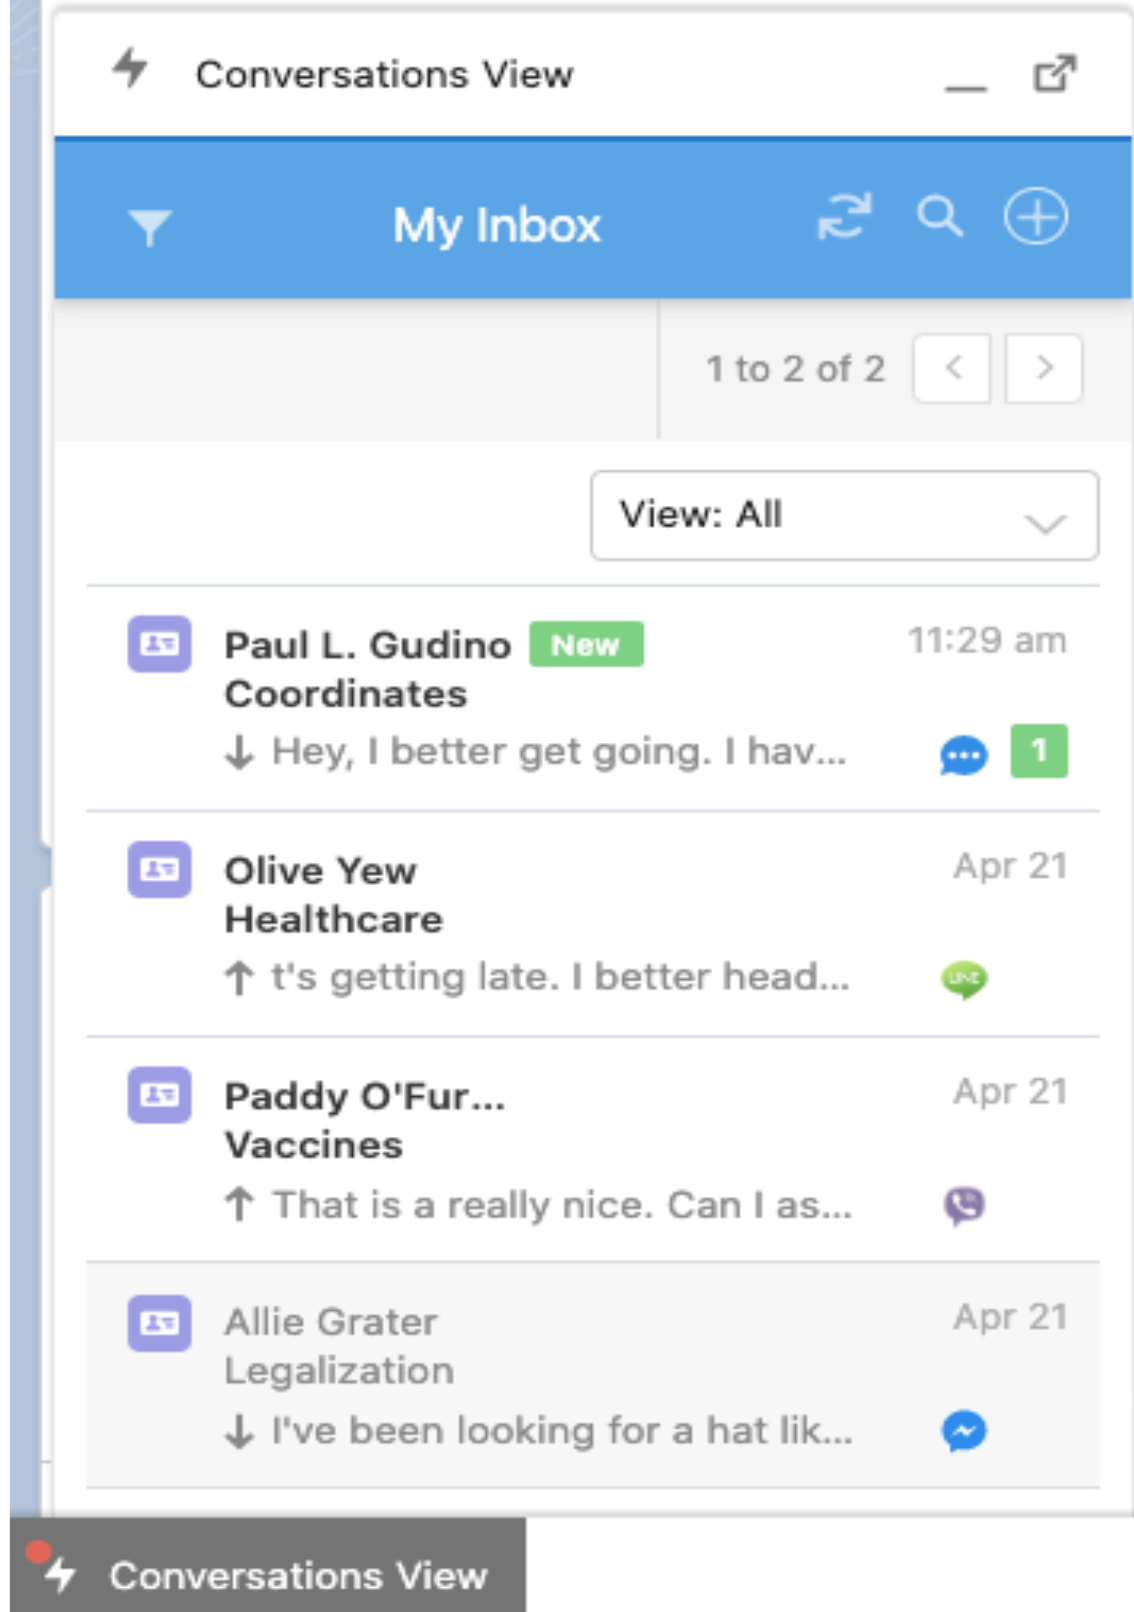
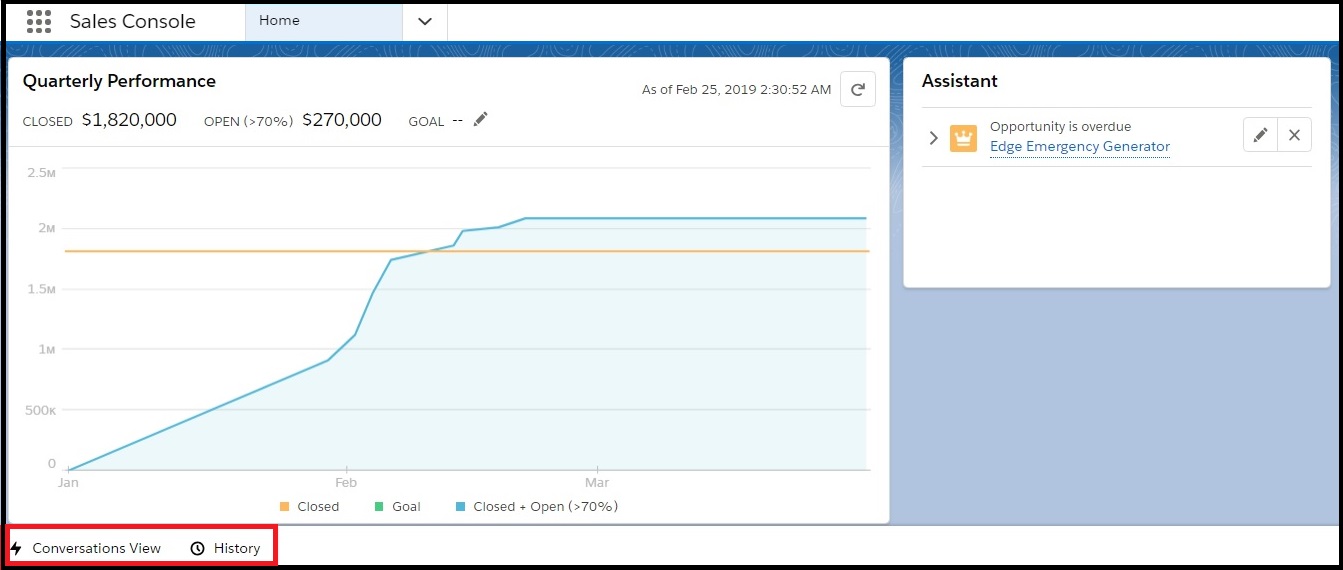
ClickSales Console. The Console page appears displaying a narrow panel at the bottom of the screen comprising theConversation View and theHistorytab.
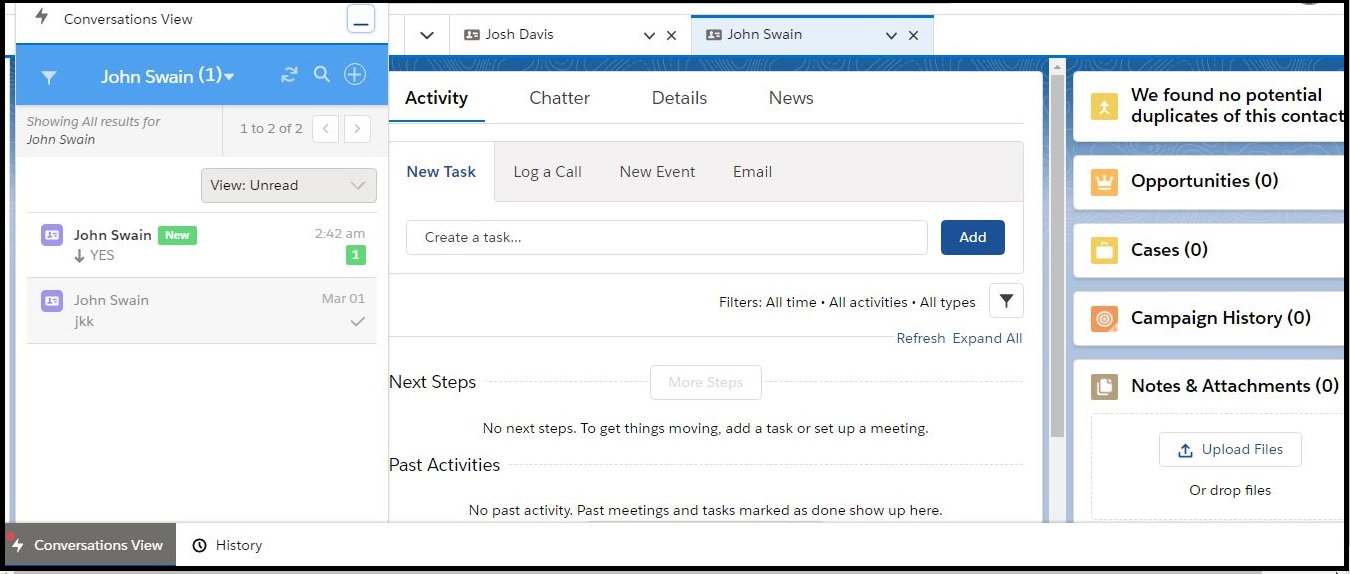
Click theConversation View. The conversation list displaying the conversations belonging to the contact currently active on the Salesforce page appears.
The Converse Inbox header bar color will vary depending on your selected theme for the Converse Desk.
The header bar also displays the notifications for all new incoming messages.
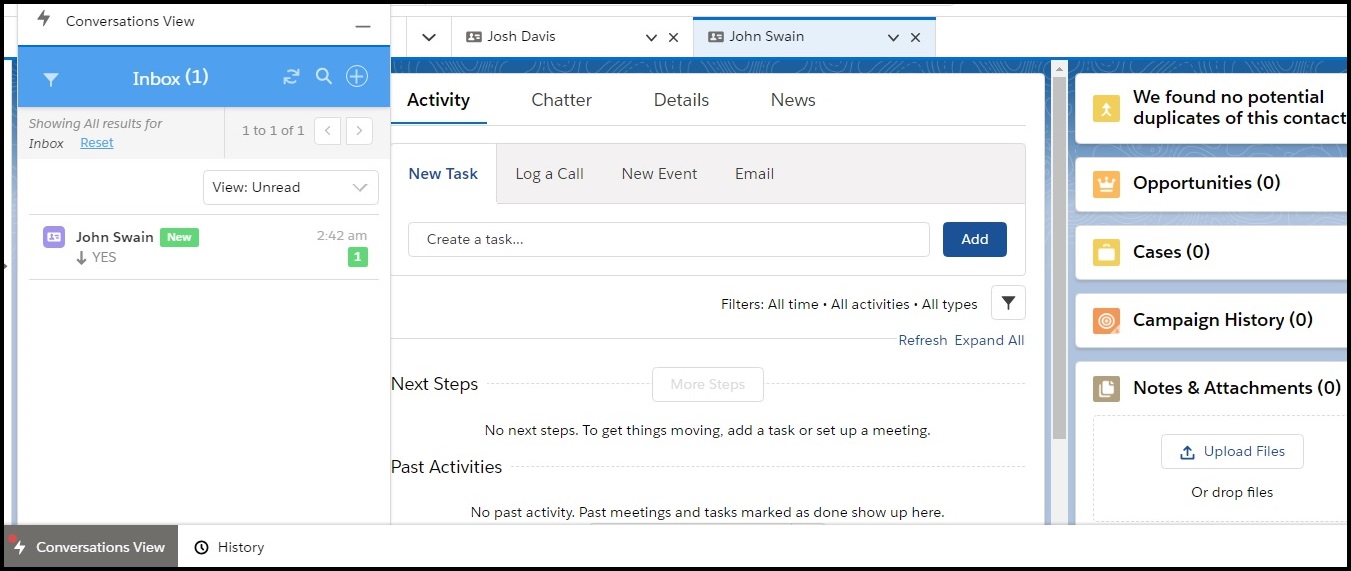
Clicknext to the contact name and then clickAll. The available conversation details belonging to all records appear.
Click Reset to revert to the default view.
Delete a Template
|
Log in to the SMS-Magic Converse application.
Click the Converse Templates tab. The Converse Templates page appears.
Select the check box next to the template you want to edit. The template is selected.
Click and then select Delete from the drop-down menu that appears. The Delete Template Confirmation page appears
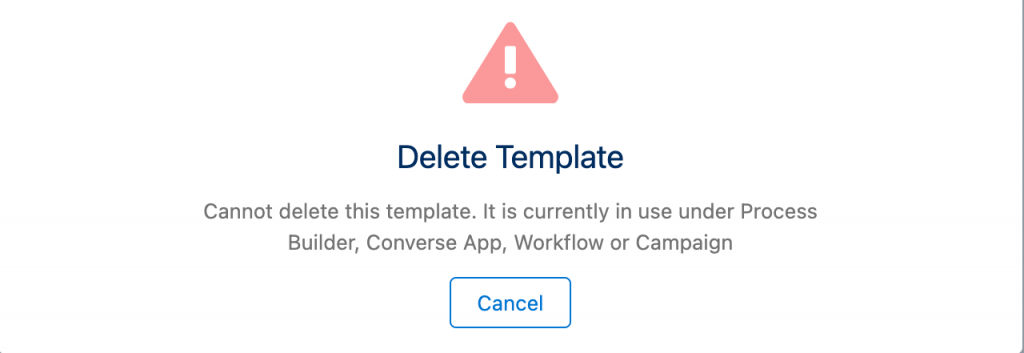
5. Click Delete the selected template will be deleted.
6. Users will be notified while deleting a template that Is already in use
7. Click on ‘Delete’ the following message will appear:
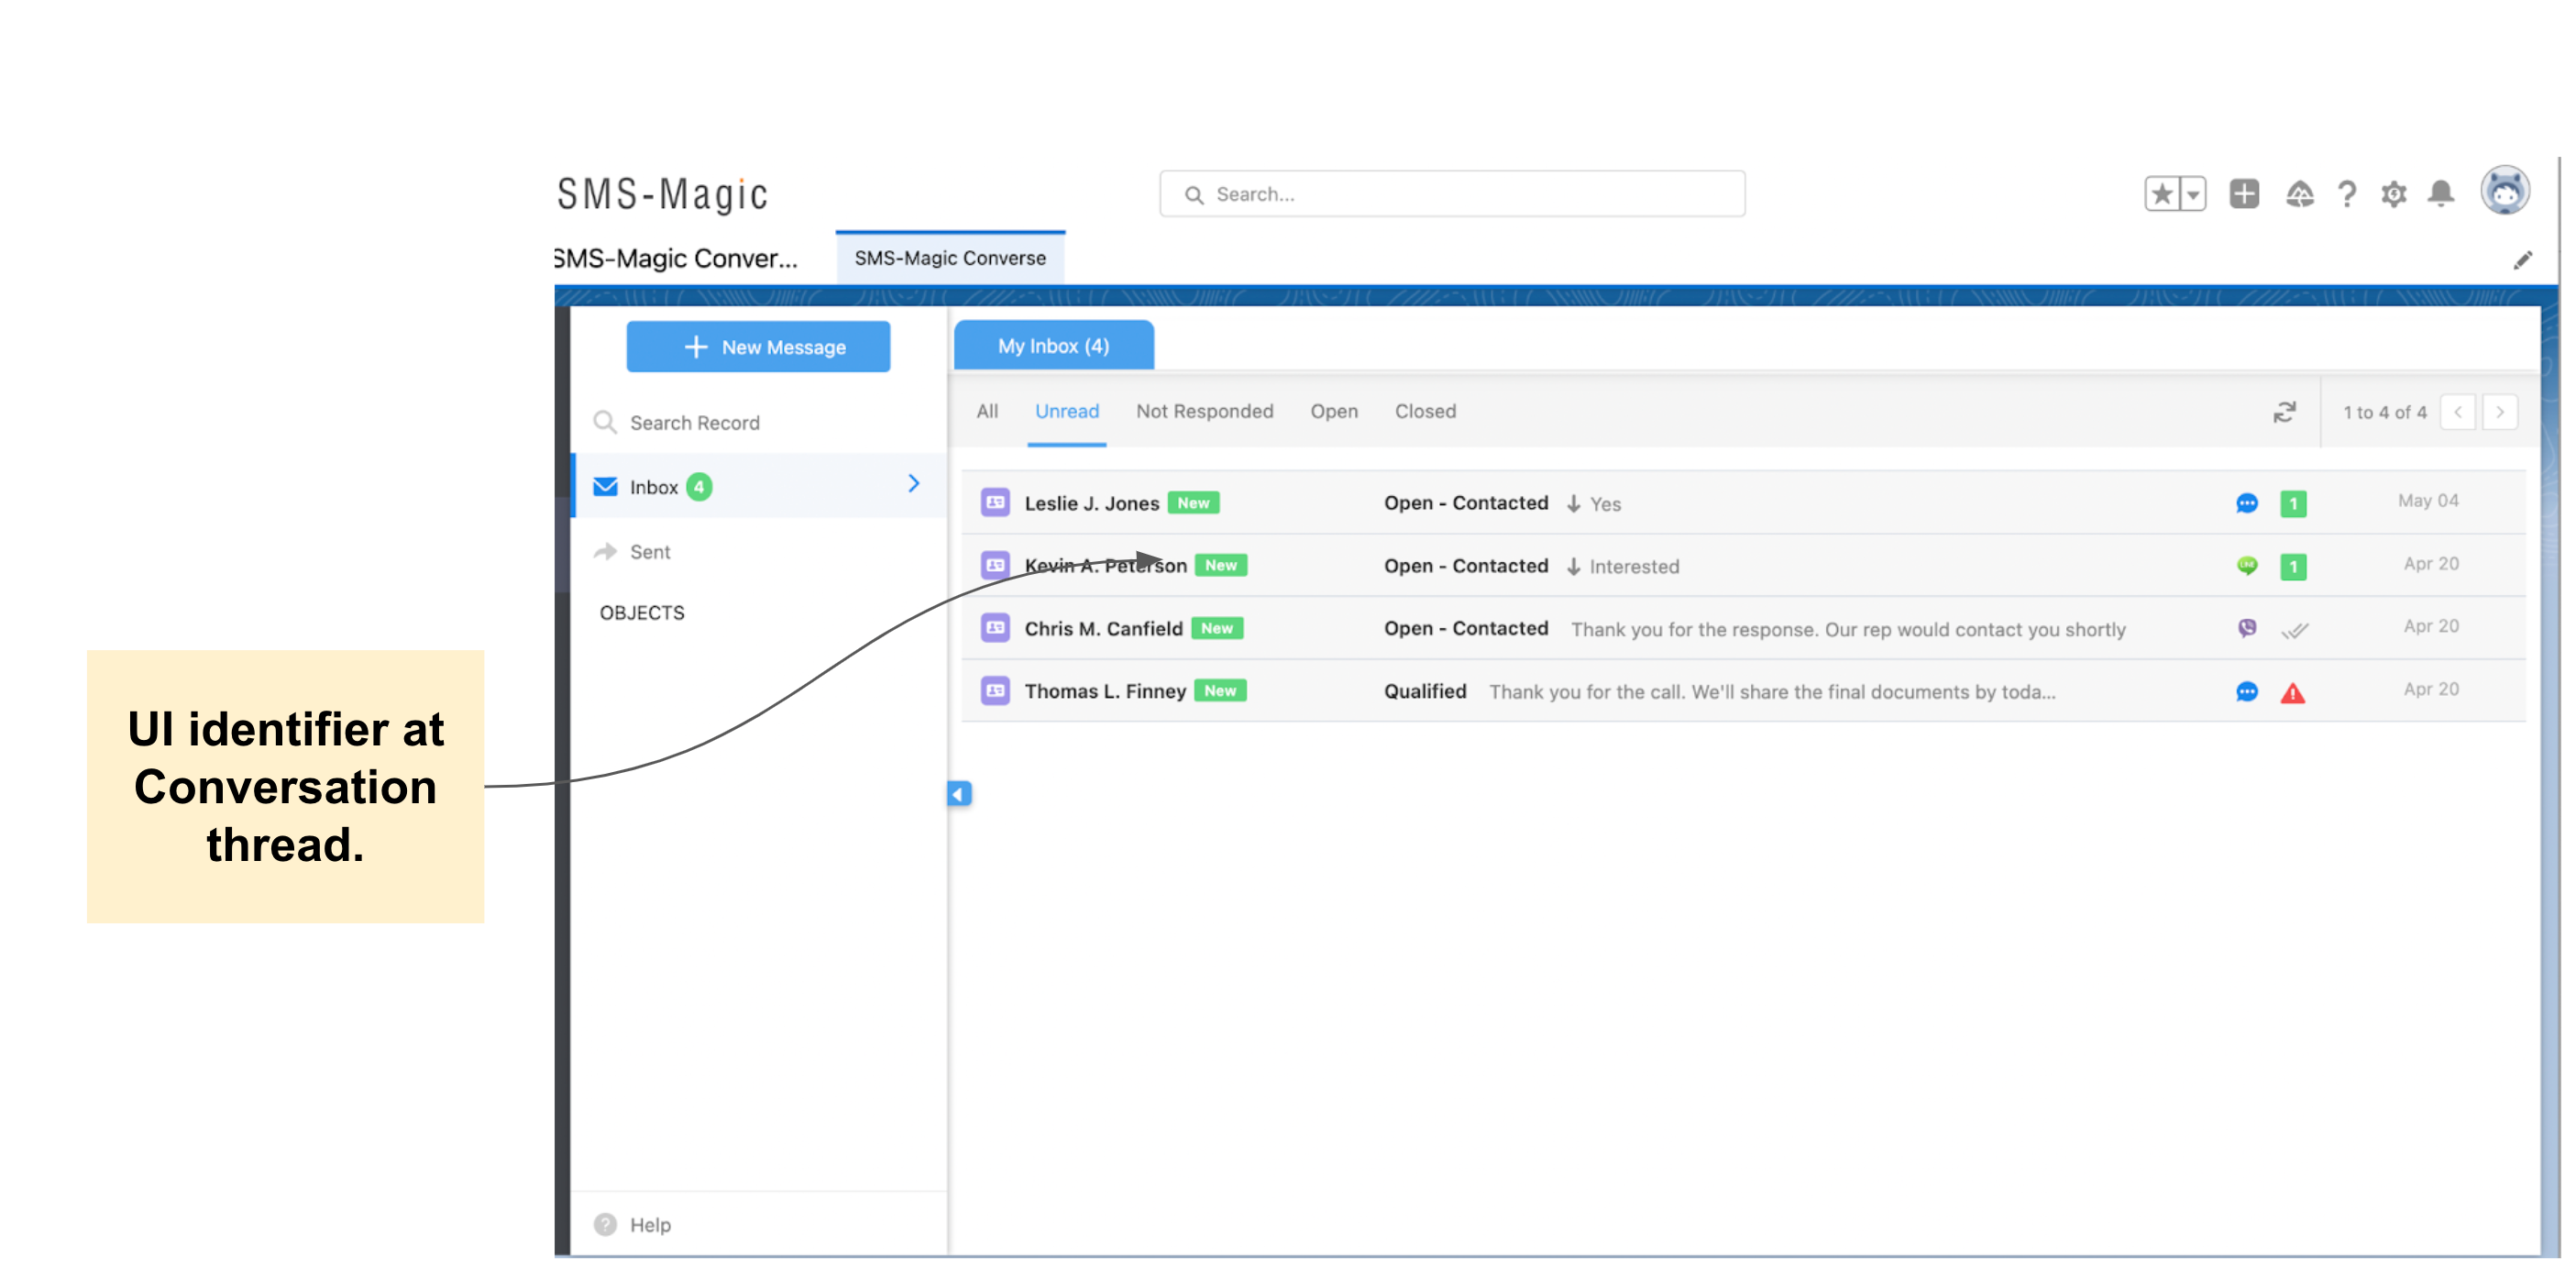
View Conversation Threads in Converse Desk
|
You can view individual conversation threads and perform multiple actions on them thus ensuring better customer engagement. The Converse Desk helps you view individual messages in the following ways:
Message Reply Panel – You can view individual conversations in a separate message reply panel that provides the entire conversation trail. The reply panel is a convenient way of viewing conversation details and performing basic tasks by remaining on the same page.
Conversation Details – The Conversation Detail View consists of two panels:
The Conversation thread panel in the center
The message composer at the bottom.
Related Conversations, if any, will appear on the right when selected. You can pin multiple conversation detail views in this manner and easily switch between the different views.
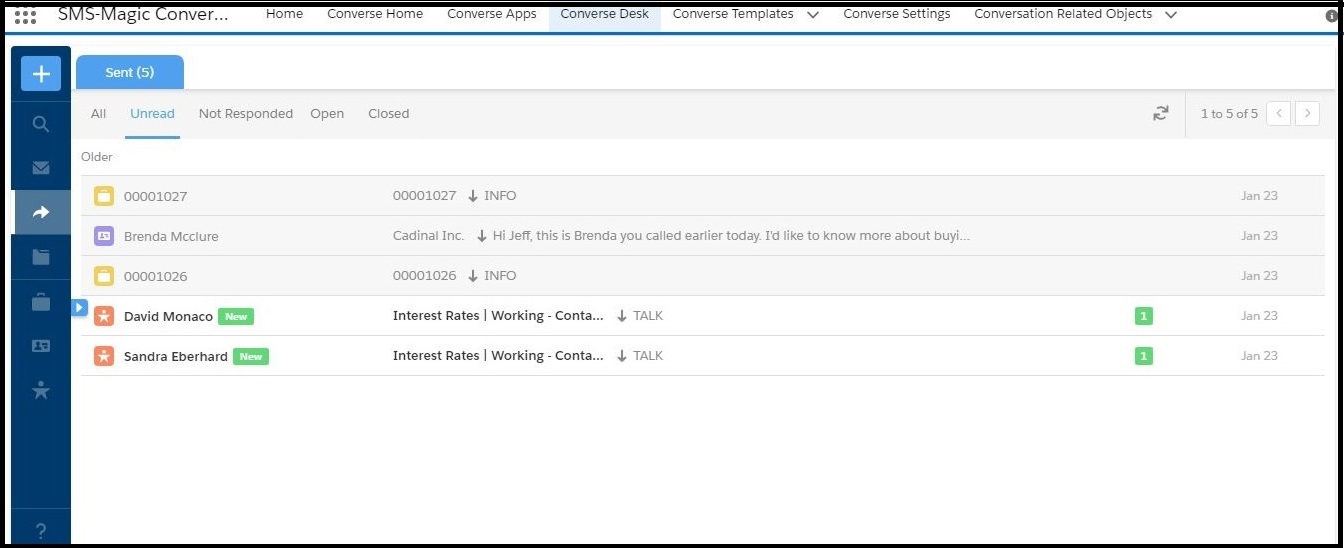
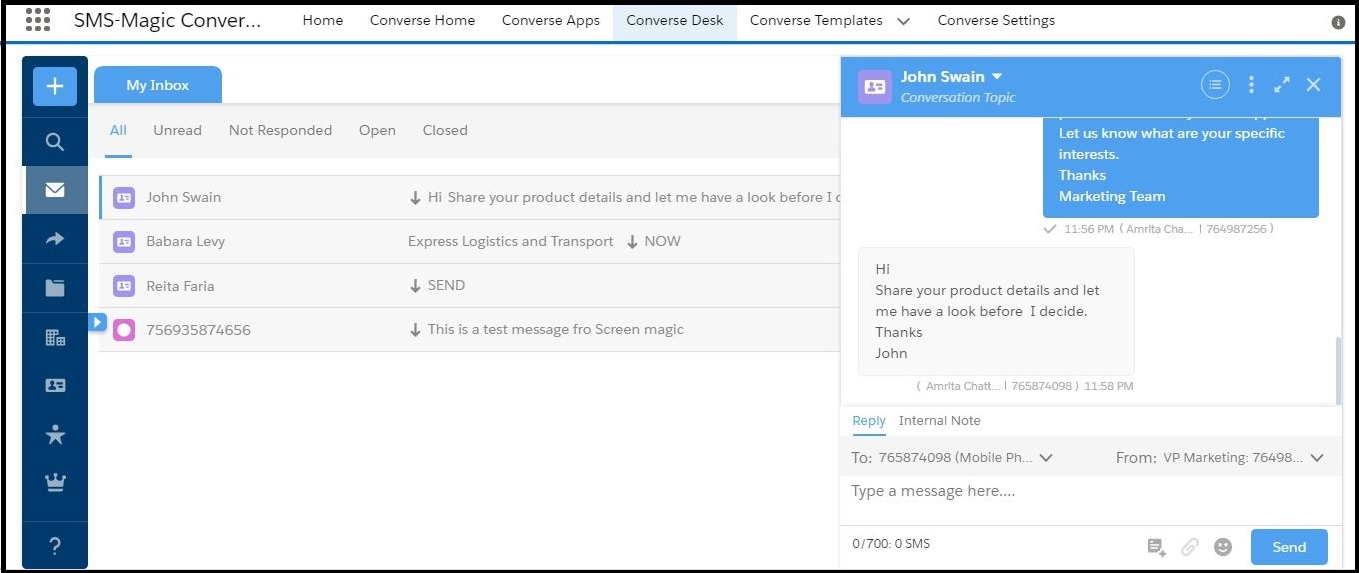
View Message in Reply Panel
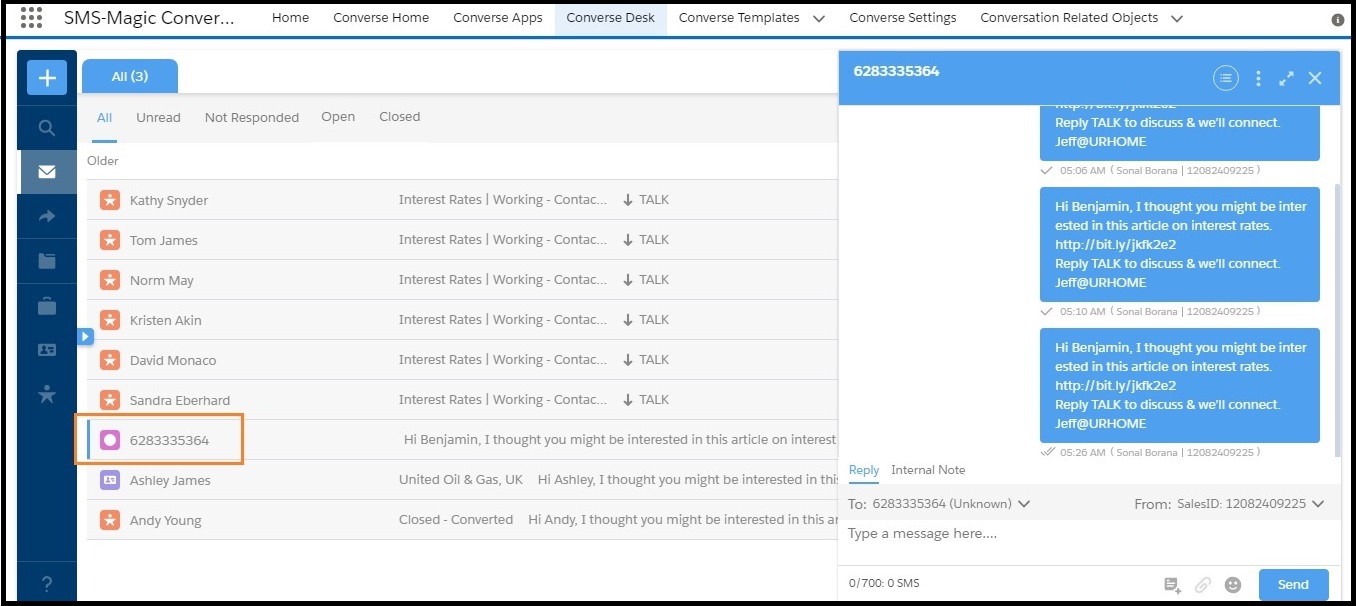
Search Conversations using Global or Conversation Filters. The conversation message list appears.
Click the contact name of the conversation recipient. The conversation reply panel appears on the right hand side of the screen.
Click next to the contact name and then click Show All Messages Sent/Received, To/From from the drop-down menu that appears. The reply pane will display all the relevant messages belonging to the selected contact. You can click Reset to revert to the default view.
3. Click the icons on the top right of the reply panel to perform the following tasks:
Icon
Description
Click to get a detailed view of a conversation.
Click to do the following:
Assign a conversation to another user. For more details, refer to the section on Assign Conversations.
View related conversations
Close a conversation
Click to execute CRM actions on a record. You can do the following:
View contacts
Edit Contacts
Create new task
Create an opportunity
Create an event
Create a Case
CRM Actions that are made available to you may vary depending on your organizational requirements and the configurations made by your Administrator.


 and then select Delete from the drop-down menu that appears. The Delete Template Confirmation page appears
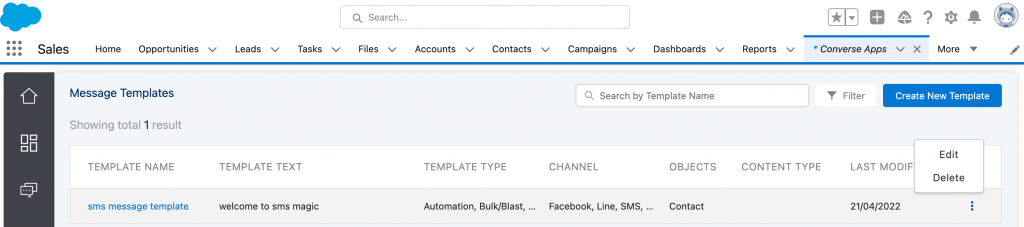
 next to the contact name and then click Show All Messages Sent/Received, To/From from the drop-down menu that appears. The reply pane will display all the relevant messages belonging to the selected contact. You can click Reset to revert to the default view.