Create and Associate a New Template to the Messaging Flow
|
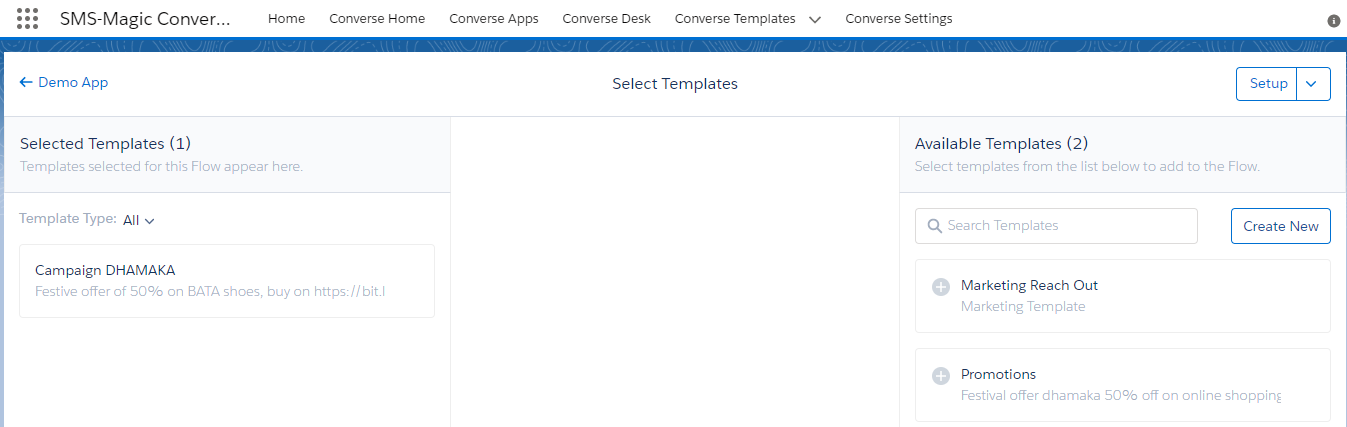
Once a new Converse App is created, you need to create and associate a new template to the message flow. On the Select Templates page, you can create new templates or select from the list of available templates. These templates are associated with the app. If needed, you can remove the template from the app.
To Create a New Template:
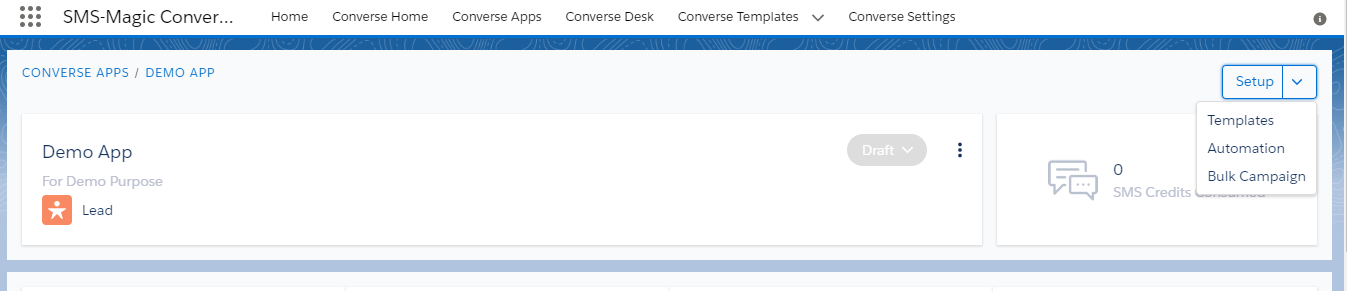
1. In the SMS-Magic Converse application, click on the Converse Apps tab.
2. Click on the App to open the app details page.
3. Click Setup and select Template.
4. On the Select Templates, page click Create New.
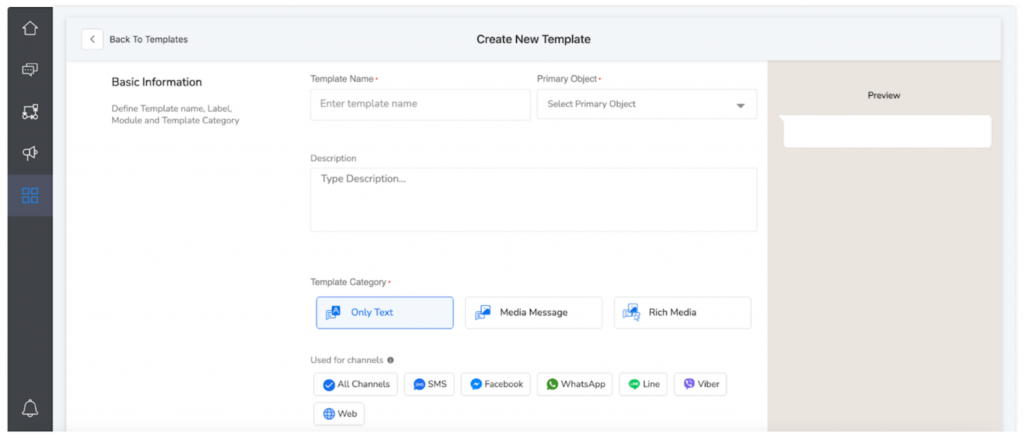
5.In the Basic Information section, enter the template name in the ‘Template Name’ field and select the primary object from the Primary Object drop-down list
6.Type the description in the description field
7.Select the templates
Note: Now from version 1.73, you can create rich media message templates. Select the template category as ‘Rich Media’ and select the channels from the list of channels. Rich media message templates allow users to use the WhatsApp functionalities like clickable buttons and call to action buttons.
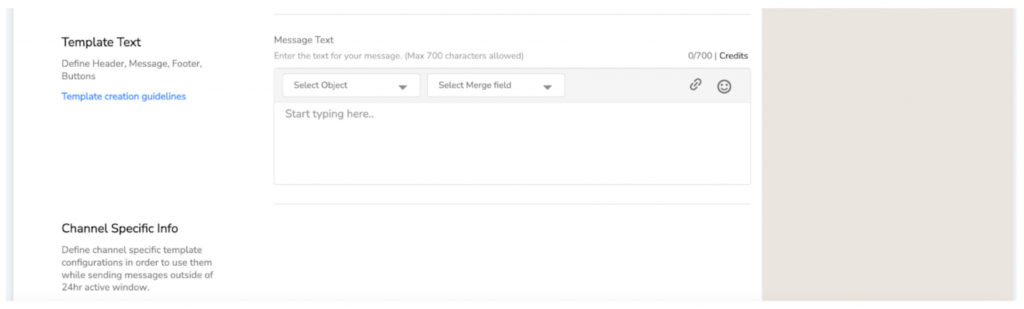
8.In Insert Merge Field, select the Object type and the Merge Field to personalize your template
9.Click Create once all details are filled
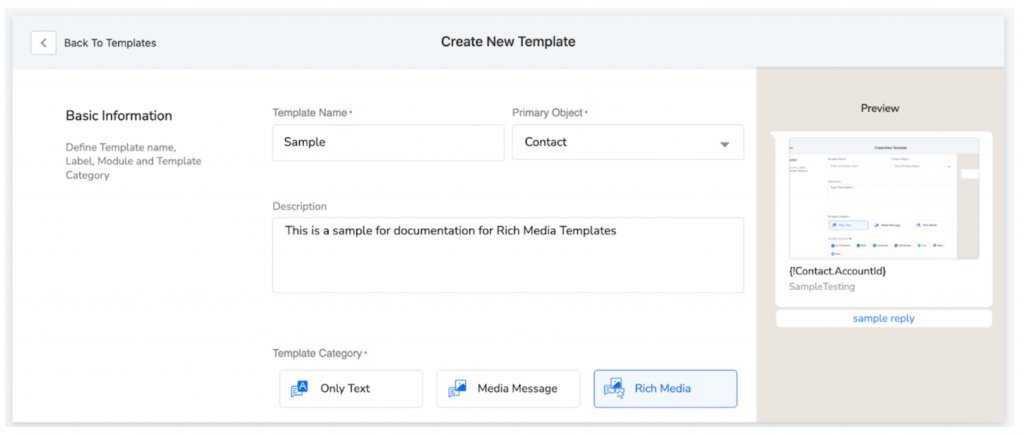
10.Once all the details are filled, you can see the preview of your template as shown in the image below:
Overview
|
You need to organize and monitor your conversation status to adopt a better approach in resolving customer queries, avoid bottlenecks, retain customer engagement and generate better business.
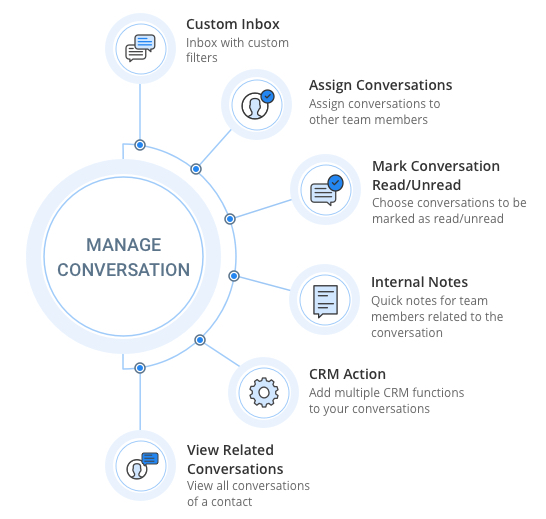
The Converse Desk provides you with multiple features to manage your conversations. This section will elaborate on ways in which you can manage conversations and will include:
Creating a Custom Inbox – You can group multiple conversations under a single category that can be displayed as a list. These list views can be shared with multiple users forming a shared Inbox for all the selected users. SMS-Magic Converse provides a set of default list views to help you categorize your conversations based on your requirement.
You can create custom list views, also known as Custom Inbox, to meet additional requirements. You can define filters to specify how you wish to categorize conversations to be grouped under these Lists. You can change filter conditions to modify custom Inbox views.
Assigning Conversations – You can assign any existing conversations to other users within your team if you are unable to resolve them. Once assigned, the conversations will be available in the Inbox of the assigned users for edits or modifications. You can select and assign multiple conversations to other users.
Marking a conversation as Read or Unread – You can mark all conversations that you have recently received, as “Read”. Similarly, all existing conversations can be marked as “Unread” to ensure that they are revisited by other members in your organization if required. The current version of SMS-Magic Converse also allows you to mark multiple conversations as read or unread based on your requirement.
Adding an Internal Note to your messages – You can add private messages to the conversations that belong to you. These notes help to act as reference notes for you in carrying forward that conversation.
Converting Unknown Numbers to leads – You can now convert an unknown phone number to a lead. Any conversation initiated from a number that is not in your current contact list can be included in your lead database as a new lead. The existing conversation, however, will continue to reflect the unknown phone number even after you convert it into a lead. You can begin a new conversation trail with the newly converted lead.
View Relevant Conversations – SMS-Magic Converse allows you to get a complete view of all conversations that have been created for a primary object. This includes all conversations that are created with the object’s parent records as well as those with its related records. This is known as viewing a related conversation.
In other words, under Related Conversation, you can get a complete snapshot of all conversations that are related to the primary object record.
For example, if you are viewing the conversation of a contact which is a child of the Account object, you will be able to view the conversations that the contact has had with other contacts in the same account as well as if there are any cases that the contact is handling within that account.
This feature is out of the box for all standard objects. However, if you wish to use custom objects for viewing related conversation, you need to configure the relationship manually.
The CRM Action New Lead has to be enabled in the Converse Settings for the object Unknown. Contact your System Administrator to complete the configurations.
Internal Notes are visible to the conversation owner and the team manager. Other users can view these notes only if they are provided with relevant permissions.
Send a New Message
|
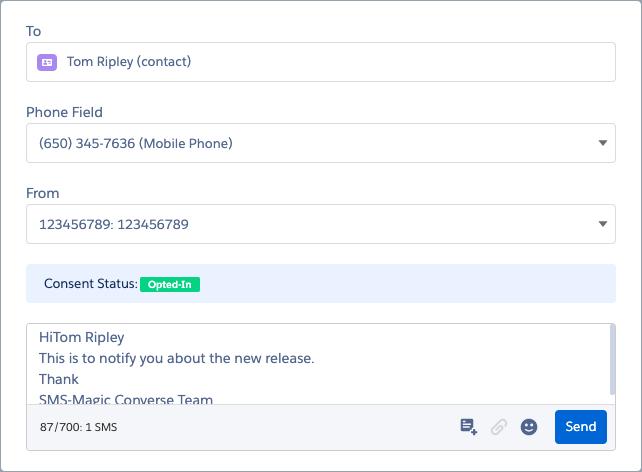
On the Converse Desk, click located above the Global search icon. The Send SMS pop-up window appears.
Enter the following details:
Fields
Description
To
Enter the Recipient Name or number.
Phone Field
Select the phone field defined for the Recipient.
From
Select the Sender ID.
Message Area
Type the message text.
Select a template for your message.
Attach media with your message.
Attach emojis with your message. Emojis take 2-character space.
You can only type custom messages that fall within the defined character limit. For longer messages, select a template.
The message composer area automatically increases in width to accommodate the message length.
Click Send.
View Campaigns
|
You can view all campaigns you have created. You can search for a specific campaign or filter records based on their run status.
On the Campaign Manager page, search for a campaign and do one of the following:
Click on the search icon to open the Search bar. Type the name of the campaign and press Enter.
Click on the filter icon to select the required run status filters from the options and click on Apply. You will see the campaign list filtered based upon the run statuses you selected.
2. The results are in the CAMPAIGNS list view
3. You can also sort the campaign results based upon Date and Time. Click on the sort option and then select the appropriate sorting option from the drop-down menu that appears. The results are sorted and the selected options displayed on the top.
4. Click on the icon adjacent to the campaign that you want to view and click on ‘View Details’ from the drop-down menu that appears. The campaign details appear:
Change the Template Owner
|
Log in to the SMS-Magic Converse application.
Click the Converse Templates tab. The Converse Templates page appears.
Select the check box next to the template which you want to assign to a new owner. The template is selected.
Select multiple check boxes and click Change Owner on the top right-hand corner if you want to change owners of multiple templates.
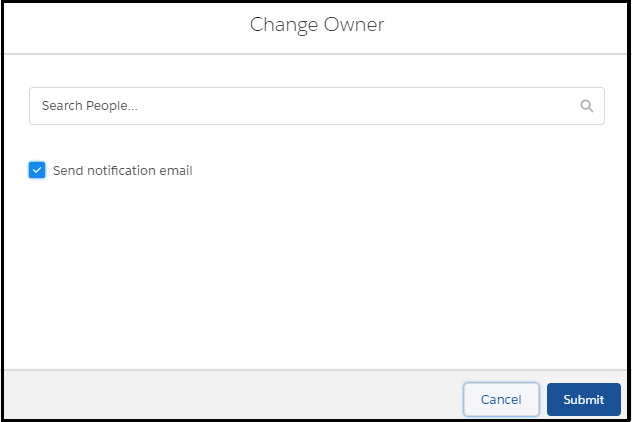
Click and then select Change Owner. The Change Owner pop-up window appears.
Type the first three letters to search for the user you want to move the template to. The search results appear as a drop-down list.
Select a User.
Clear the Send notification email check box if you do not want to send an email notifying the user of being assigned as the template owner.
Click Submit.
Delete a Template
|
Log in to the SMS-Magic Converse application.
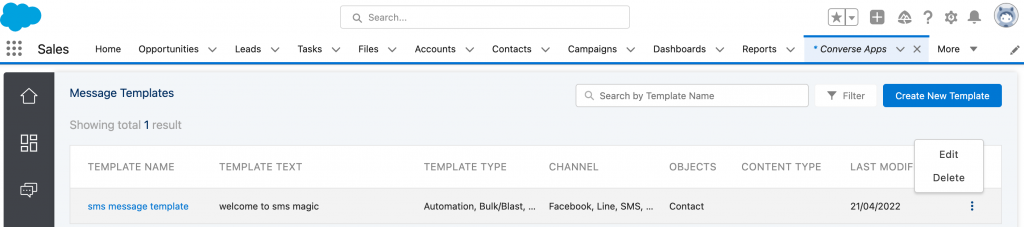
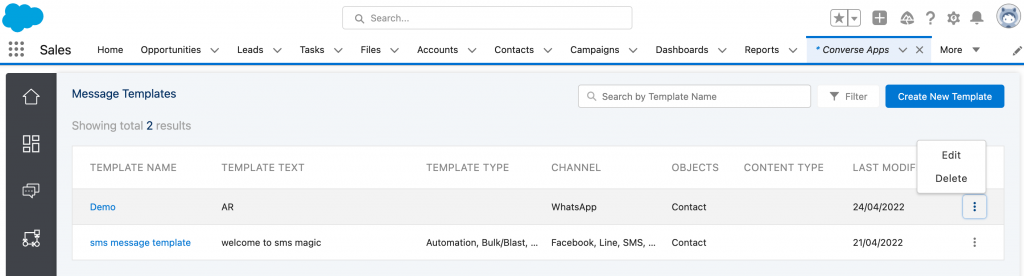
Click the Converse Templates tab. The Converse Templates page appears.
Select the check box next to the template you want to edit. The template is selected.
Click and then select Delete from the drop-down menu that appears. The Delete Template Confirmation page appears.
5. Click Delete
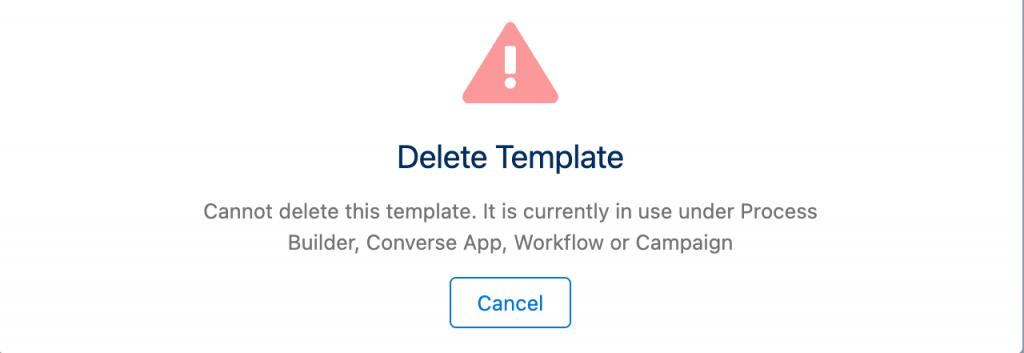
6. Users will be notified while deleting a template that is already in use
7. Click on the ‘Delete’ template the following message will appear:
Create a Message Flow
|
Once a new template is created and associated with the message flow, you need to create the automation message flow.
To Create an Automation Message Flow:
1. In the SMS-Magic Converse application, click on the Converse Apps tab.
2. Click on the App to open the app details page.
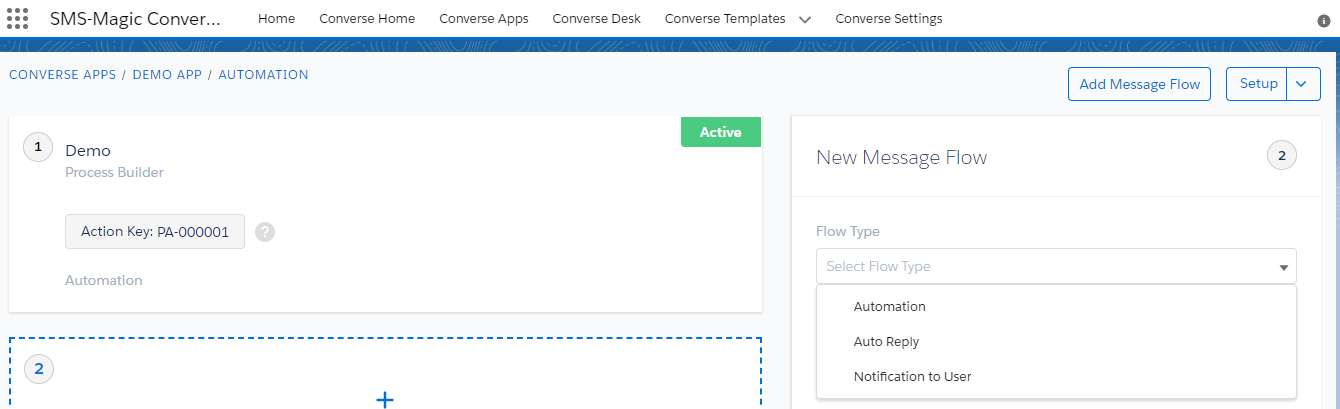
3. Click Setupand select Automation.
4. On the Message Flow configuration page, select the Flow Type. The type can be:
Automation
Auto Reply
Notification to User. Select Automation as the flow type.
5. Enter the name of the message flow in the Namefield.
6. Enter a short description of the message flow in the Descriptionfield.
7. Select the phone type in the PhoneFields.
8. Select the sender ID in the Sender ID field.
9. Select the action trigger in the Message Flow Trigger field.
10. Select the template in the Templatefield. The text of the template is displayed.
11. In addition to these, if you select Auto Reply or Notification to User as the flow type options, you need to enter values for the Keywordfield. The keyword will be defined by you and will be specific to your business needs.
12. Click Create.
View Conversations using Global and Conversation Filters
|
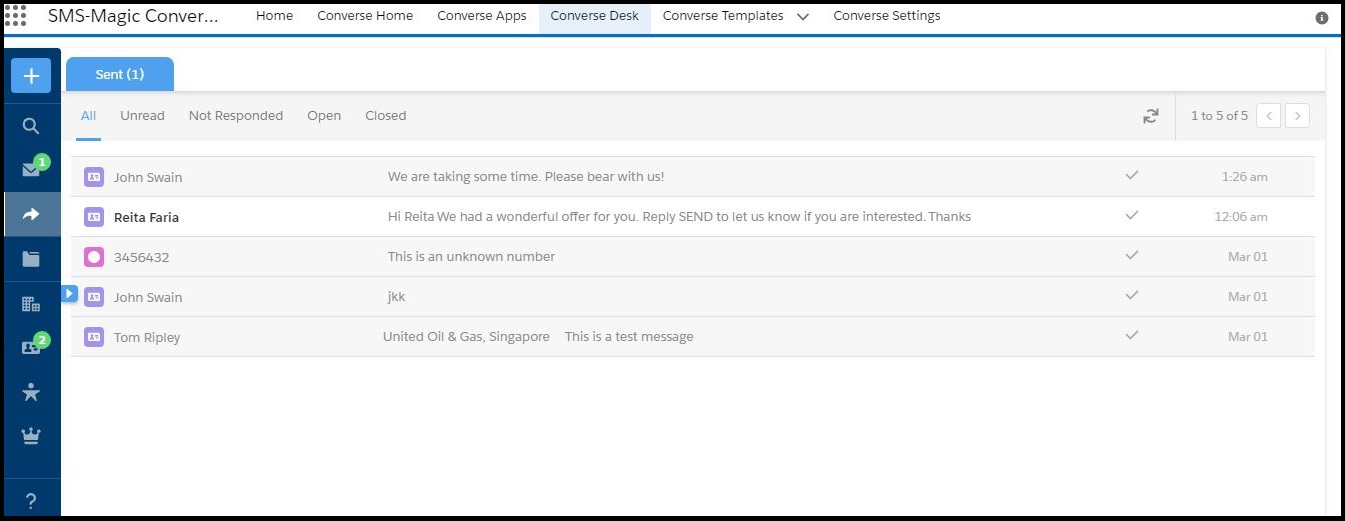
View Conversations using Global Filters
Using global filters, you can view all conversations under specific categories. Conversations are grouped in the form of lists within the global filters. On selecting a specific folder, you can view the relevant lists that it comprises. You can also search within these lists to view specific conversations.
Click Converse Desk. The Converse Desk Home page appears.
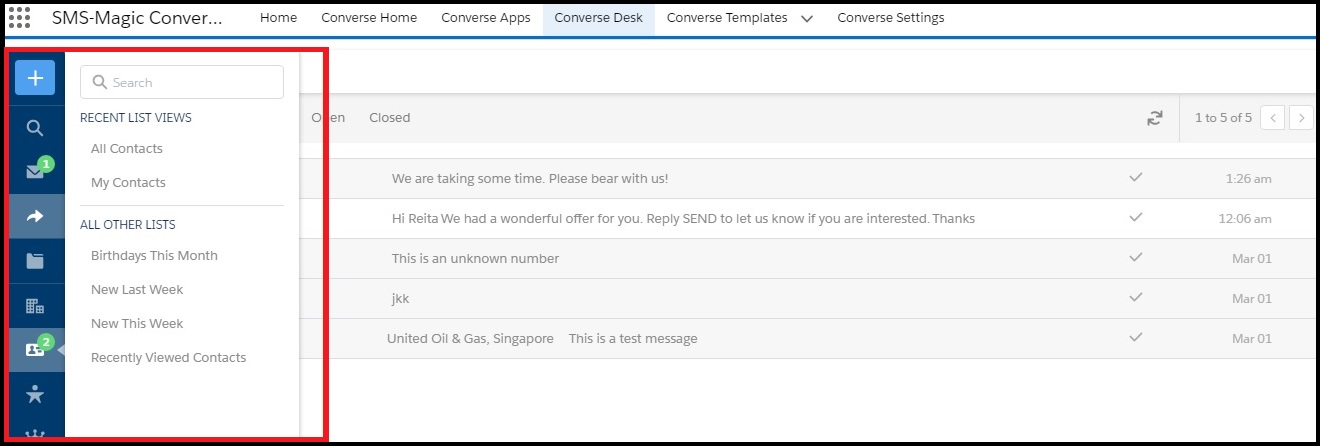
Click any of the global filters. The relevant list view it comprises appears.
If you click any object, the list view appears.
Click a list view. The relevant conversations grouped under that list appears.
Now, use the following global filters to search within these lists to view specific conversations.
Global Filter
Description
Inbox
This category filters all conversations which you own. The team lead can also create a custom Inbox that will display messages belonging to the entire team for quick resolution of all open issues.
Sent
This category filters conversations that you have sent to the recipients.
Custom Lists
This category filters conversation according to the Converse Apps that you have configured for the Converse Desk.
Objects
This category filters all conversations owned by the objects you have configured for the Converse Desk.
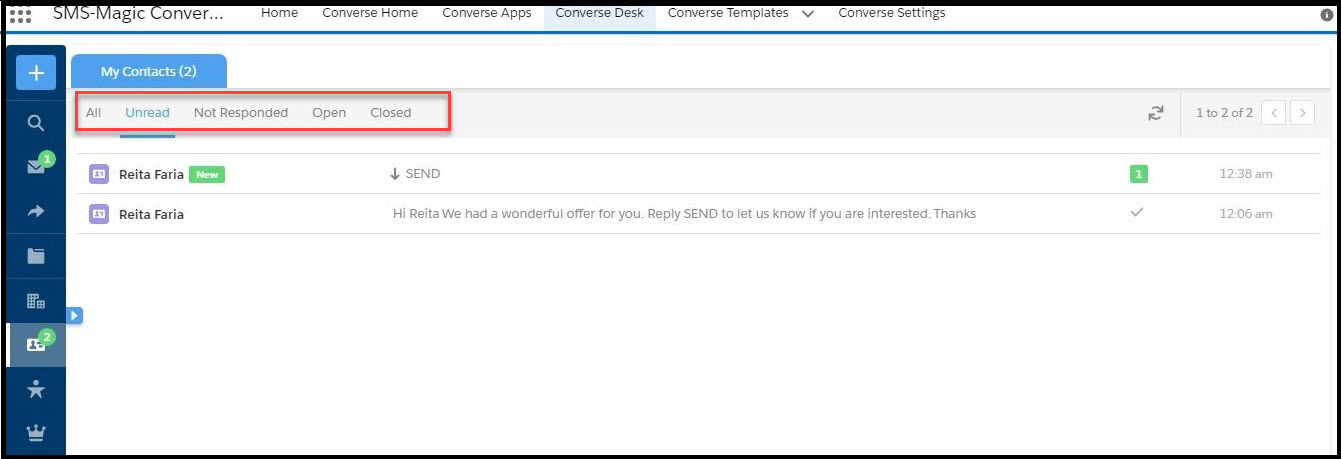
View Conversations using Conversation Filters
You can categorize conversations based on their status. These are known as conversation filters. All conversations that you view under these conversation filters will be a combined view using Global filters and the relevant conversation status.
Follow the steps provided in the Global Filter search section to open your list view. The relevant conversations grouped under that list appears.
Now, use the following conversation filters to search within these lists to view specific conversations.
Conversation Filter
Description
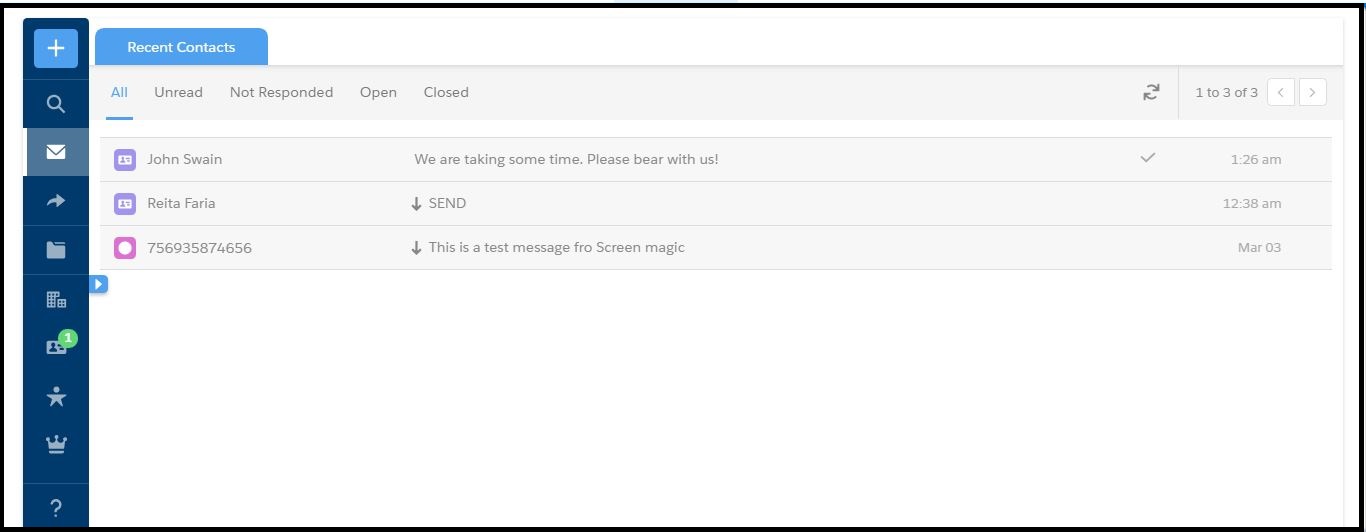
All
This category displays all conversations regardless of their status.
When you toggle from other conversation views to this view, all conversations with the same lead or contact for which you are the owner will be marked as read.
However, conversations that are owned by other users will continue to remain marked as unread.
This category filters all conversations which you own. The team lead can also create a custom Inbox that will display messages belonging to the entire team for quick resolution of all open issues.
Unread
This category displays all unread conversations.
Not Responded
This category displays all conversations that have not received any response from customers.
Open
This category filters all conversations owned by the objects you have configured for the Converse Desk.
Closed
This category displays all closed conversations.
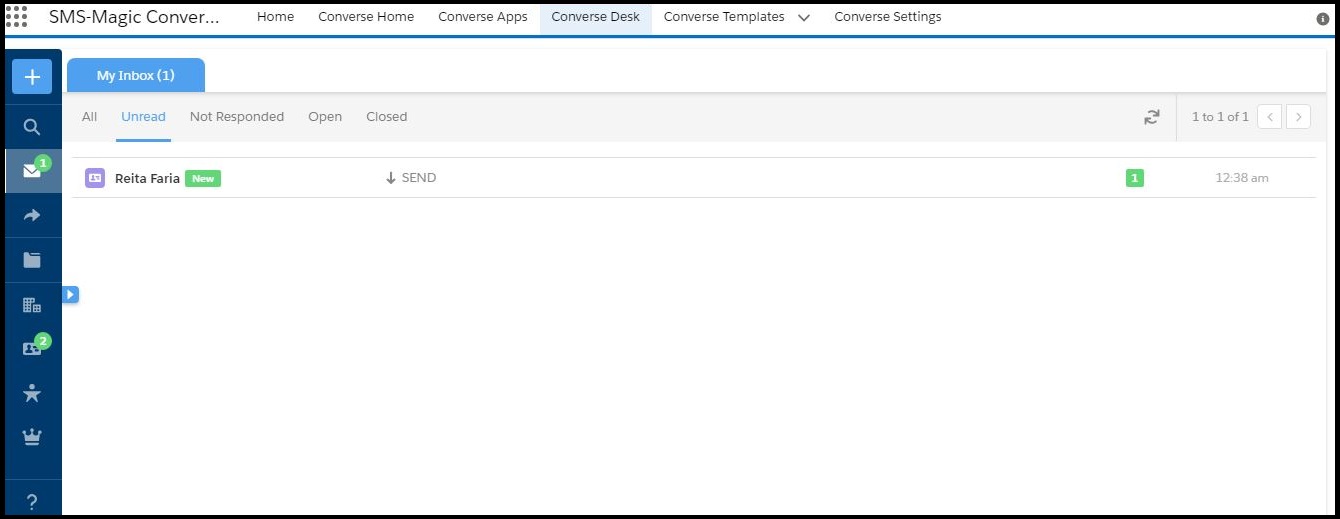
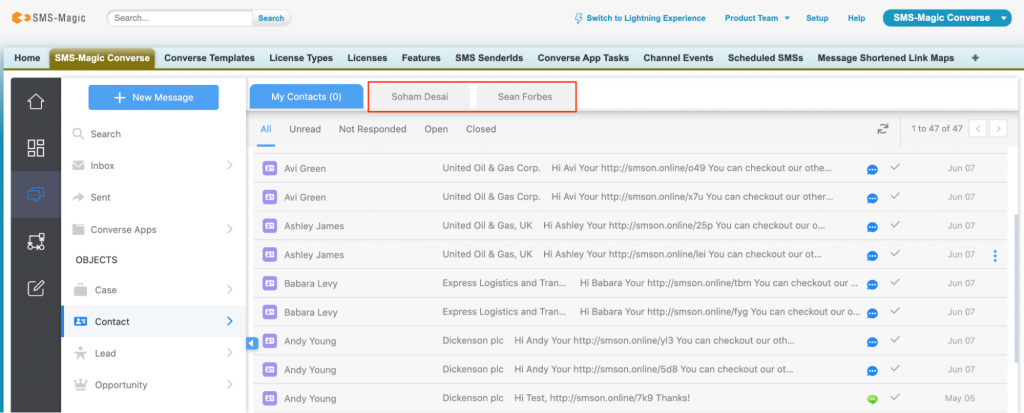
Your last opened converse desk filtered view, conversations, and open tabs will be persisted here by the system.
If you go to Contacts->My Contacts->All and open any contacts (for instance here, Soham Desai and Sean Forbes), and again go back to ‘All’ contacts, then the Inbox filter view and the conversation tabs, both will be persisted by the system as shown in the image above.
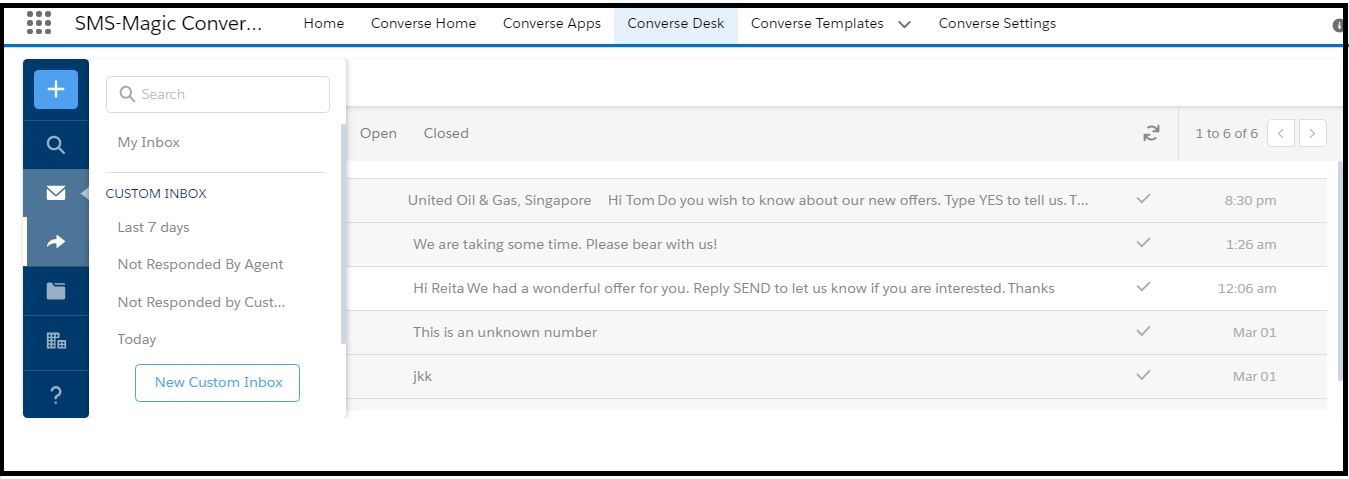
Create a Custom Inbox
|
In Converse Desk, click Inbox. The list of conversations appear.
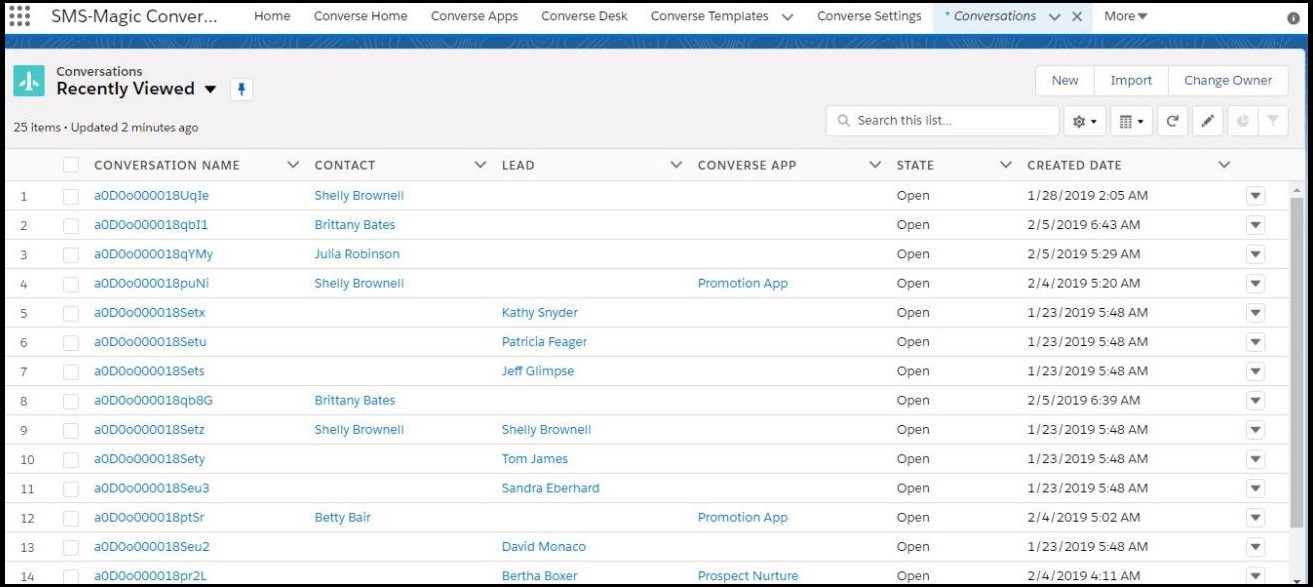
Click New Custom Inbox. The Default list view appears under the Conversations tab.
To view this feature, the Custom Filter should be selected while configuring the Converse Desk Layout. Contact your System Administrator to enable this feature.
Click to change list view to All from the header.
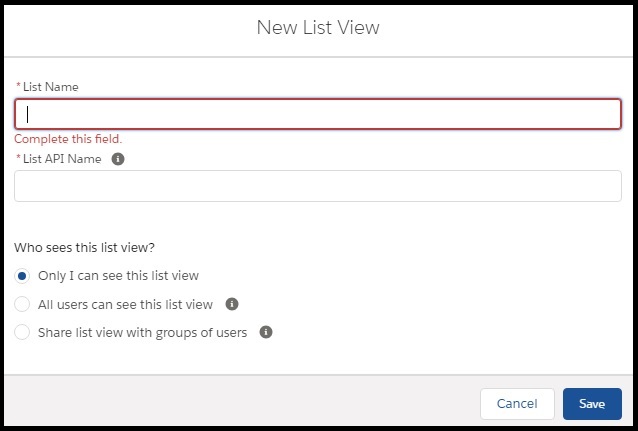
Click and then click New under the List View Controls menu that appears. The New List View appears.
Under List Name, enter the name you want to assign to the list.
Under List API Name, enter the API name for the list.
Select the user group to whom you want to make this list available. The available options are:
Only I can see this view – Click this to make the list view available to you
All users can see this list view – Click this to make the list view available to all users in your organization
Share list view with group of users – Click this to make the list view available to selected teams within your organization. You can select the relevant teams from the list that appears.
Click Save. The custom list view is created and the filter screen appears.
Click Add Filter. The add filter fields appear.
Under Field, click the drop-down menu to select the field by which you want to filter conversations for including it in the list view.
Under Operator, click the drop-down menu to select the filter operator.
Under Value, enter the value by which you want to filter the conversations.
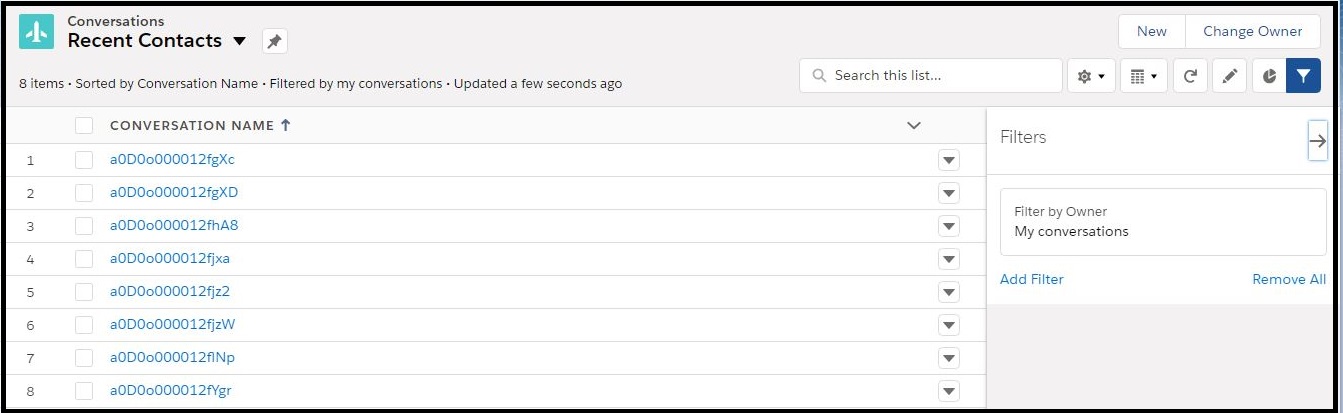
Click Done. The filter conditions appear as shown.
You can add a filter logic to select more specific conversations.
Click Save to create the custom Inbox.
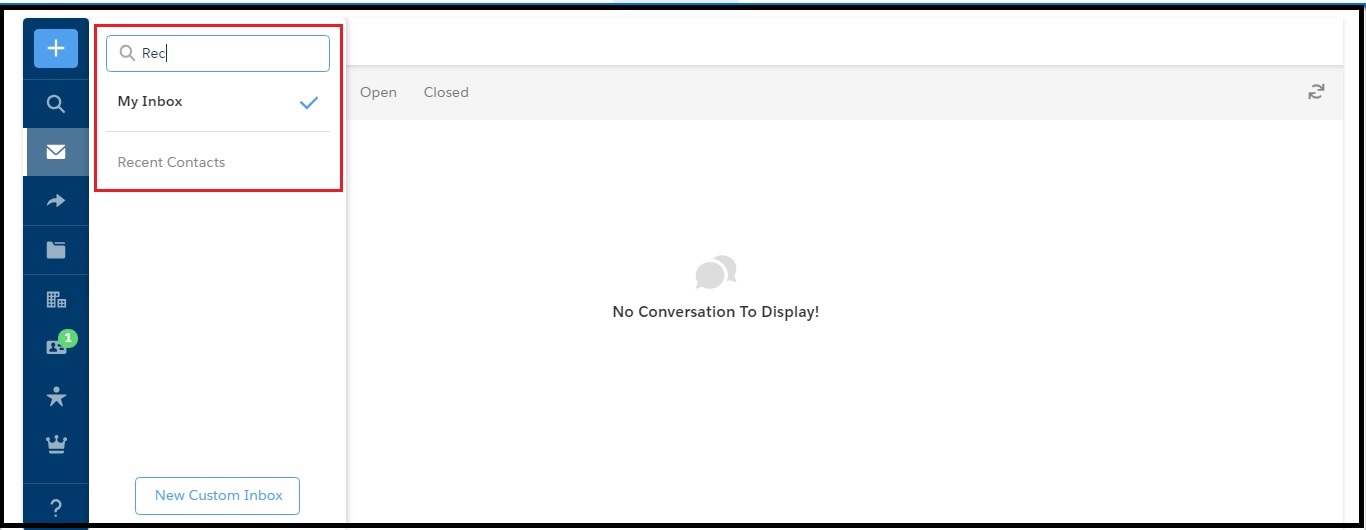
On the Converse Desk, click Inbox. The available lists appear.
Search for the Custom Inbox view you have created. The search results appear.
Click the custom Inbox list view name you have created. The conversation list appears.
Create a New Template
|
Log in to the SMS-Magic Converse application.
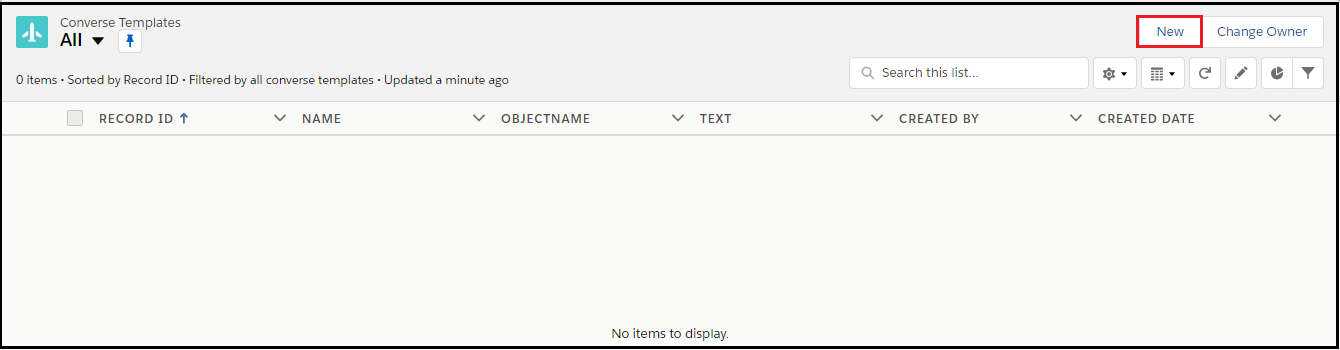
Click the Converse Templates tab. The Converse Templates page appears.
Click New. The New Template pop-up window appears.
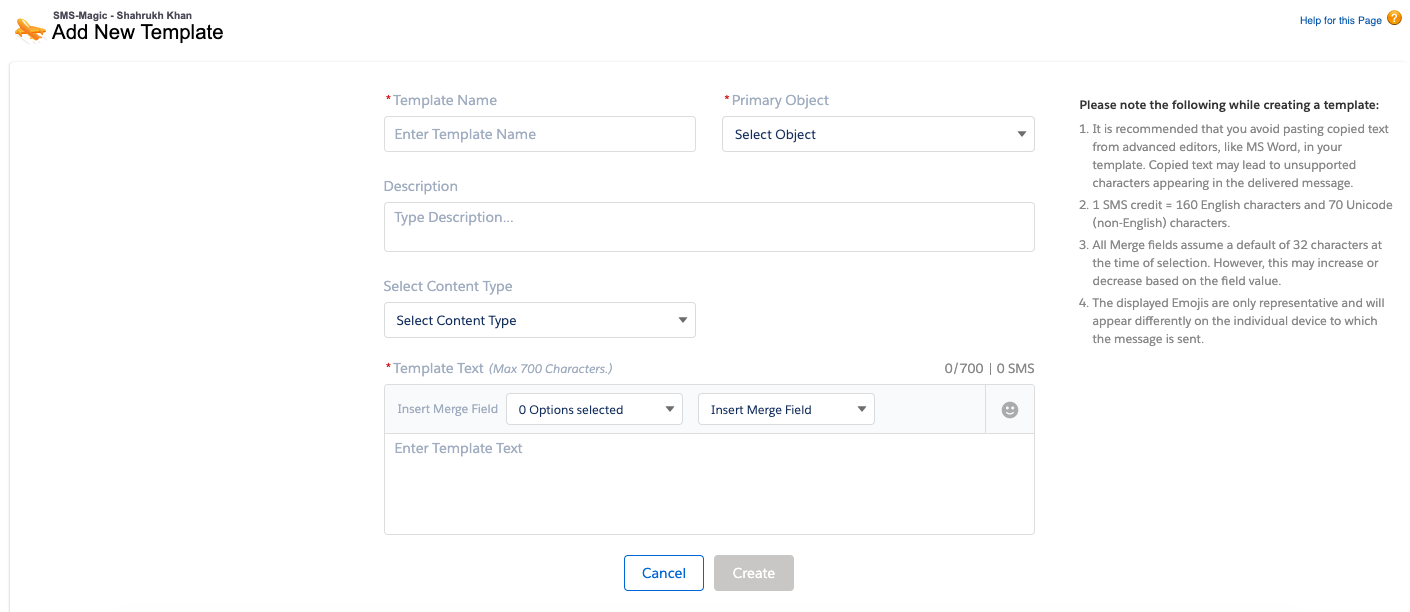
Enter the relevant details as follows:
FIELD
DESCRIPTION
Template Name
Type an identifier for a Template.
Primary Object
In the drop-down list, select the primary Object that you want to associate with the template.Create the object in Message Object Configuration (MOC) prior to associating it with the template.Contact your System Admin for creating objects.
Description
Type a small summary to describe the template.
Selec t Content Type
In the drop-down list, select the content type you want to tag to the template. If you are using the old compliance feature you need not select values in this field.
Template Text
Type the default template text. Select the fields that you want to use as merge fields within the template text.
Click Create. The new template is created.
Edit a Template
|
Log in to the SMS-Magic Converse application.
Click the Converse Templates tab. The Converse Templates page appears.
Select the checkbox next to the template you want to edit. The template is selected.
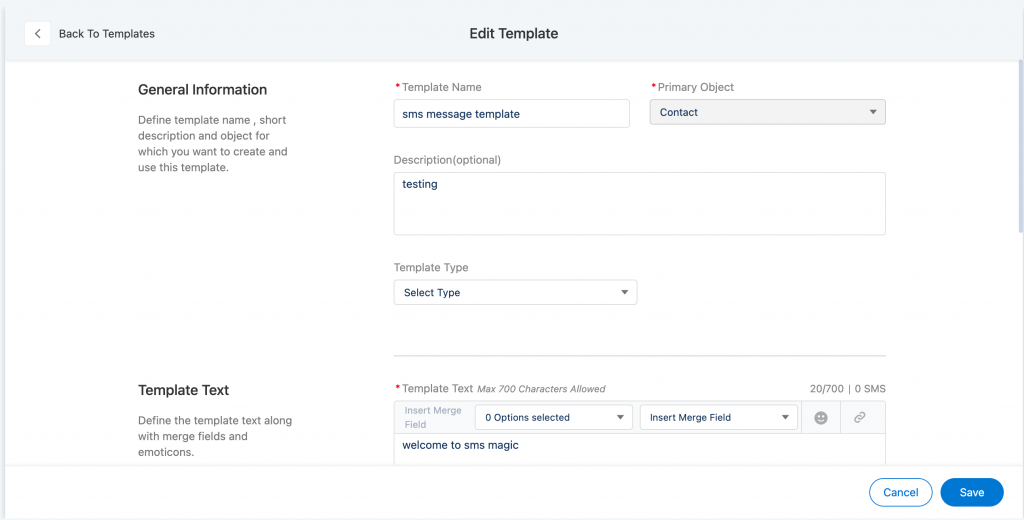
4. Click on ‘Edit’ the following page will appear:
5. Edit the details as required. The following table provides details on individual fields
6. Click Save once the template is modified
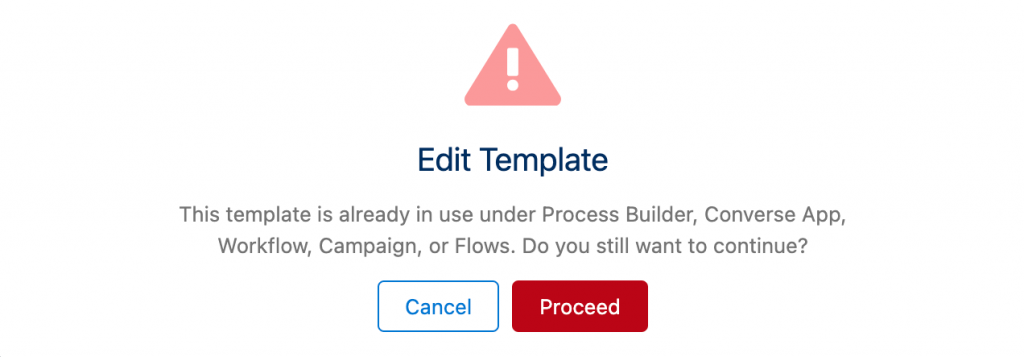
7. Users will be notified with a message if a template is already in Use and the following message will appear:
8. Click on ‘Cancel’ if you don’t wish to edit the template
9. Click on ‘Proceed’ if you wish to edit the template
Change the Template Owner
|
Log in to the SMS-Magic Converse application.
Click the Converse Templates tab. The Converse Templates page appears.
Select the check box next to the template which you want to assign to a new owner. The template is selected.
Select multiple check boxes and click Change Owner on the top right-hand corner if you want to change owners of multiple templates.
Click and then select Change Owner. The Change Owner pop-up window appears.
Type the first three letters to search for the user you want to move the template to. The search results appear as a drop-down list.
Select a User.
Clear the Send notification email check box if you do not want to send an email notifying the user of being assigned as the template owner.
Click Submit.
Keyword-Based Automation
|
Keyword-based automation is the automatic sending or triggering of text messages to individuals or groups of people based on certain keywords. You can configure keyword-based automation when messages are triggered on a specific date and for a particular event. This is similar to running drip campaigns. Keyword-based automation saves time while ensuring that your customers instantly get the right response and your lists are accurately updated based on the keywords in your received messages. As a business user, you can define the automation template in the Converse App which can be used to make it work with process builder, workflows, and flows.
To create Keyword-based automation, first, you need to create an automation message flow and then trigger an SMS Message based on a Keyword Response using the action key.
In the following example, we will update a Salesforce record based on the keyword response of a customer.
To create an automation message flow, do the following:
1. Go to the App detail page and click Setup.
2. From the list, select Automation.
3. From the Setup Automation Campaign dialog, select the number of steps that are part of the message flow.
4. On the Message Flow configuration page, select the Automation flow type.
5. Enter the name of the message flow in the Name field.
6. Enter a short description of the message flow in the Description field.
7. Select the sender ID in the Sender ID field.
8. Select the action trigger in the Message Flow Trigger field.
9. Select the template in the Template field. The text of the template is displayed.
10. By default, Do not send to opt-out members is selected. To send the message to opt-out members, clear the checkbox.
11. Click Create.
Trigger an Automation Message Flow from Process Builder using Action Key
Auto-reply is one of the first automation you need to implement because they reassure customers that they will be taken care of as soon as possible, no matter when they send you a message.
To create Auto-reply, first, you need to create a message flow and then trigger an Auto-reply message using the action key.
To create an auto-reply to text message flow, do the following:
1. Go to the App detail page and click Setup.
2. From the list, select Automation.
3. From the Setup Automation Campaign dialog, select the number of steps that are part of the message flow.
4. On the Message Flow configuration page, select the Auto Reply flow type.
5. Enter the keyword for the message flow in the Keyword field. The keyword is decided by the user.
6. Enter the name of the message flow in the Name field.
7. Enter a short description of the message flow in the Description field.
8. Select the sender ID in the Sender ID field.
9. Select the action trigger in the Message Flow Trigger field.
10. Select the template in the Template field. The text of the template is displayed.
11. Click Create.
Trigger an Auto-Reply Message Flow from Flows
Using the Action Key generated for each message in a message flow the user can trigger further messages from Flows. The triggering of the messages is based on certain criteria and conditions. In the following example, we send auto-replies based on the incoming message keyword.
What is the Action Key?
For each message created in the message flow, a unique Action Key is generated. The action key is necessary to trigger messages from the Flows.
To Trigger an Auto-Reply SMS Message based on a Keyword Response:
From the Salesforce navigation on the top right click Setup.
Select Flows by searching it in the Search Setup field.
Click on the Flows option as highlighted in the image above. the following page will appear:
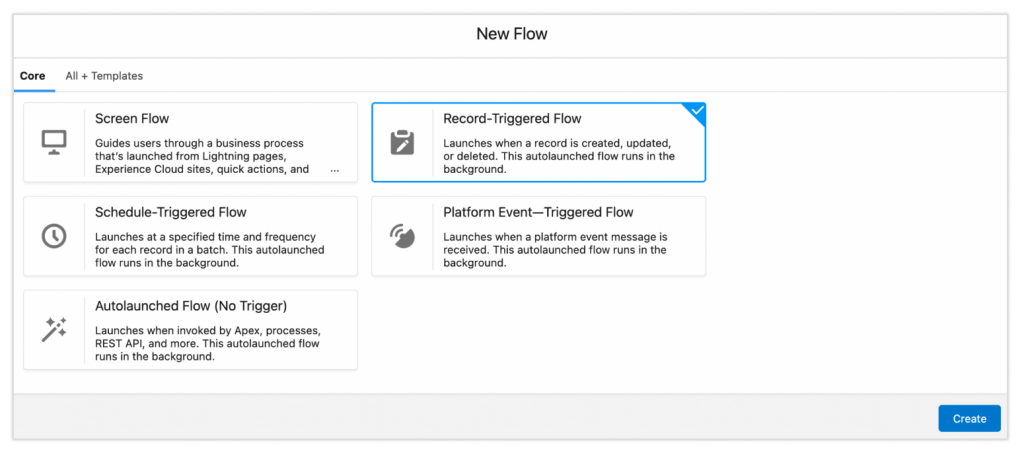
Click on the New Flow button, and the following page will appear:
Here, you will get many flow template options to select from. As per your requirement, select the right type of flow to continue. For instance, select the ‘Record-Triggered Flow’ and click on Create button.
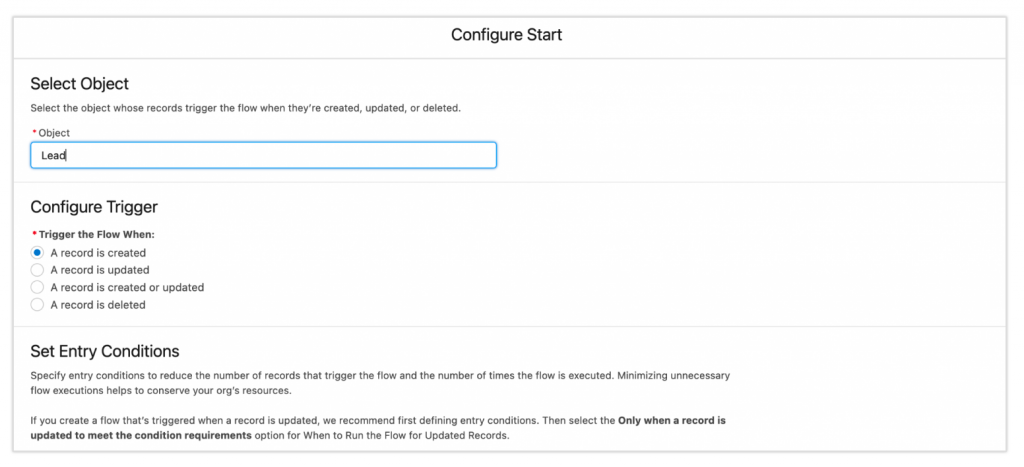
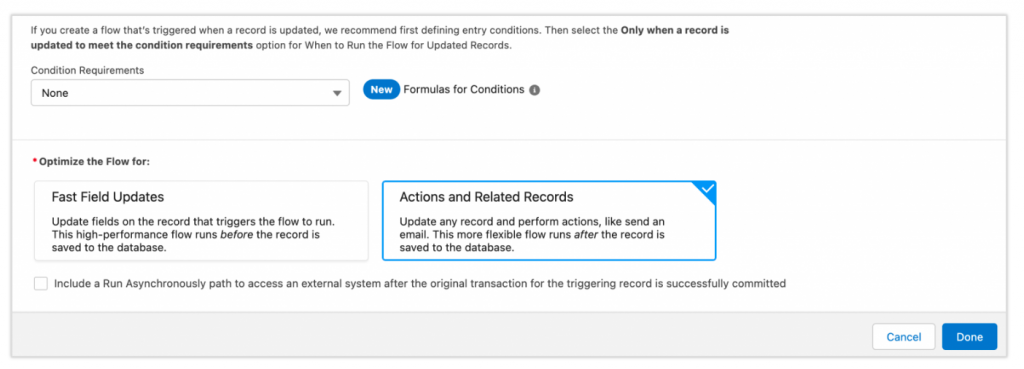
Here, consider an example when a customer wants to trigger an automated message when a record is created, updated, or deleted. Enter Object as Lead, select trigger option as ‘A record is created’, and click on the ‘Done’ button to proceed.
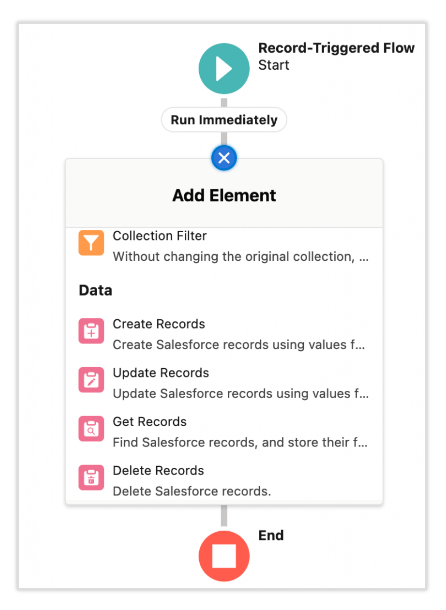
Once the object is created, you need to define the elements. Click on the plus sign in the flow as shown above. The following elements will appear:
Select the Create Records element to create records. The following page will appear:
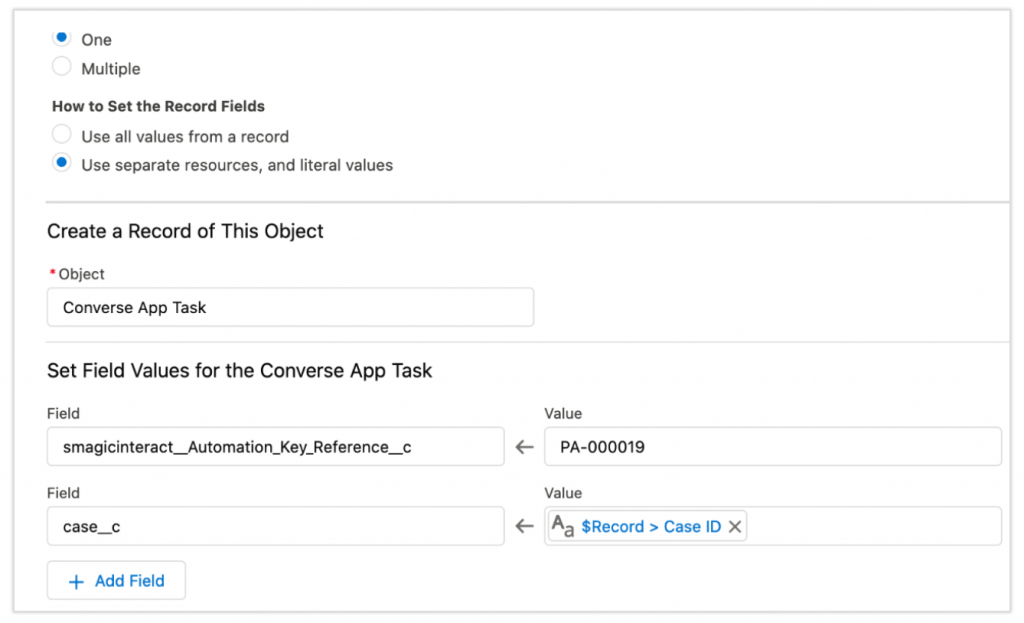
Select the method in which you want to set the record fields.
In the Object field, mention as ‘Converse App Task’.
In the next section, you need to set field values for the converse app task.
You can add more fields by clicking on the ‘Add Field’ button.
Add the required criteria in the flow and click on the ‘Save’ button
Click on Run to test the flow
Click on Activate to activate the message flow
Create Bulk Campaigns
|
Log in to the SMS-Magic Converse application.
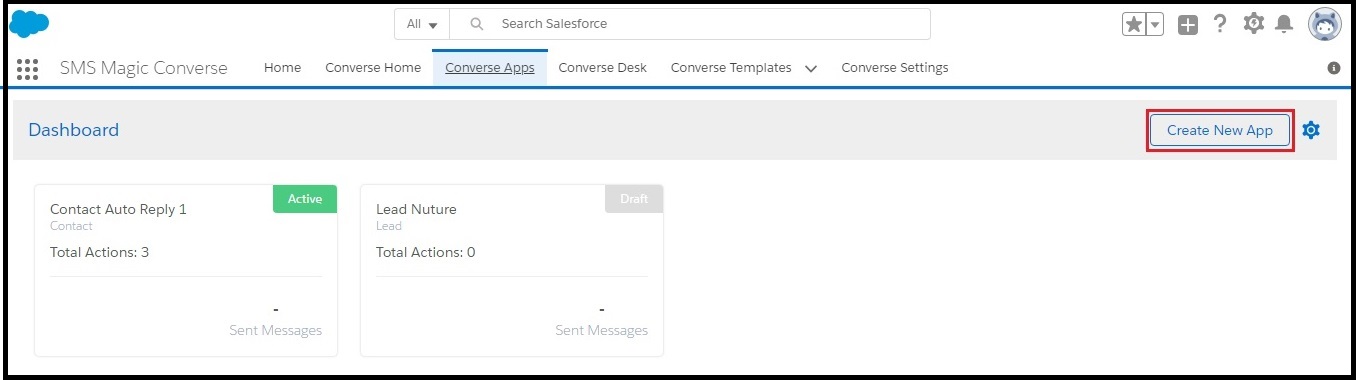
Click the Converse Apps tab. The Converse Apps Dashboard appears.
On the App detail page set the status of the app for bulk campaign to Active.
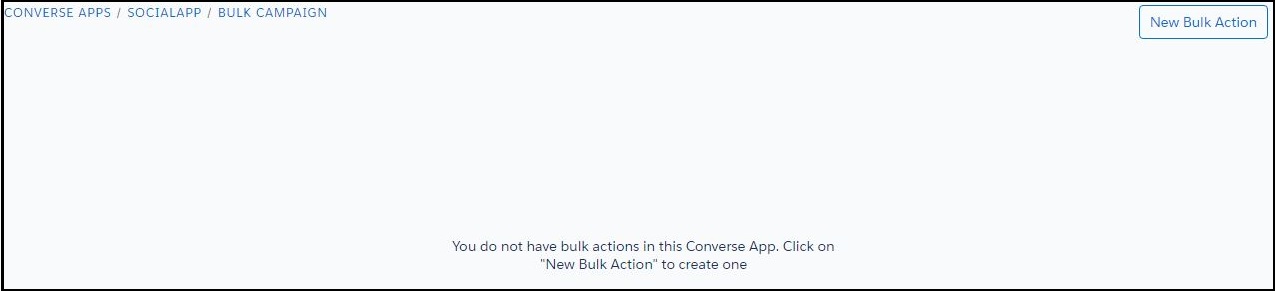
On the top right, click Setup and then click Bulk Campaign.The Bulk Campaign page appears.
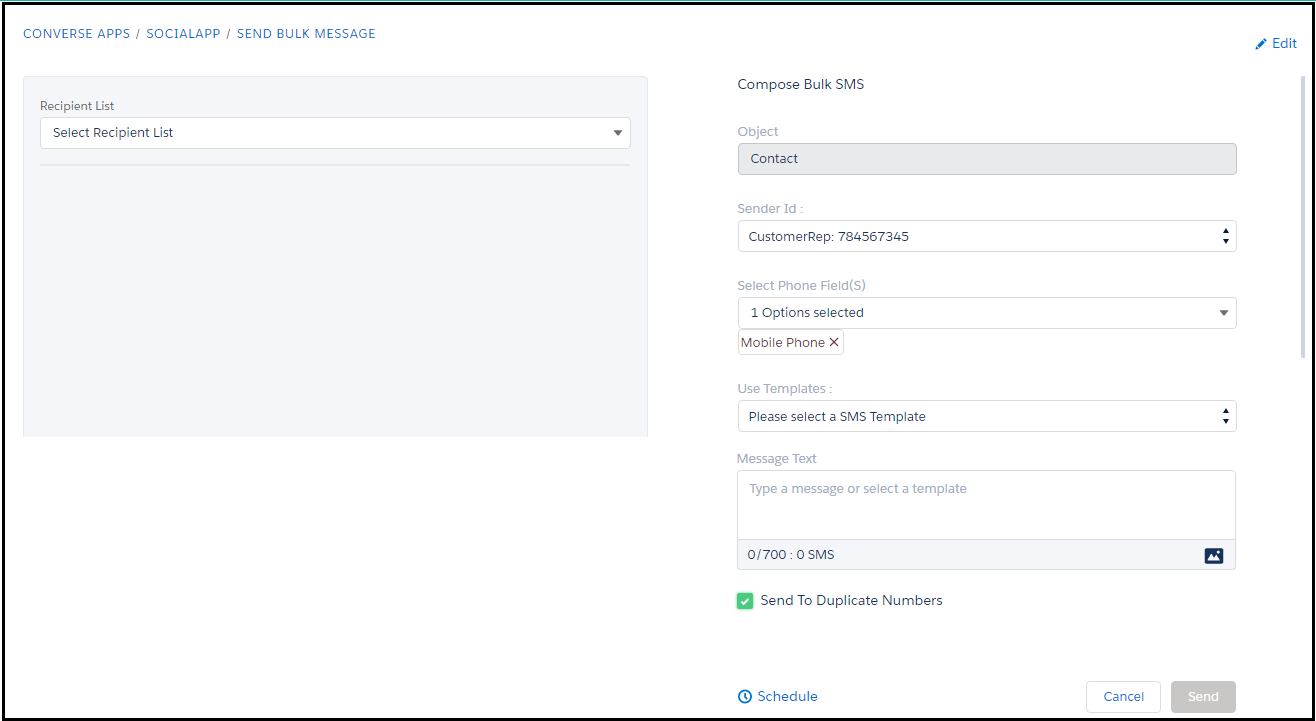
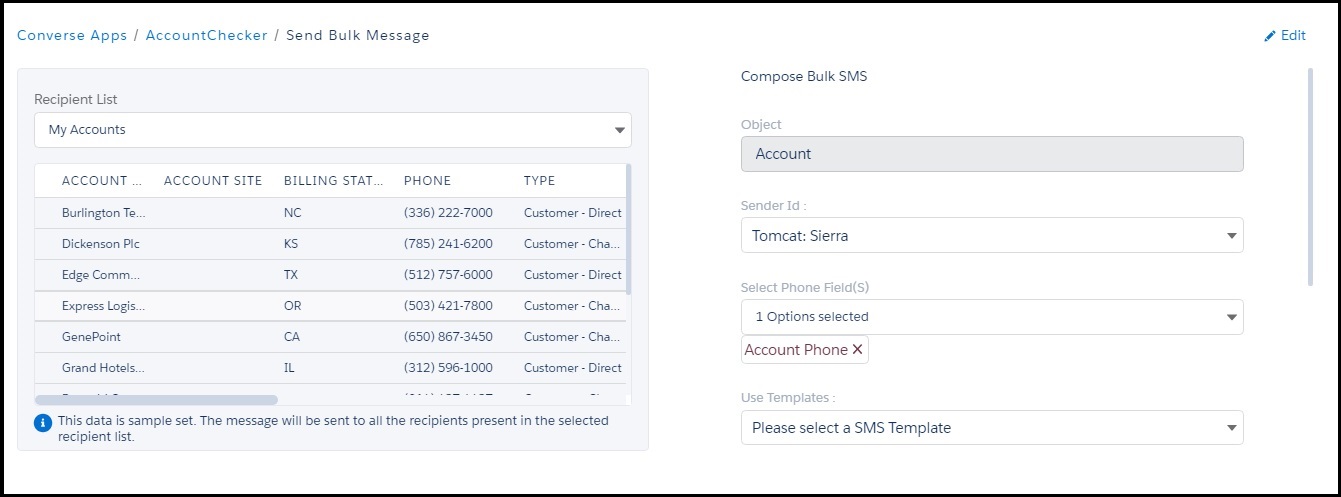
Click New Bulk action. The Send Bulk Message screen appears.
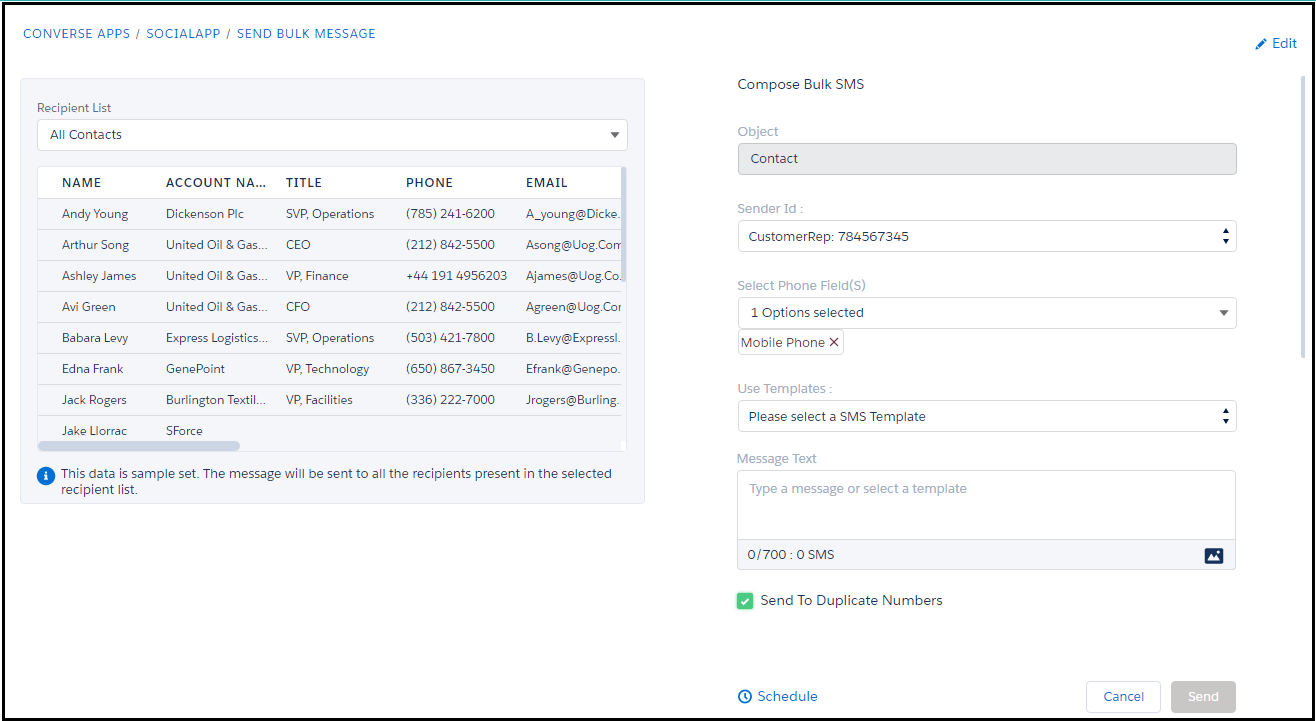
Under Recipient List, select the list of recipients to whom you want to send the message. The list of recipients appear.
Under Sender ID, select the Sender ID from whom the message will be sent.
Under Select Phone Field(s), select the phone type . If available, the user can select more than one phone type.
Under Use Templates, select the template to use for the bulk campaign.
Under Message Text type the message to be sent out to the selected recipients. If you have selected a template, this section will display the message from the selected template. You can also edit the message and include images.
By default, the Send to Duplicate Numbers remains selected. Clear the check box if you do not want to send the message to duplicate numbers existing in the list.
Click Schedule if you want to send the message at a specific time and date.
Refer to the section on Schedule Campaigns for more details on scheduling campaigns.
Click Send to send the message immediately.
Name Bulk Campaigns
|
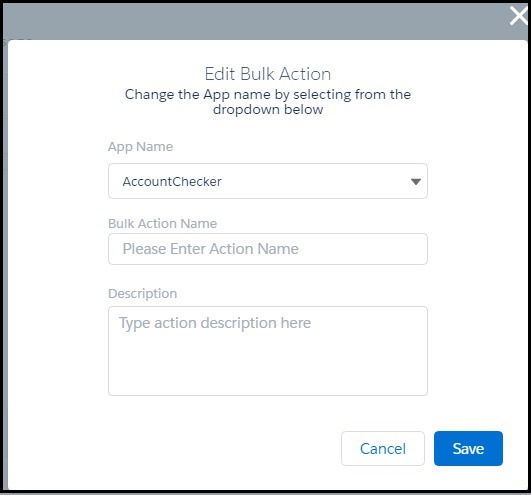
Click Edit at the top right of the Send Bulk Message page. The Edit Bulk Action pop-up window appears.
Under App Name select the new converse app name.
Under Bulk Action Name, type a name for the bulk action.
UnderDescription type a short description of the bulk action .


 and then select Delete from the drop-down menu that appears. The Delete Template Confirmation page appears.