1

Overview

Consent records are the most important prerequisites for sending messages to your customers. It defines the necessary permissions that are required for you to send messages to customers.

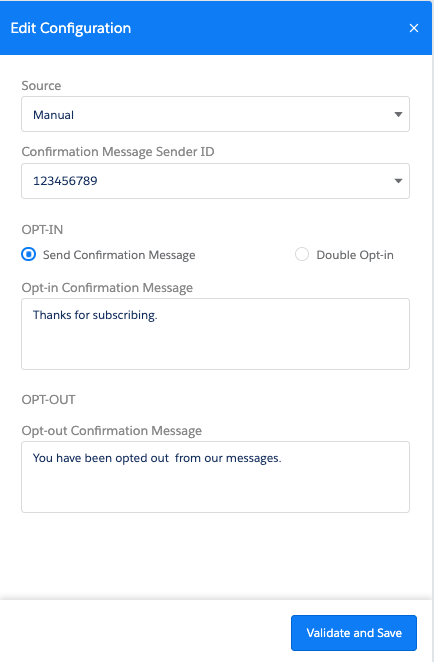
Double opt-in consents are another essential requirement in order to continue your messaging practices. These are received in response to requests sent to customers using non-handset sources, like web forms or emails, to record their compliance.

As per regulatory guidelines, all consent, collected through non-handset sources or created manually need to be maintained and recorded in a database.

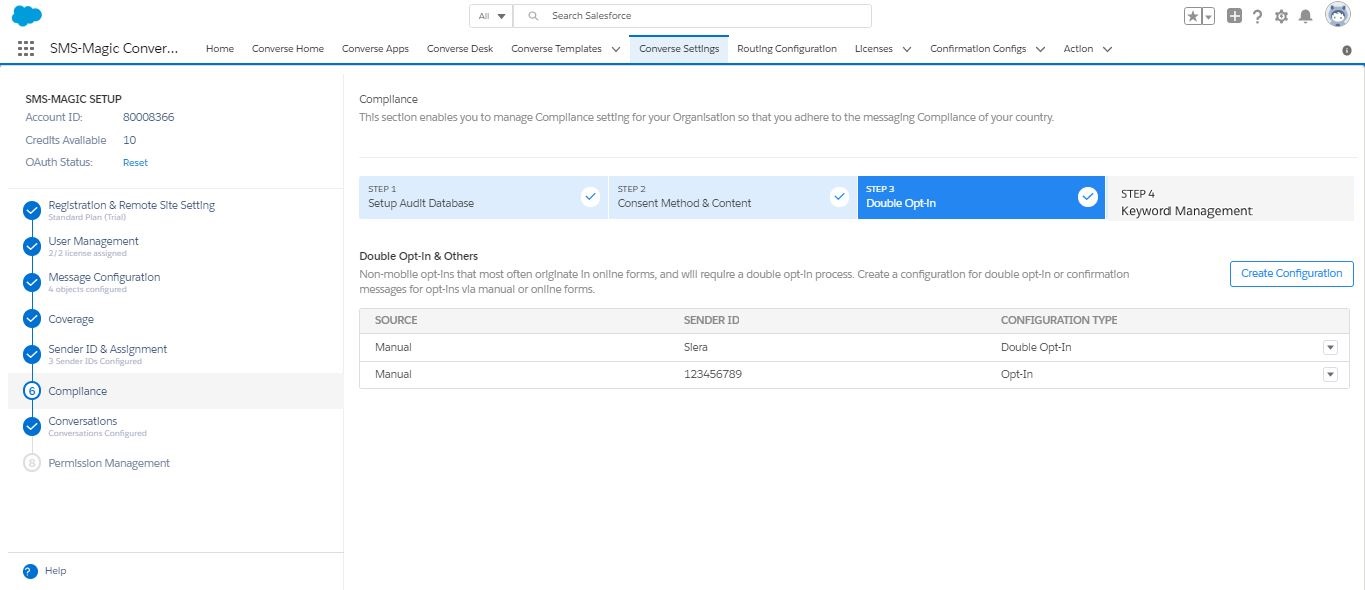
Consent is recorded on the basis of the parameters defined in Step 2 of the Compliance Configuration described in the section Configure Audit Database.
Refer to the section for more details on Consent Record Parameters.

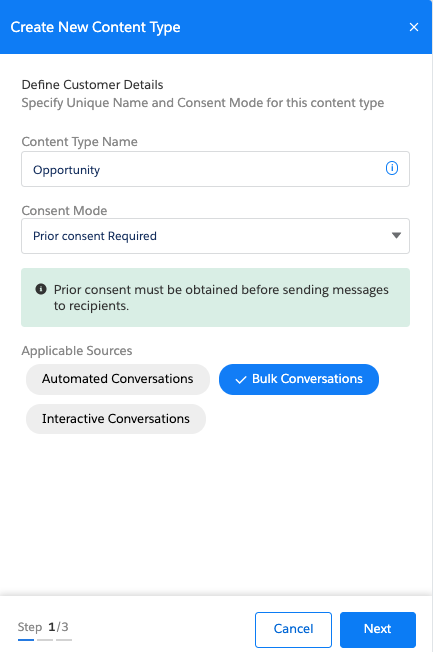
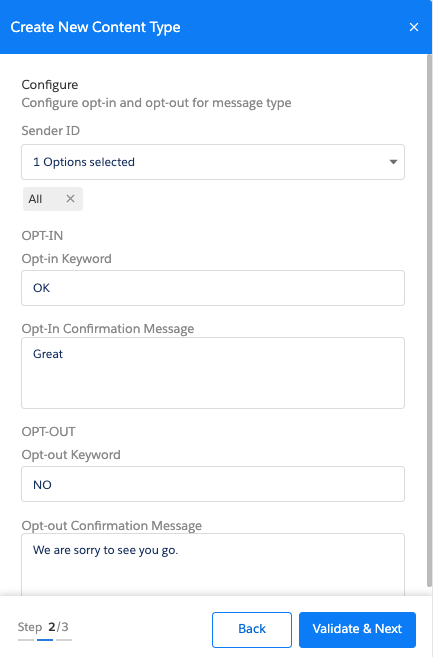
Consent can be created in the following ways:


Edit Double Opt-in Configuration

  1. Under Double Opt-in & Others, click next to the configured Double Opt-In source that you want to edit and click Edit. The Edit Configuration screen appears.
  2. Edit the details as required.
    Refer to the table below for more details:
  3. Click Validate and Save. The Double Opt-in & Others screen appears.
  4. FIELD DESCRIPTION
    Source Select the non-handset source from which you want to create consent records.
    Confirmation Message Sender ID Select the Sender ID from which the confirmation message will be sent.
    OPT-IN
    Send Confirmation Message Select the option to send a confirmation message.
    Double Opt-In Select the option to enable the customer to send a double Opt-in.
    Opt-in Confirmation Message Type the confirmation message that will be sent out for an Opt-in request.
    This field appears only if you select the Double Opt-in option.
    Double Opt-in Message Type the message that will be sent out to request for a Double Opt-in.
    This field appears only if you select the Double Opt-in option.
    Double Opt-In Keyword Type the keyword that will be used for sending double opt-in requests.
    This field appears only if you select the Double Opt-in option.
    Double Opt-In Confirm Message Type the message that will be sent out to confirm a Double Opt-in request.
    This field appears only if you select the Double Opt-in option.
    OPT-OUT
    Opt-Out Confirmation Message Type the message that will be sent out to confirm an Opt-out request.
    This field will appear if you do not select the Double Opt-in option.


Create Content Type

  1. Under Consent for Specific Content , click Create New. The Create New Content-Type pop-up window appears.
  2. Enter the customer details to create a new content type.
    Refer to the table below for more details on individual fields.
  3. Click Next. The Configure section appears to help you add the Sender ID and Keyword configurations for the new content type.
    Refer to the table below for more details on individual fields.
  4. Click Validate and Next. The Opt-out Instructions section appears.
  5. Avoid using the same keywords as those in the default Keyword configuration section.
  6. Enter details, as required, to add an opt-out instruction to your message.
    Refer to the table for more details on individual fields.
  7. Click Save. The new message type appears on the Content-Type table.

Field

Description

Define Customer Details

Content Type Name


Type the content type name. It must follow the given guidelines:

  • It must be a maximum of 40 alphanumeric characters including underscores (_)
  • It must start with a letter.
  • It should not include spaces
  • It must not end with an underscore or contain two consecutive underscore characters.

Consent Mode

In the drop-down list select the relevant consent mode for the new content type.

Applicable Sources

Select the message source. The available options are:

  • Automated Conversation
  • Bulk Conversation
  • Interactive Conversation

Configure

Sender ID

In the drop-down list, select the Sender ID that will be associated with this Content-Type. Consent is created only if you receive an incoming request for this content-type using this Sender ID.
This field is available only if you select Sender ID as your consent parameter in Step 1 of the Compliance configuration. If Sender ID is not a consent parameter then consent records for content-type is created using the same Sender ID through which the incoming request is sent.

Opt-In keyword

Type the specific Opt-in Keywords that you want to associate with this content type.
Once configured this rule will be given priority over the basic settings.

Opt-In Confirmation Message

Type the message that will be sent to customers in response to the Opt-in request.

Opt-out Keyword

Type the specific Opt-out Keywords that you want to associate with this content type.

Opt-Out Confirmation Message

Type the message that will be sent to customers on receiving the Opt-out request.

Opt-Out Instructions (Optional)

Auto append opt-out Instruction in every message

Select the option if you want to add an opt-out instruction to every message that is sent out.

In an Interval

Select the number of days after which the opt-out instruction will be appended to the content-type message being sent out.

Select an Interval

In the drop-down list select the number of days after which you want to append the opt-out instruction with the content-type message.

Do not Auto-append opt-out instructions in every message

Select this option if you do not want to want to append an opt-out instruction to every content-type message that is sent out.

Opt-out Message

Type the message you want to append as an opt-out instruction.

This field appears only if you select the Auto append opt-out Instruction in every message option.