1

Create Consent Manually

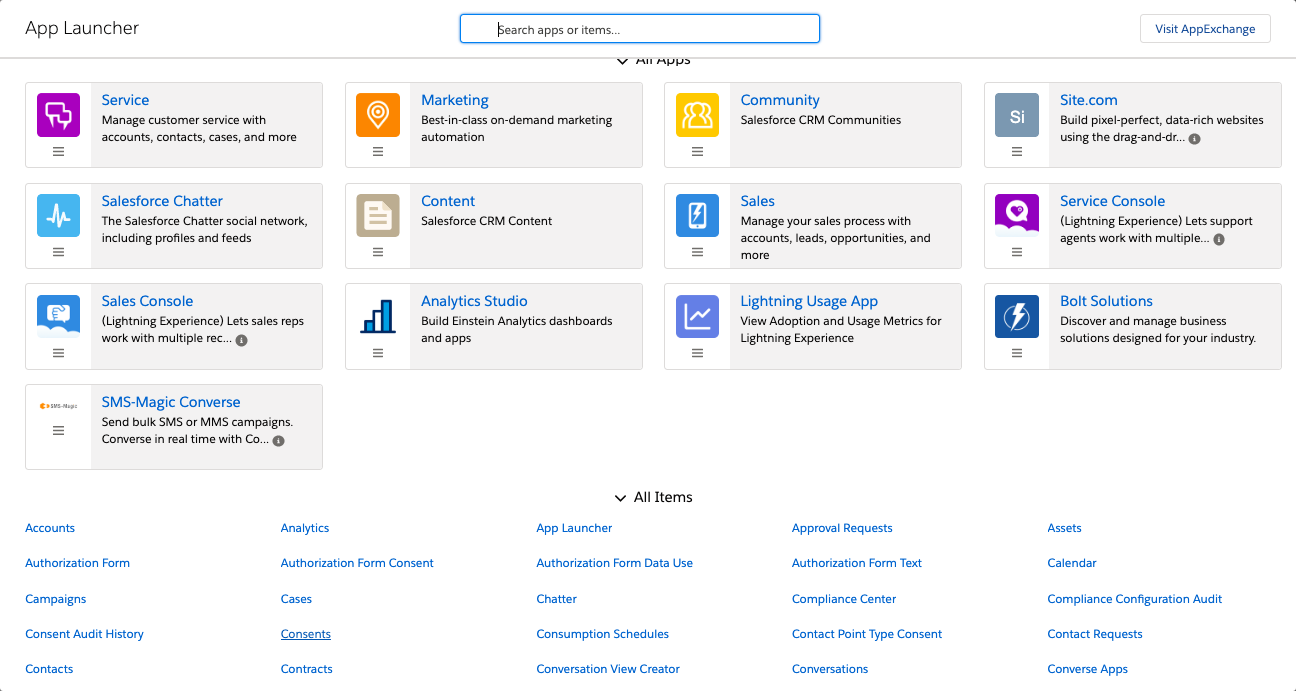
  1. Click. The app launcher appears.
  2. Under All Items, click Consents. The Consent List view page appears.
  3.  

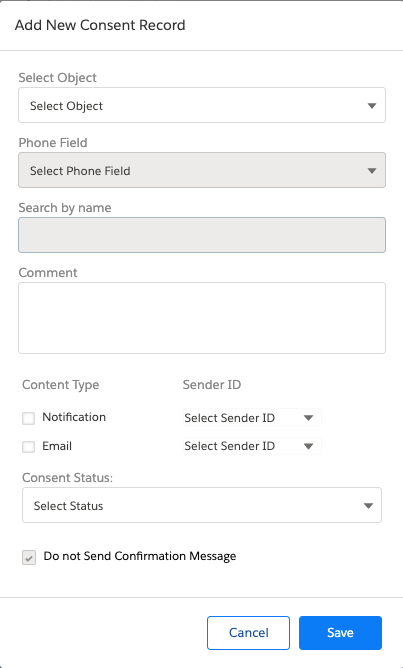
  4. Click New. The Add New Consent Record pop-up window appears.
  5. If the button is disabled, enable the Allow users to manually Add/Edit Consent Records option in Step 2 of the Compliance Configuration process.
  6. Enter the details as required.

    Refer to the table below for more details on individual fields.
  7. Click Save. The Consent Record List is added to the consent database and appears as shown.
  8. Click individual record and the record details appears as shown.
FIELD DESCRIPTION
Select Object Select the object for which you want to create the consent record.
Phone field Select the phone field from which consent records will be considered. 
Search By name Search the Contact name for which the consent record will be created.
Comment Type a comment for the record.
Content Type Select the appropriate checkbox next to select the appropriate content type. This parameter will appear only if they have been configured in Step 1 of the Compliance Configuration process. Contact your System Admin for more details on the consent record parameters configured.
Sender ID Select the Sender ID from which consent will be initiated. This is available only if Sender ID is configured as a consent record parameter in Step 1 of the Compliance Configuration process. Contact your System Admin for more details on consent record parameters configured.

If Sender ID is not configured then consent will be created from any Sender ID. Once the consent record is created, a confirmation message is sent back to the same Sender ID to complete the process. If a Sender ID is configured then consent will be created only when request is received from the specified Sender ID.
Consent Status In the drop-down list select the status of your consent. The available options are:Opt-InOpt-OutPending
Do not send Confirmation Message Select this check-box to avoid sending a message to confirm the consent status of the customer.
Confirmation Message Sender ID Select the sender ID that will be displayed when the confirmation message is sent to the customer.


Edit Consent Record

  1. Select the checkbox adjacent to the consent record you want to edit.
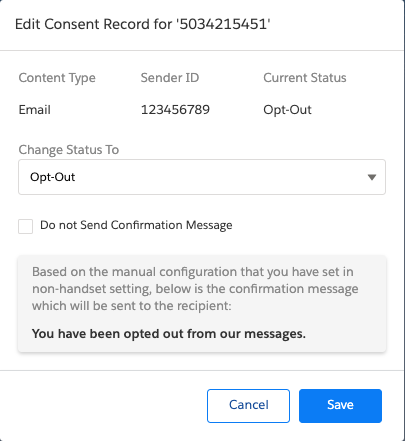
  2. Click and then select edit. The Edit Consent Record for <phone number> pop-up window appears.
  3. Edit the details as required. Refer to the table below for more details on individual fields.
  4. FIELD DESCRIPTION
    Content Type Displays the content type for which consent has been added.
    Sender ID Displays the default Sender ID for receiving the consent.
    Current Status Displays the current consent status.
    Change Status To Select the new consent status.
    Do not send Confirmation Message Select this check-box to send a message confirming the consent status of the customer.

    Confirmation Message Sender ID Select the Sender ID that will be displayed when the confirmation message is sent to the customer. 
    Opt-out confirmation message Type the confirmation message that will be sent in case the consent status is set to Opt-Out.
  5. Click Save Changes. Consent Record is updated in the list view.
  6. Click  on the list view to edit the record phone number.
    Click and then select Delete to delete a consent record.
  7. Click the record number. The Consent Details appear.
FIELD DESCRIPTION
Content Type Displays the content type for which consent has been added.
Sender ID Displays the default Sender ID for receiving the consent.
Current Status Displays the current consent status.
Change Status To Select the new consent status.
Do not send Confirmation Message Select this check-box to send a message confirming the consent status of the customer.

Confirmation Message Sender ID Select the Sender ID that will be displayed when the confirmation message is sent to the customer. 
Opt-out confirmation message Type the confirmation message that will be sent in case the consent status is set to Opt-Out.


Change Consent Record Owner

  1. Log in to Salesforce.
  2. Click . The App Launcher pop-up window appears.

  3. Under All items, click Consents. The Consents record page appears.

  4. Click and select All to remove filters and view all records. The All records view appears.
  5. Select the checkbox adjacent to the consent record you want to edit.
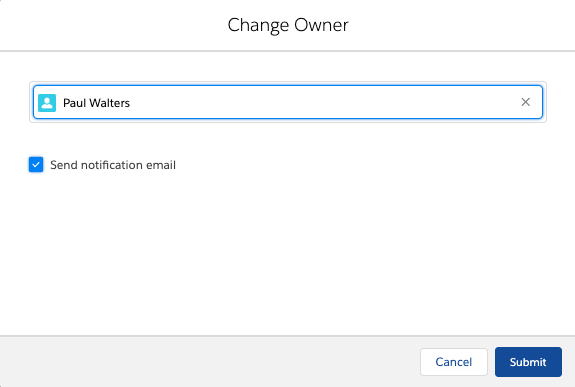
  6. Click and then select Change Owner. The Change Owner pop-up window appears.
  7. Type the first three letters to search for the user you want to move the consent record. The search results appear as a drop-down list.
  8. Select a user.

    Prior to selecting a user, ensure that read permissions are enabled for the current record and all related records.

  9. Clear the Send Notification Email checkbox if you do not want to send an email to notify the selected user of being assigned as the consent record owner.
  10. Click Submit.


Add Template to Content Type

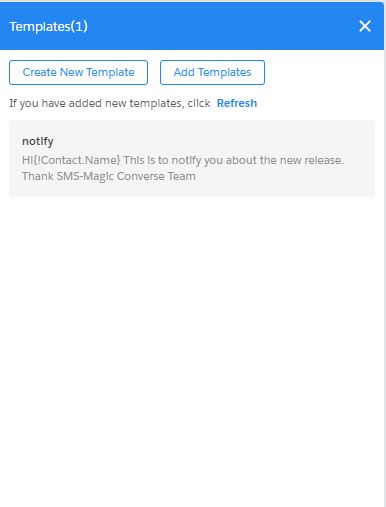
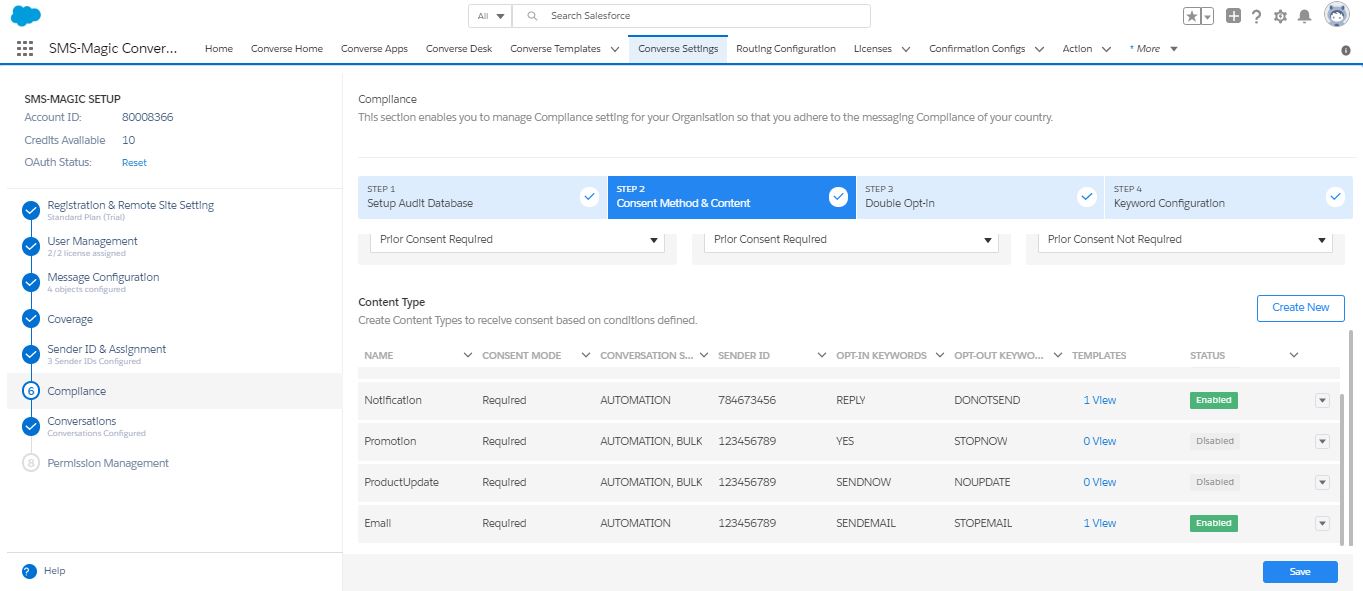
  1. On the Content Type page, under Templates, click View. The Templates pop-up window appears.
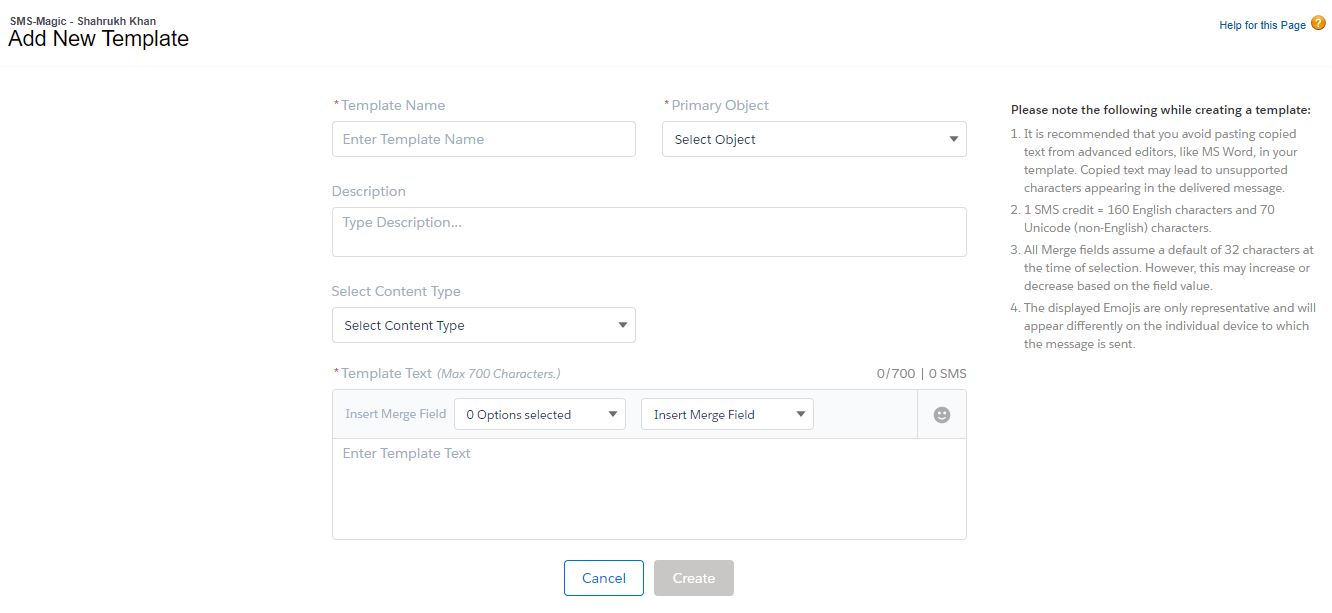
  2. Click Add Templates. The Add New Template page appears.
  3.  

  4. Enter the details to create a new template.Refer to the section on Create New Template for more details.
  5. Click Create.The template is created.
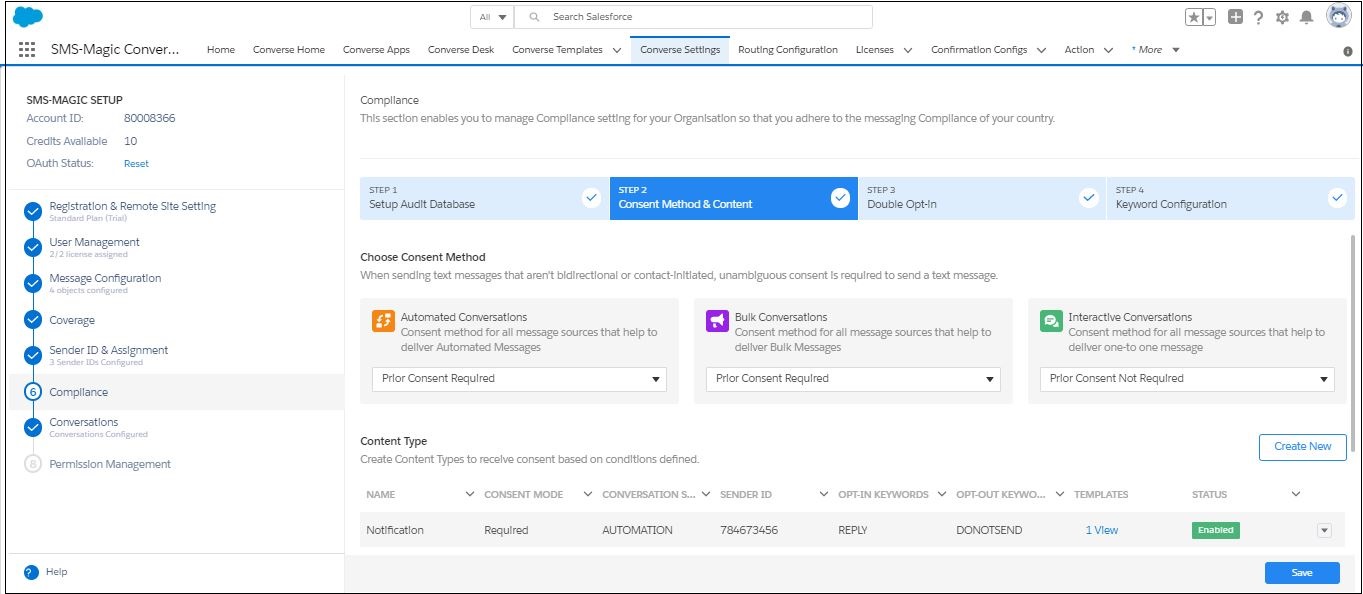
  6. Under Converse Settings, click Compliance. The Compliance page appears.
  7. Click Step 2. The list of Content types appear.
  8. Under Templates, click View. The Templates pop-up window appears displaying the tagged template if you have already tagged it with the content type at the template creation stage.
  9.  

    While creating templates, you can select the content type in the drop-down list.This will tag the template.


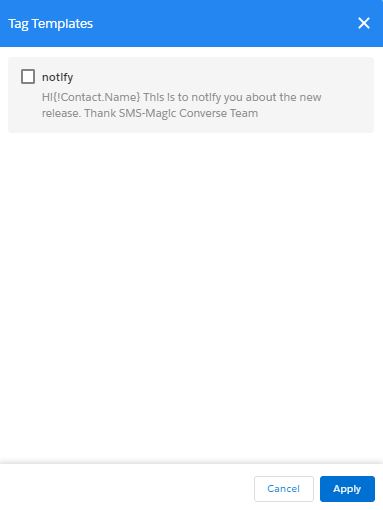
  10. If your templates are not tagged, click Add Templates. The Tag Template pop-up window appears.
  11.  

  12. Select the template you want to tag.
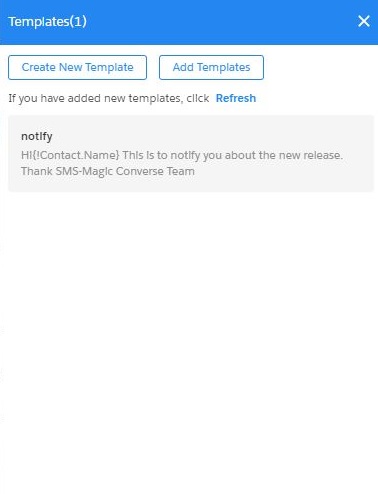
  13. Click Apply. The Templates pop-up window appears displaying the tagged template.
  14.  

  15. Click . The Content Type page appears displaying the Template column for the Content Type updated with 1 View.


View Audit History

  1. Log in to Salesforce.
  2. Click . The App Launcher pop-up window appears.
  3. Under All items, click Consents. The Consents record page appears.
  4. Click and select All to remove filters and view all records. The All records view appears.
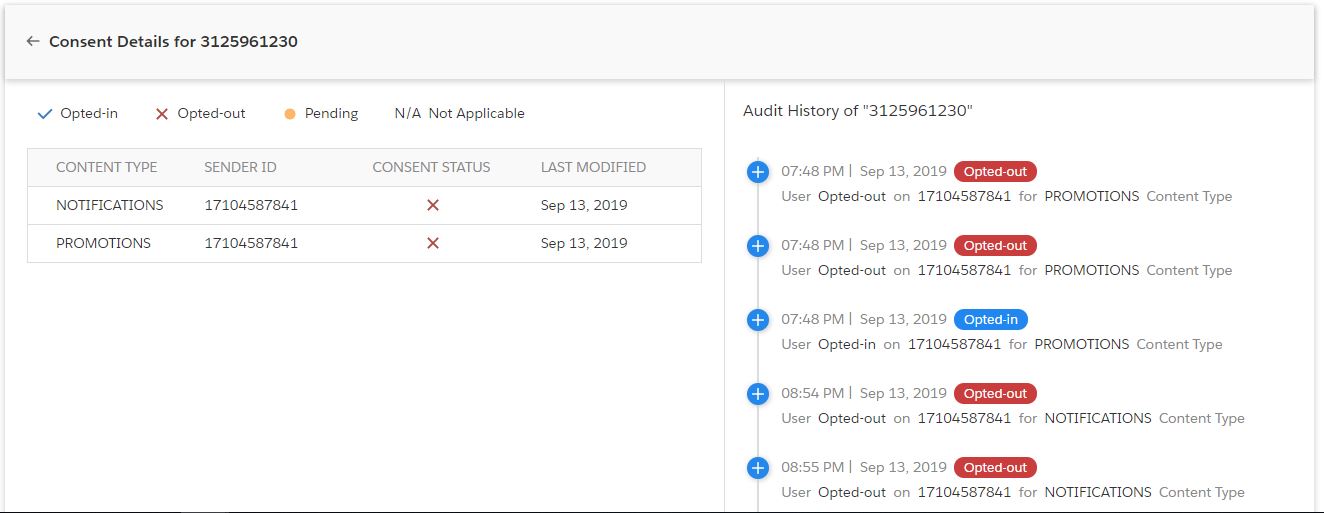
  5. Click a consent record to view details. The Consent details page appears.
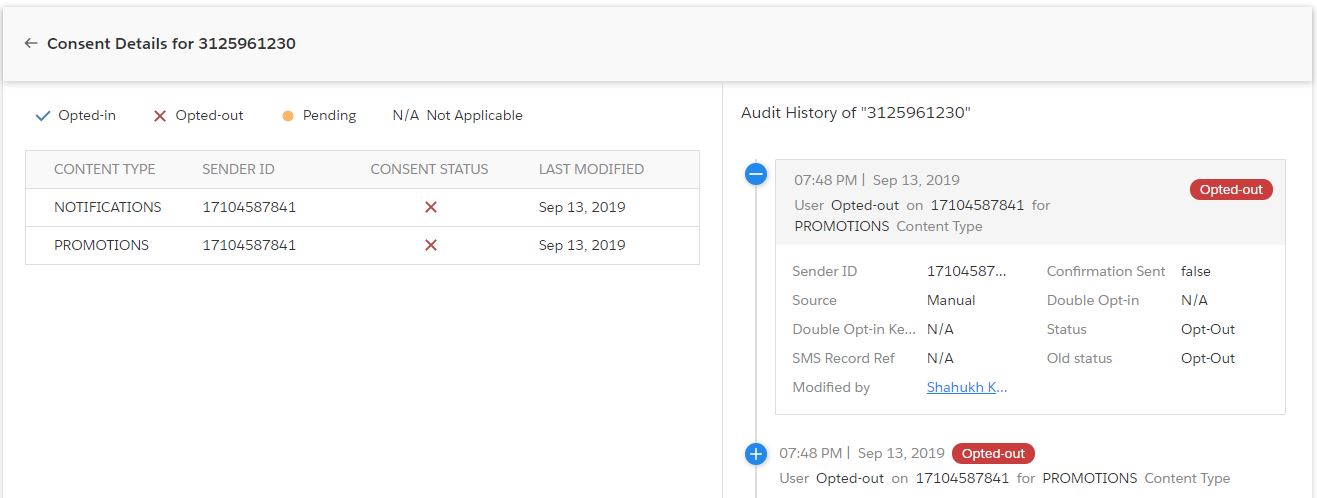
  6. Click a consent status on the right to view the audit history details.
  7. Refer to the table below for more details on individual fields.

FIELD DESCRIPTION
Sender ID Displays the Sender ID who sent the consent.
Confirmation Sent Displays whether a confirmation message has been sent out for the consent received.
Source Displays the source from which the consent is received.
Double Opt-In Displays whether a double opt-in request is sent to the customer.
Double Opt-in Keyword Displays the Double opt-in keywords that is shared with customer. This field displays value only if the Double opt-in request is sent to customers.
Status Displays the current consent status of the record. For example, Opt-in, Opt-out or Pending.
SMS Record Reference Displays the reference number of the SMS History record.
Old Status Displays the previous consent status of the record.
Modified By Displays the ID of the user who modified the record.


Edit Content Type

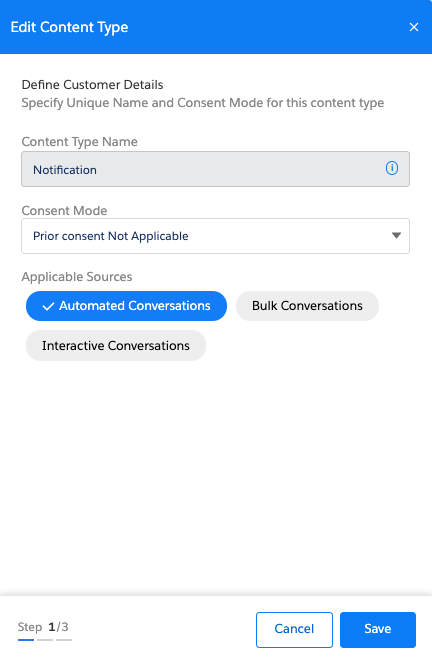
  1. On the content type page, select next to the content type you want to edit and click Edit. The Edit Content Type pop-up window appears.
     
  2.  

  3. Modify the fields as per requirements. Refer to the table below for more details.
  4. Click Save.

Field

Description

Define Customer Details

Content Type Name

Displays the content type name.
This field cannot be edited.

Consent Mode

In the drop-down list select the relevant consent mode for the new content type.

Applicable Sources

Select the message source through which you want to send the content-type:

  • Automated Conversation
  • Bulk Conversation
  • Interactive Conversation

Configure

Sender ID

In the drop-down list, select the Sender ID that will be associated with this Content-Type. Consent is created only if you receive an incoming request for this content-type using this Sender ID. If you select All in the Sender ID drop-down list, you can create a consent for that content-type when you receive an incoming request through any of the Sender IDs configured in your Org.
This field is available only if you select Sender ID as your consent parameter in Step 1 of the Compliance configuration. If Sender ID is not a consent parameter then consent records for content-type is created using the same Sender ID through which the incoming request is sent.

Opt-In keyword

Type the specific Opt-in Keywords that you want to associate with this content type.
Once configured it will override the manual message keywords created in Step 3.

Opt-In Confirmation Message

Type the message that will be sent to customers in response to the Opt-in request.

Opt-out Keyword

Type the specific Opt-out Keywords that you want to associate with this content type.

Opt-Out Confirmation Message

Type the message that will be sent to customers on receiving the Opt-out request.

Opt-Out Instructions (Optional)

Auto append opt-out Instruction in every message

Select the option if you want to add an opt-out instruction to every message that is sent out.

In an Interval

Do not Auto-append opt-out instructions in every message

Select the option if you do not want to add an opt-out instruction to every message that is sent out.

Opt-out Message

Type the message you want to append as an opt-out instruction