SMS-Magic App on Gmail
Overview
Setting up the SMS-Magic App on your Gmail account enables texting from Gmail. With this, your organization’s data can be synced automatically, and emails from your Gmail can be easily associated with your Salesforce records, text right from Gmail, and much more. Configure the SMS-Magic App on Gmail and increase your productivity and experience the power of conversing seamlessly.
Steps to Configure SMS-Magic App on Gmail
Follow the below steps to configure the SMS-Magic app on Gmail:
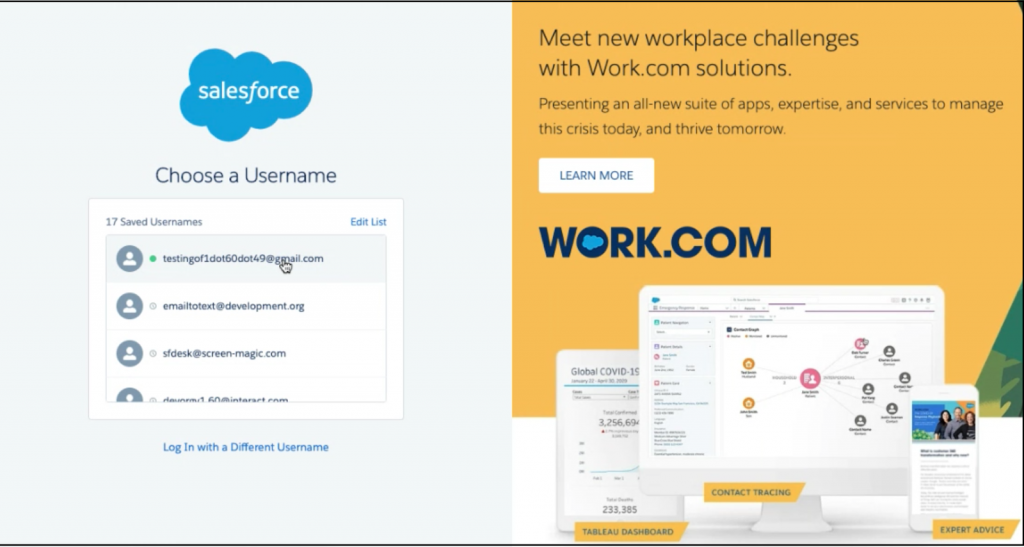
- Login to Salesforce using your valid credentials:
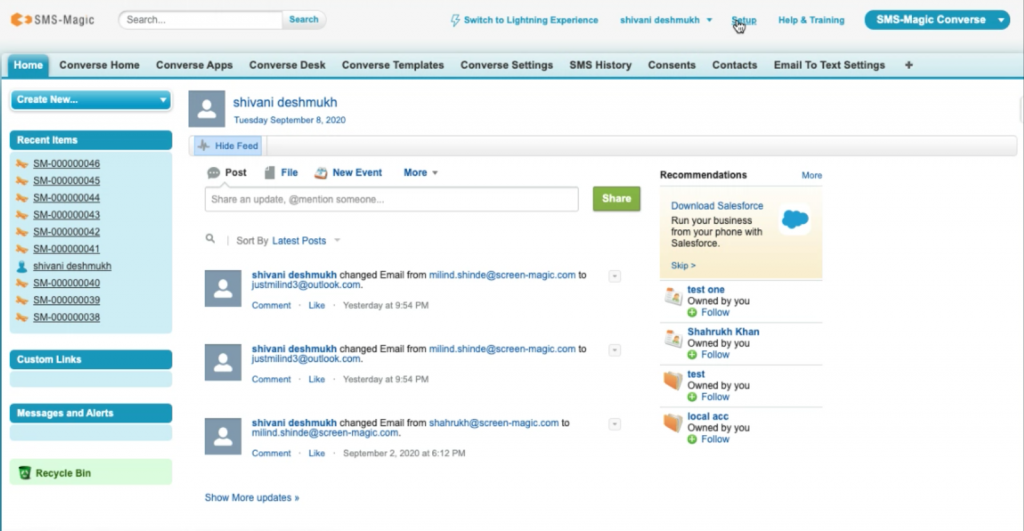
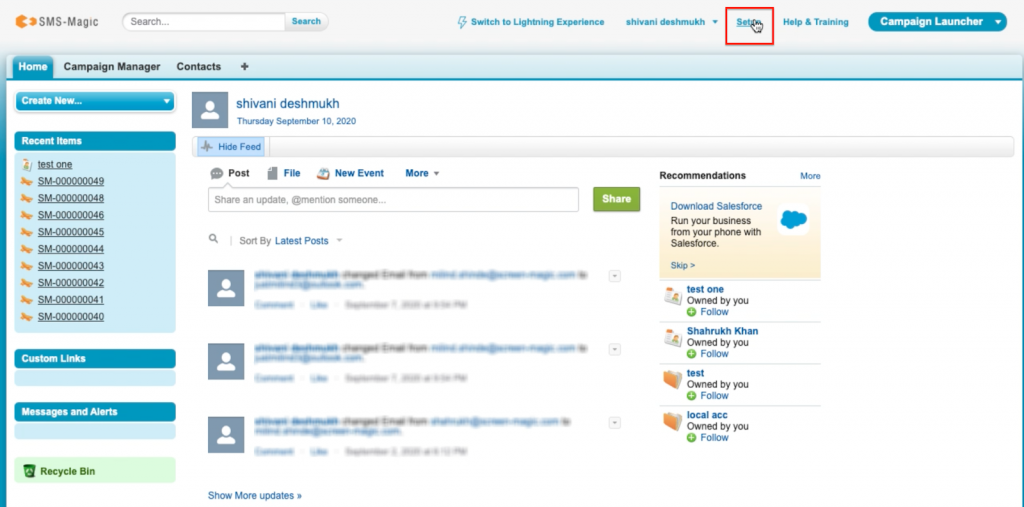
- Click on the ‘Setup’ link on the top, as shown in the image below:
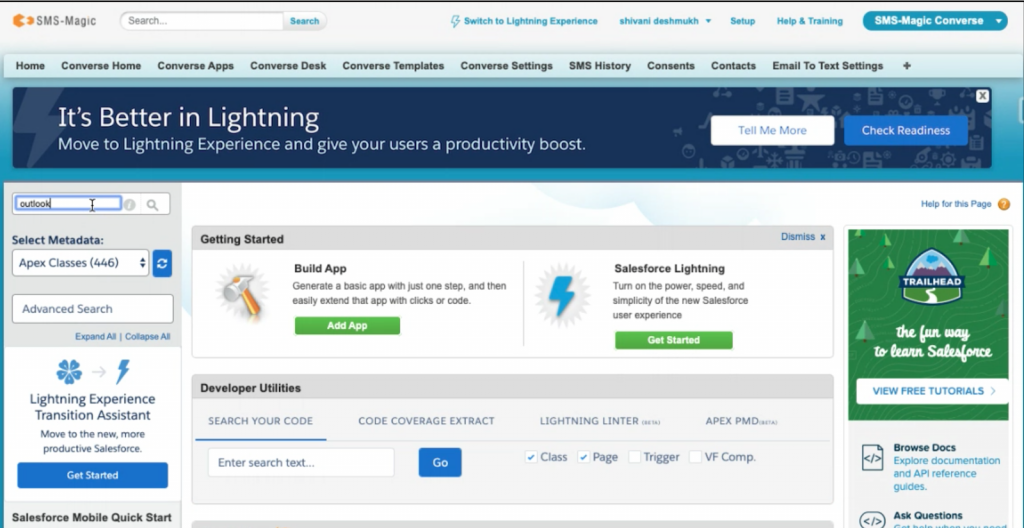
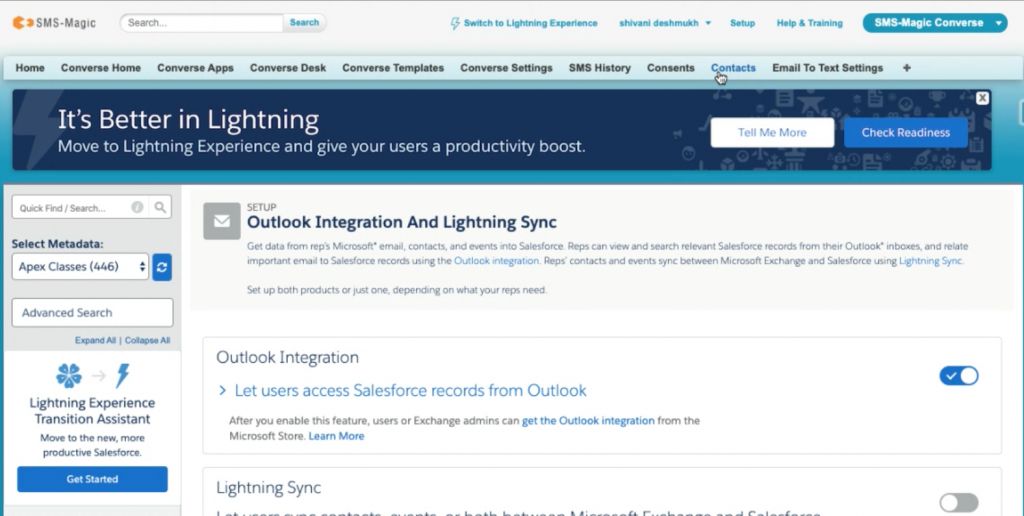
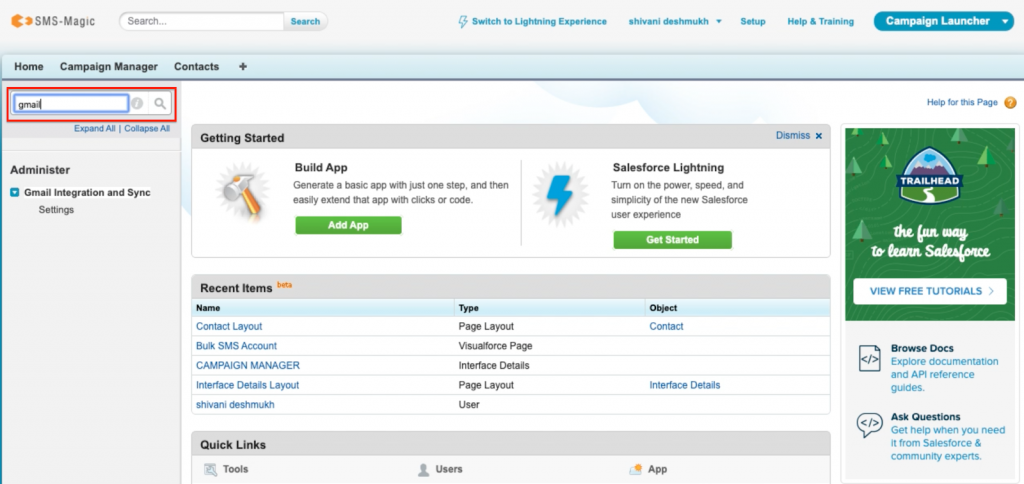
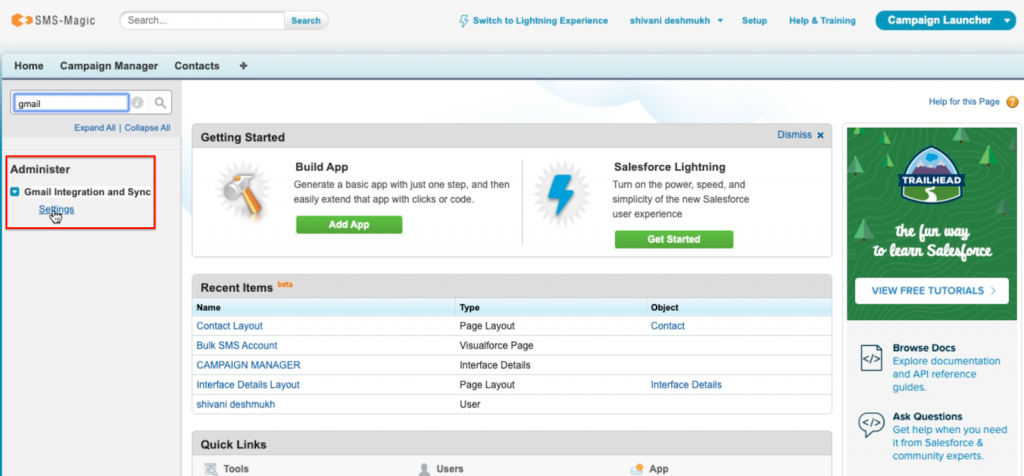
- Search for ‘Gmail’ in the search field in the left-hand side, as shown below:
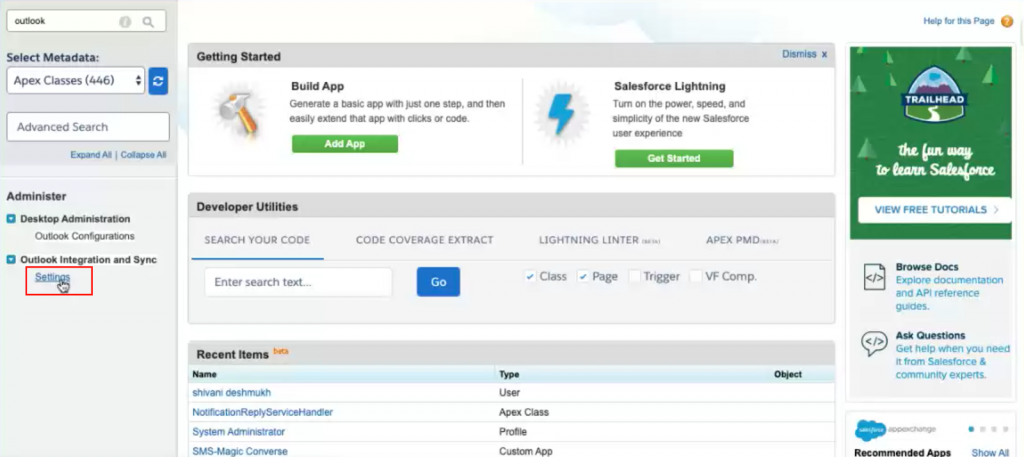
- Under the ‘Gmail Integration and Sync’ section, click on the ‘Settings’ link as shown in the screenshot below:
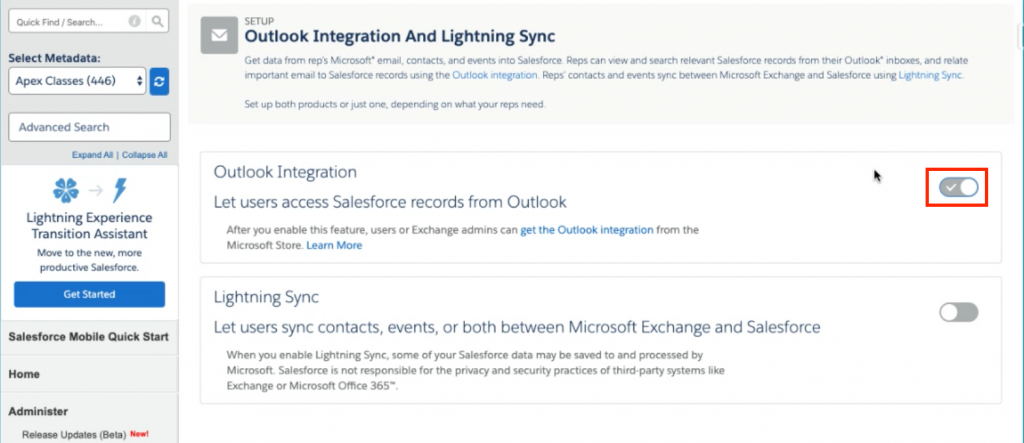
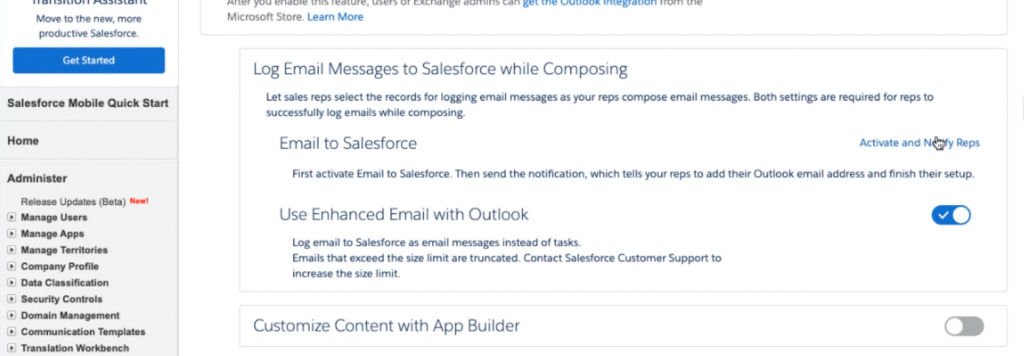
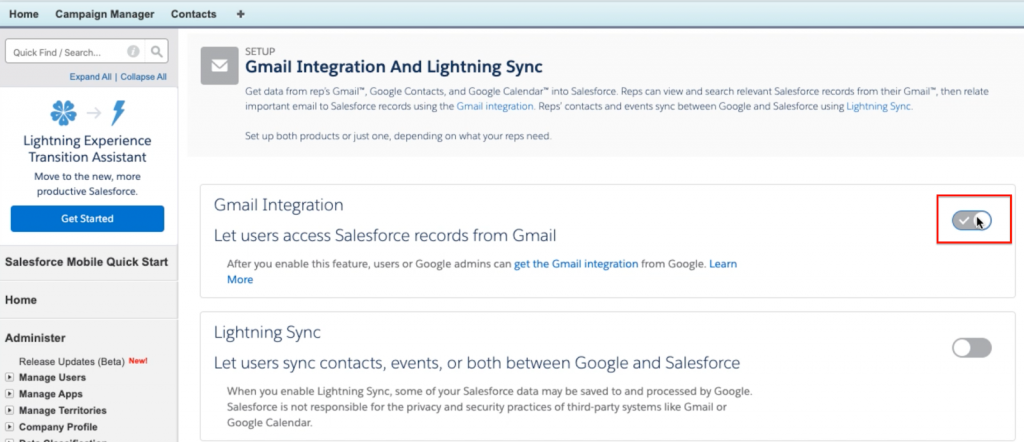
- Under the Gmail Integration’ section, click on the toggle button to let users access Salesforce records from Gmail
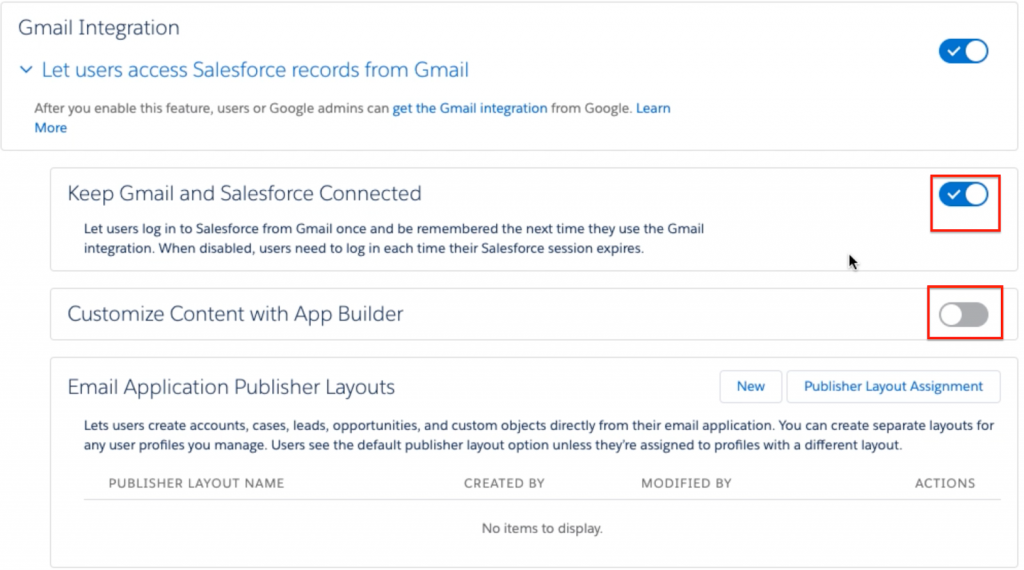
- Once it is enabled, you will get a dropdown with options such as ‘Keep Gmail and Salesforce connected’, and ‘Customize Content with App Builder’. Click on both the toggle buttons, as shown in the image below, to continue:
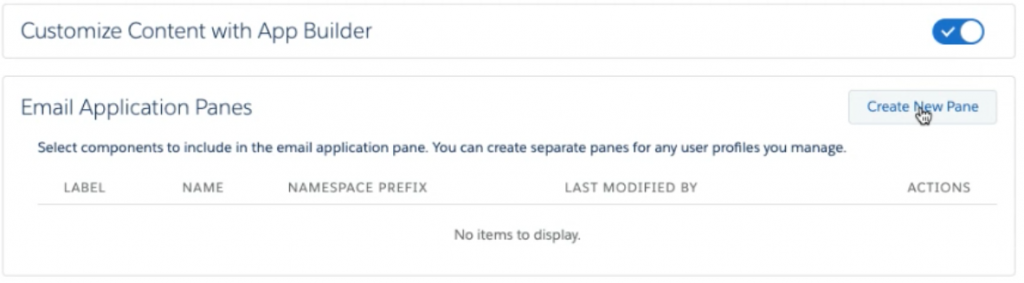
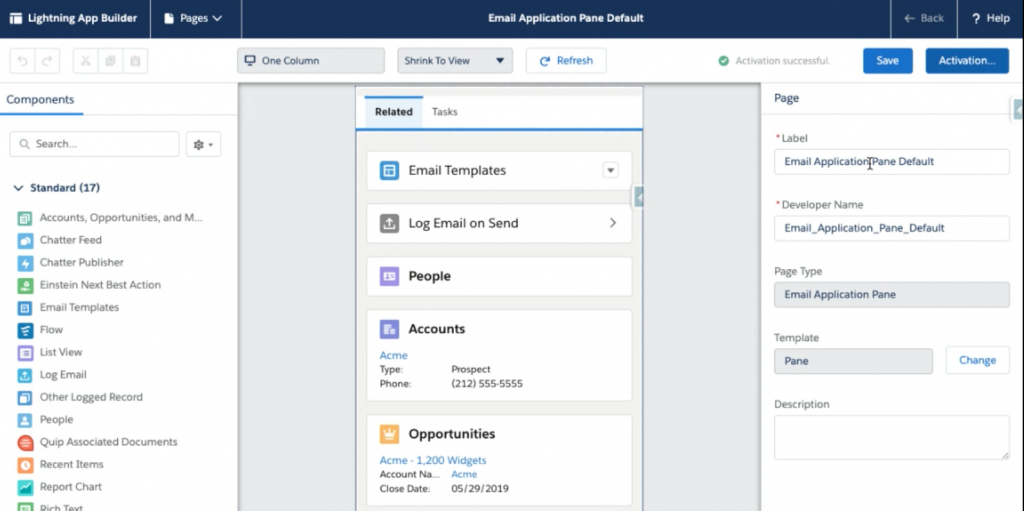
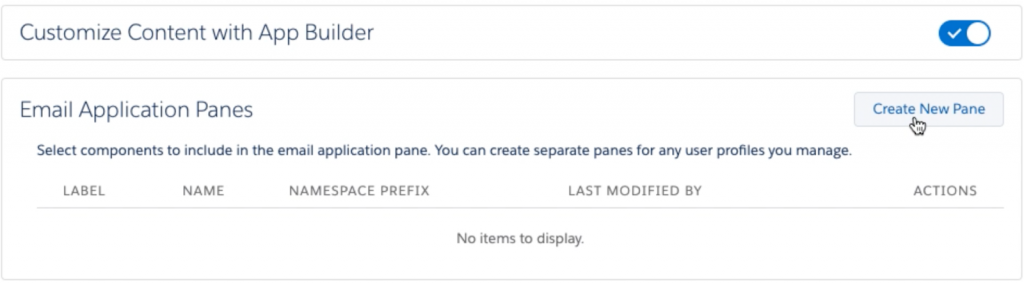
- Under the Customize Content with App Builder section, click on the ‘Create New Pane’ button:
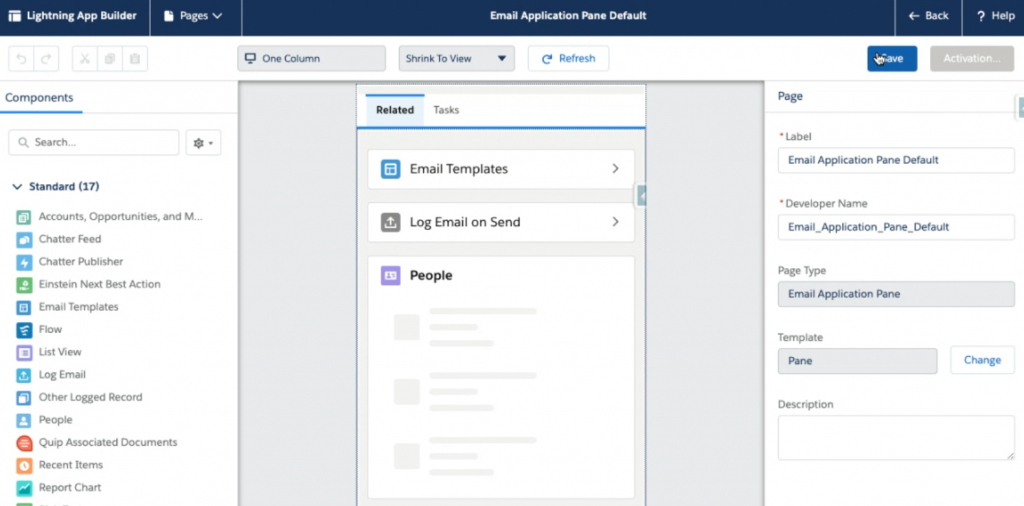
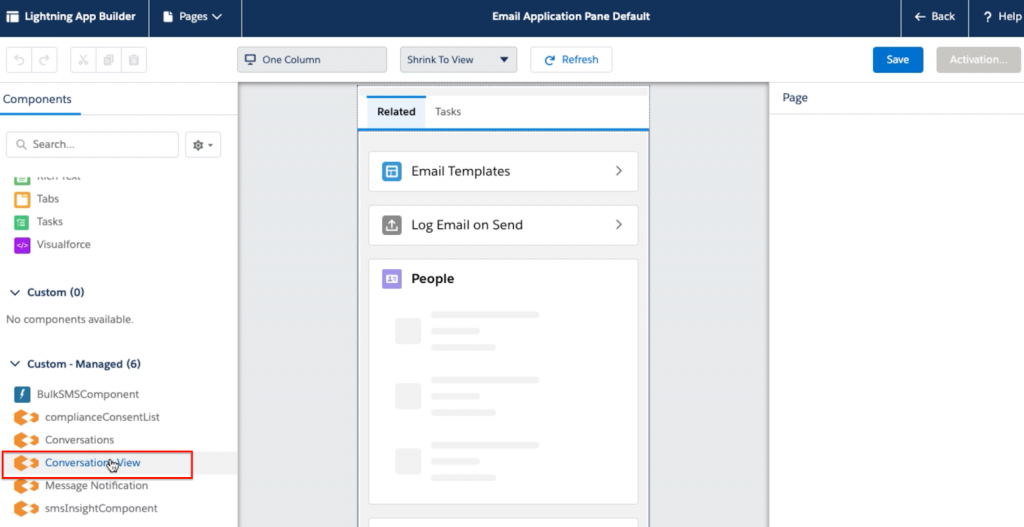
- Once the page is loaded, search for ‘Conversation View’ option:
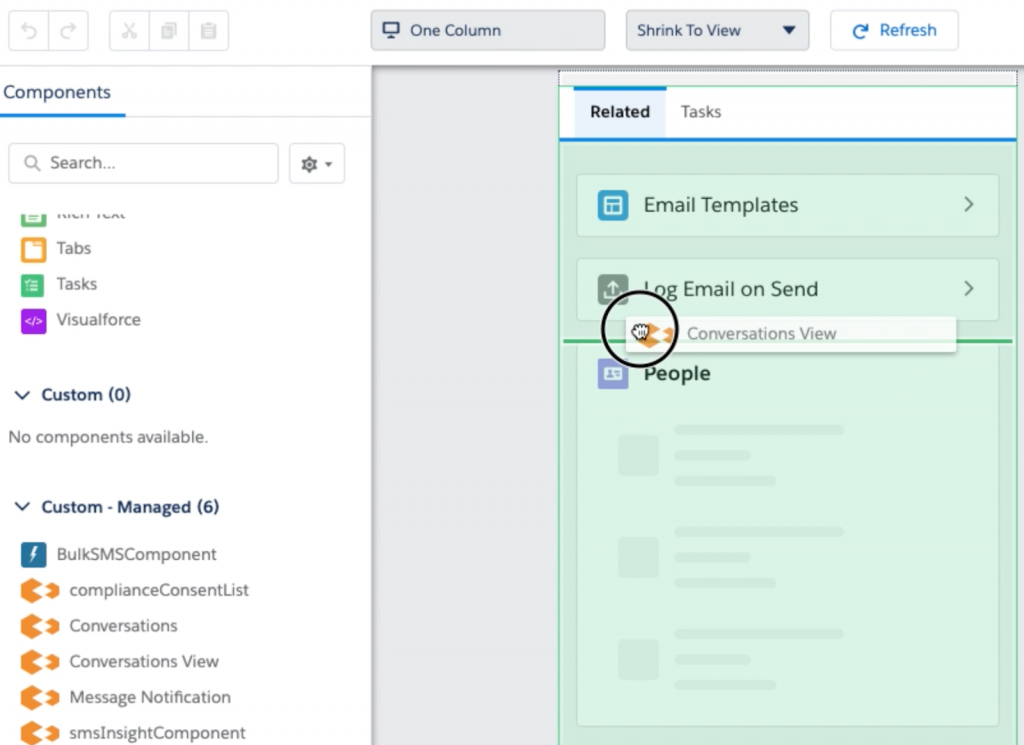
- Drag and drop the Conversation View option to the pane:
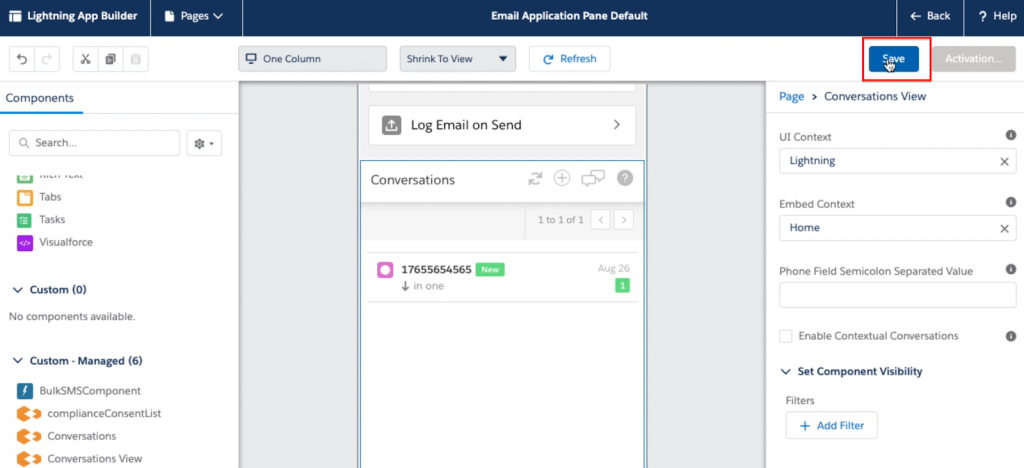
- Once added, click on the ‘Save’ button:
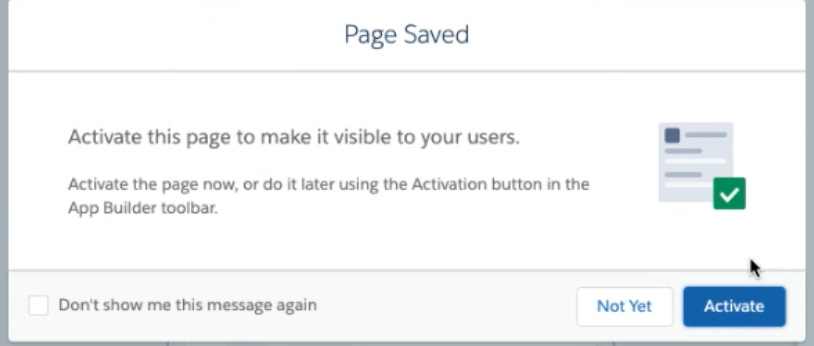
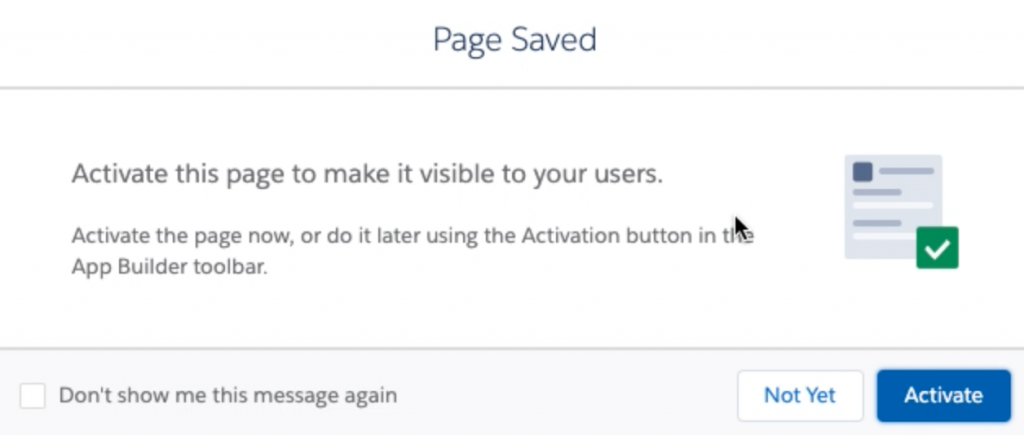
- Click on the ‘Activate’ button to proceed:
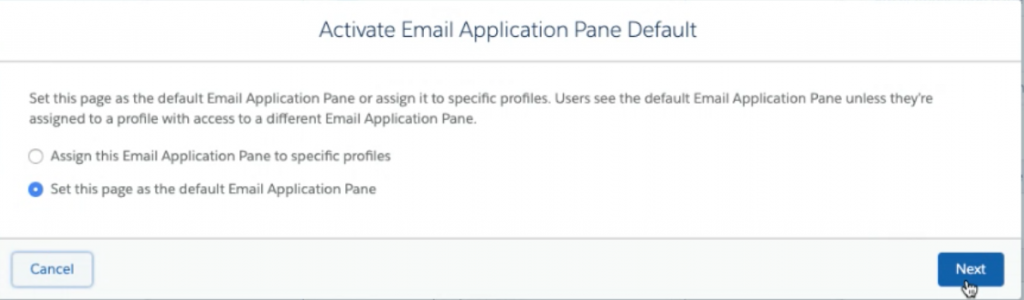
- Click on the ‘Next’ button to proceed further:
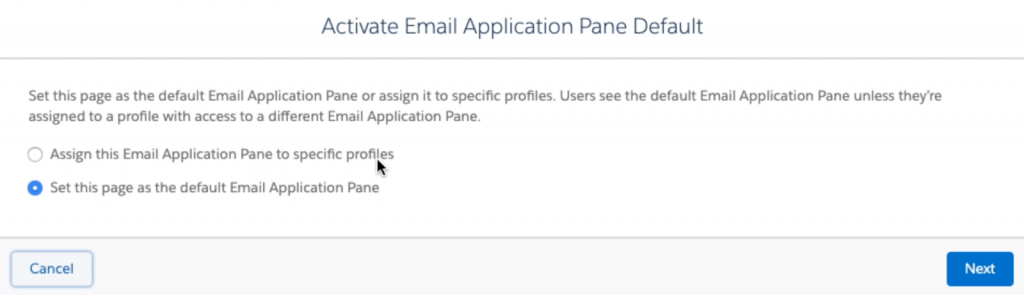
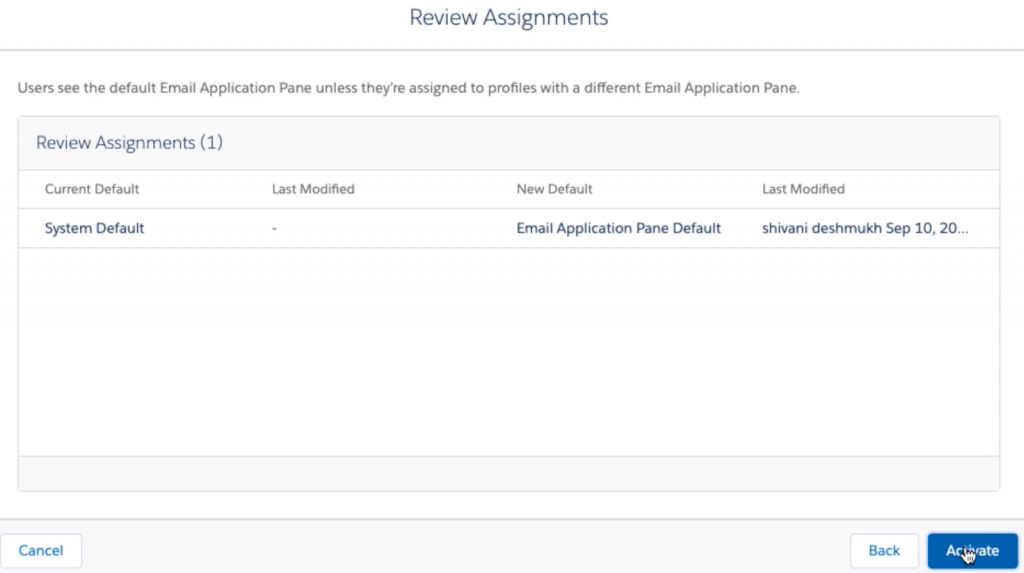
- Click on the ‘Activate’ button to activate the default email application pane:
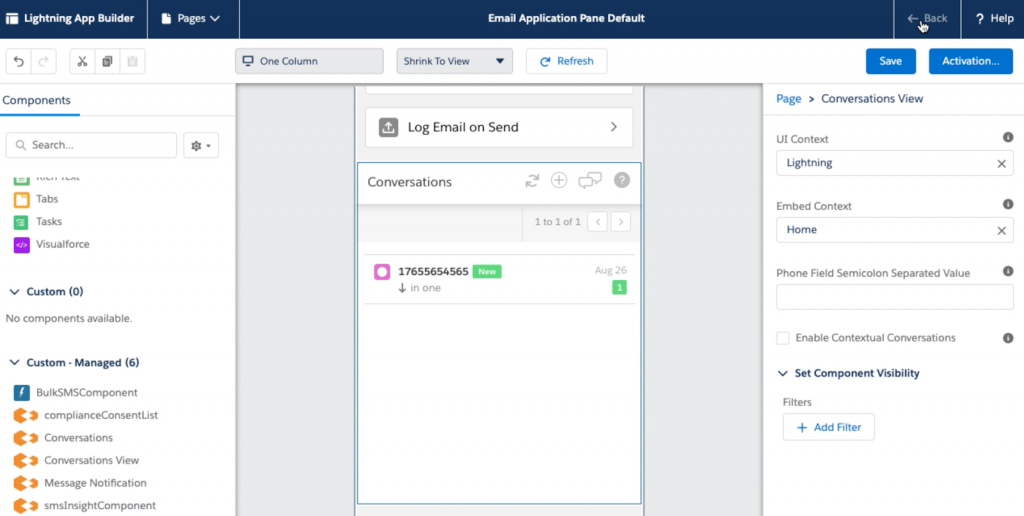
- Click on the ‘Back’ button on the top right of the page:
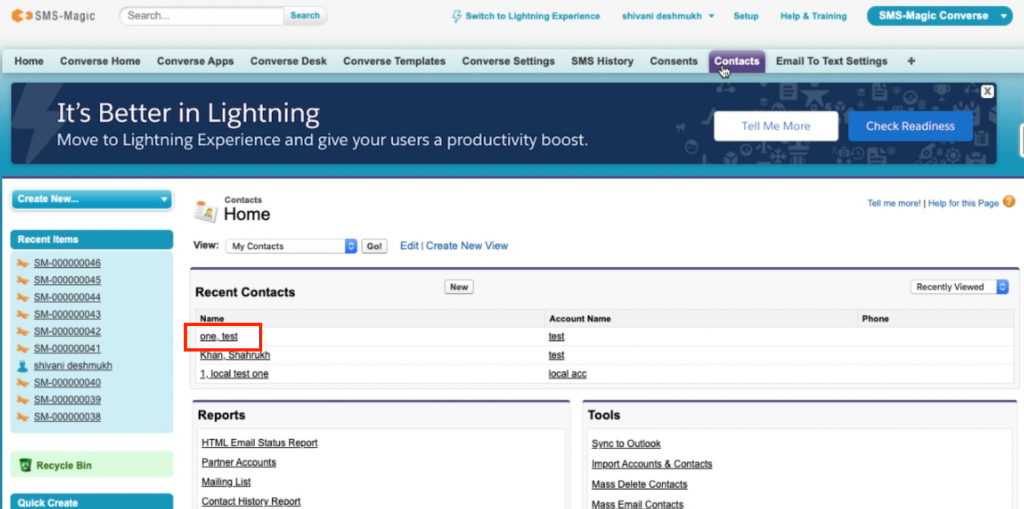
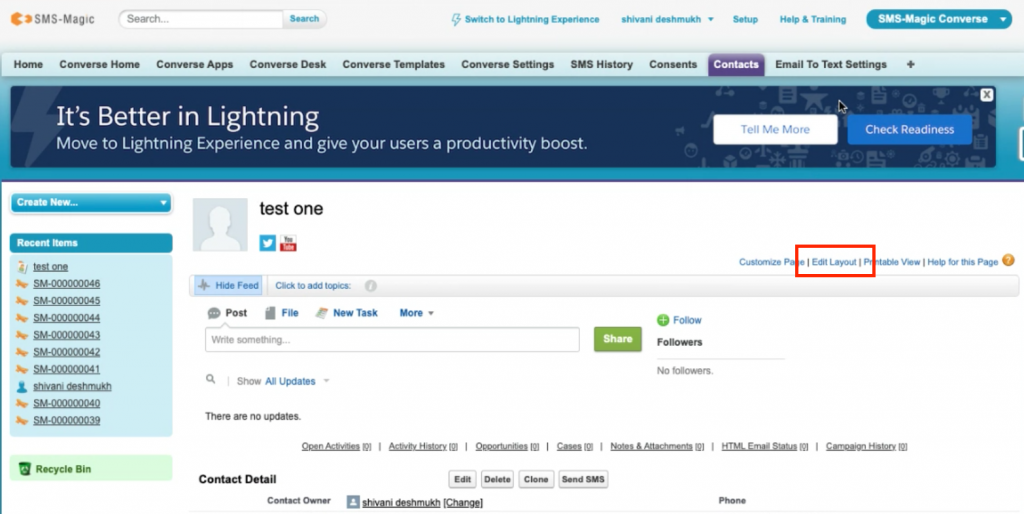
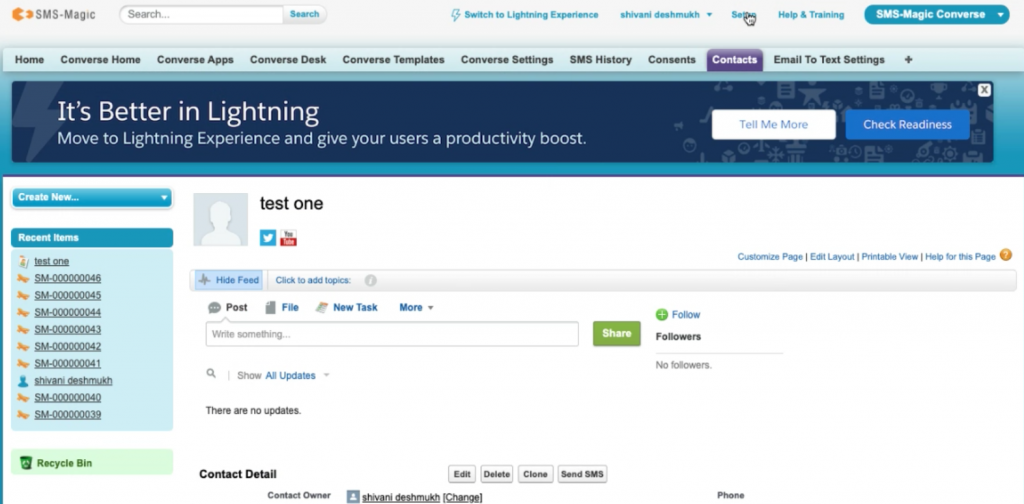
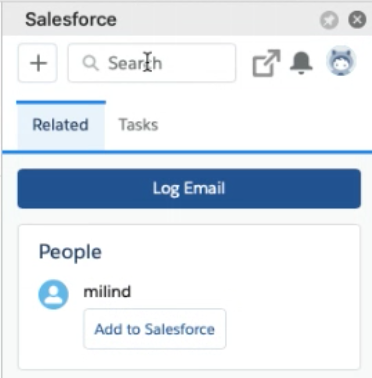
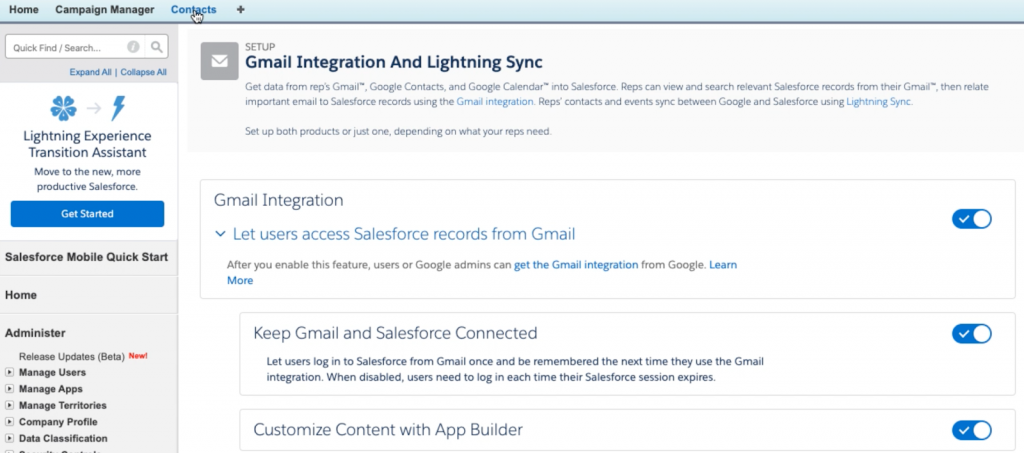
- Verify if your settings are saved. As we want our conversations to be enabled for our contacts, click on the ‘Contacts’ tab on the top:
- The following contacts will be displayed:
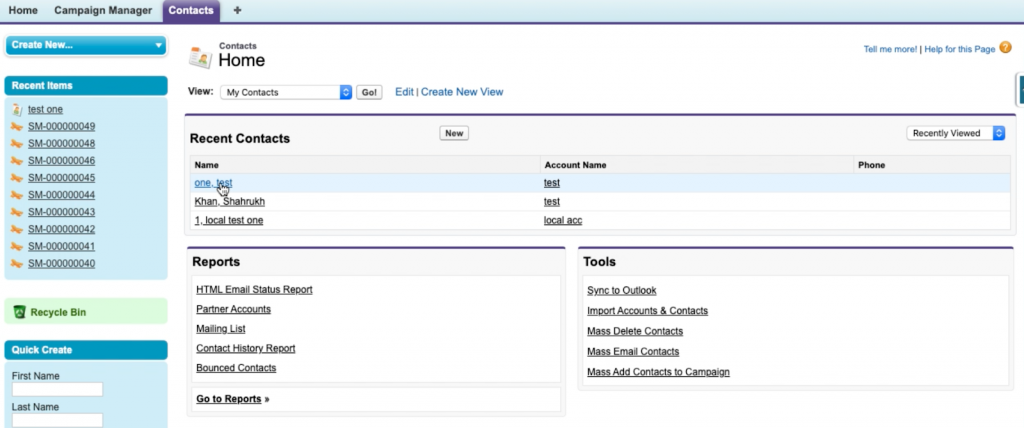
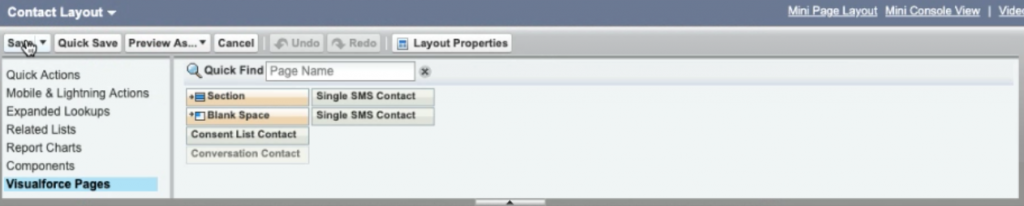
- Click on any of the contacts, for instance, click on ‘one test’ as shown above. Now add the conversation tab to it. For this, you have to edit the layout. Click on ‘Edit Layout’ as highlighted in the image:
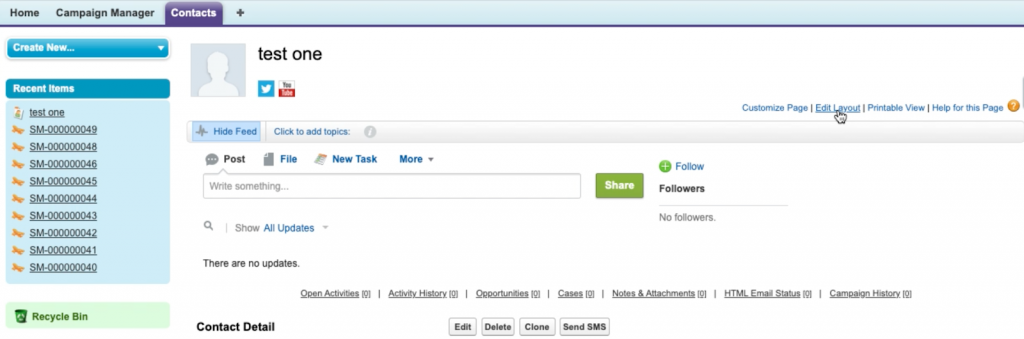
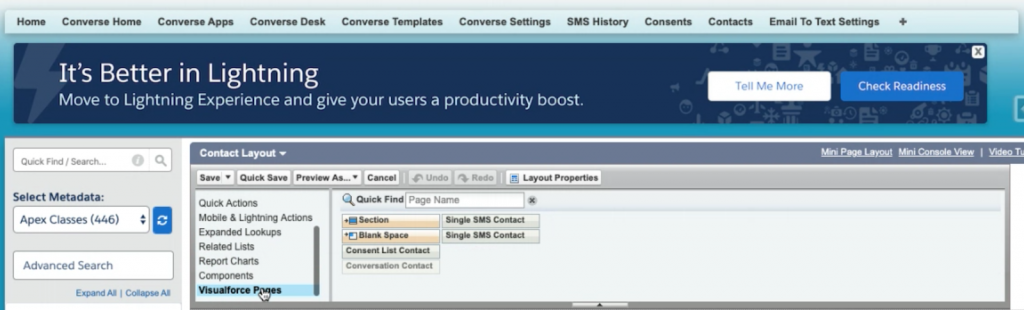
- After clicking on the ‘Edit Layout’ option, the following page appears:
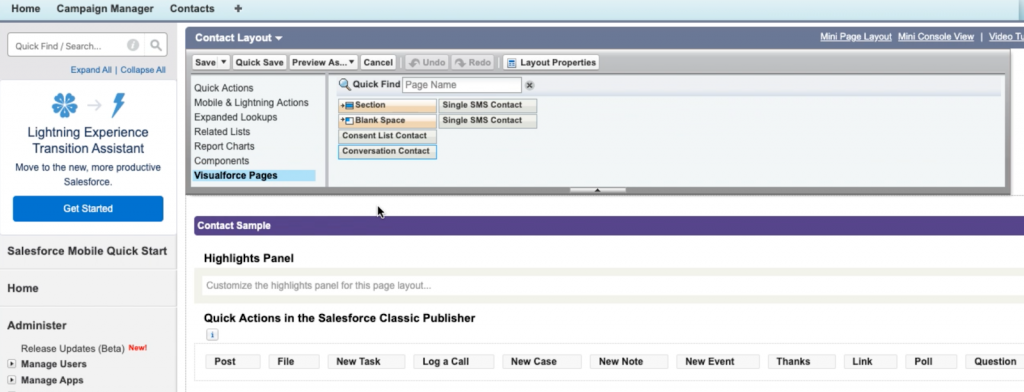
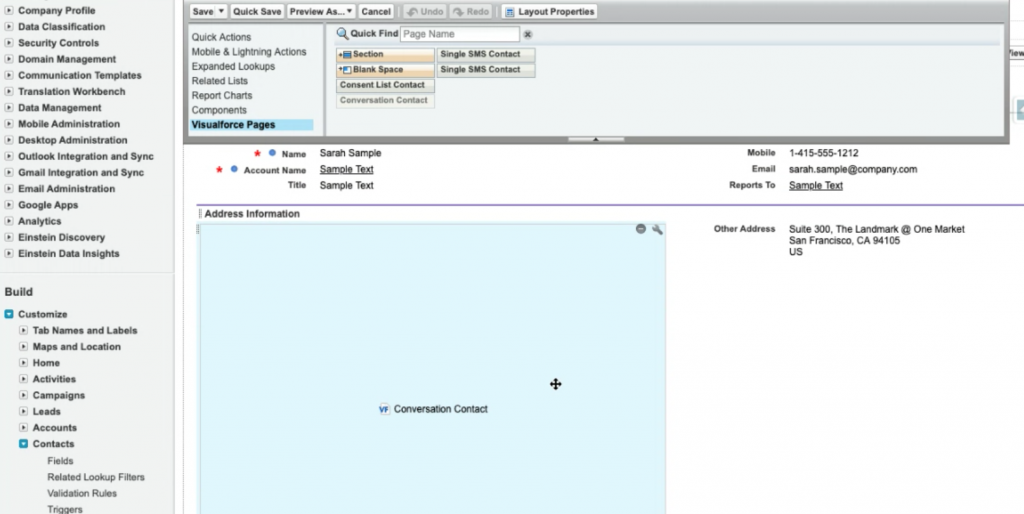
- Search for the ‘Visualforce pages’ option. Drag and drop the ‘Conversation Contacts’ option to your Visualforce page:
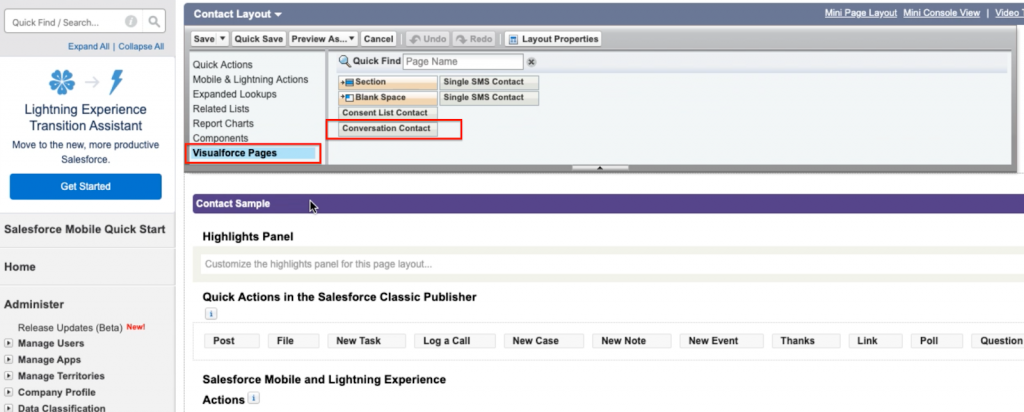
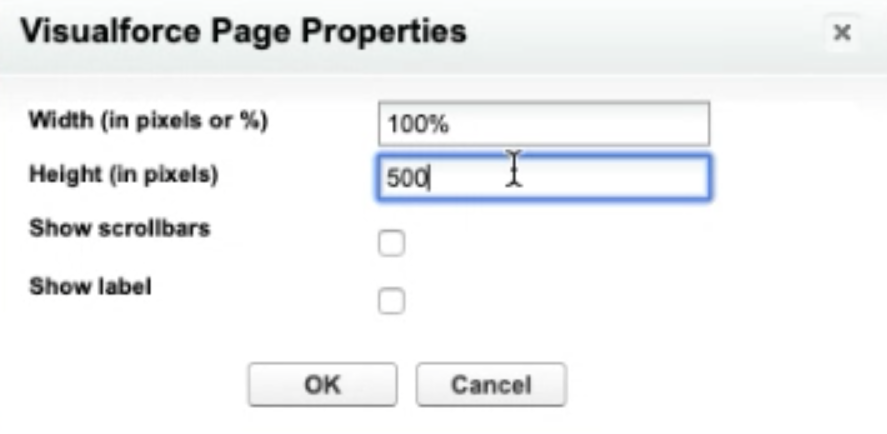
- Here, you can set up the Visualforce page properties. Click on the
button, the page set up window will appear:
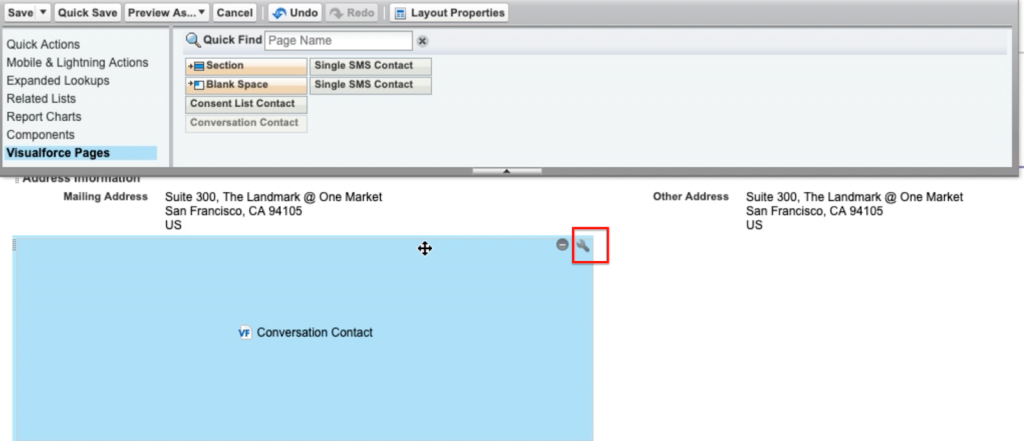
- The pixels should be a minimum 500 so that it will be visible on your Gmail account. Click on the ‘OK’ button and then click on the ‘Save’ button to save the layout:

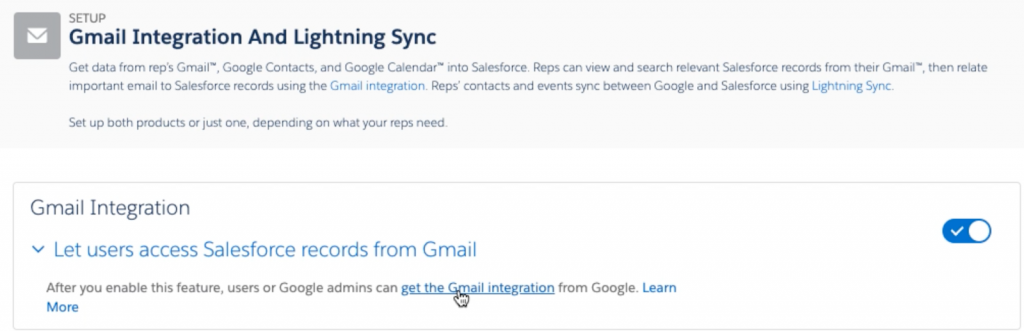
- Once the layout is saved, go back to the ‘Gmail Integration and Lightning Sync’ page. Under ‘Gmail Integration’, you can see the ‘Let users access Salesforce records from Gmail’ option. Under that, click on the ‘get the Gmail integration’ link as shown in the below image:
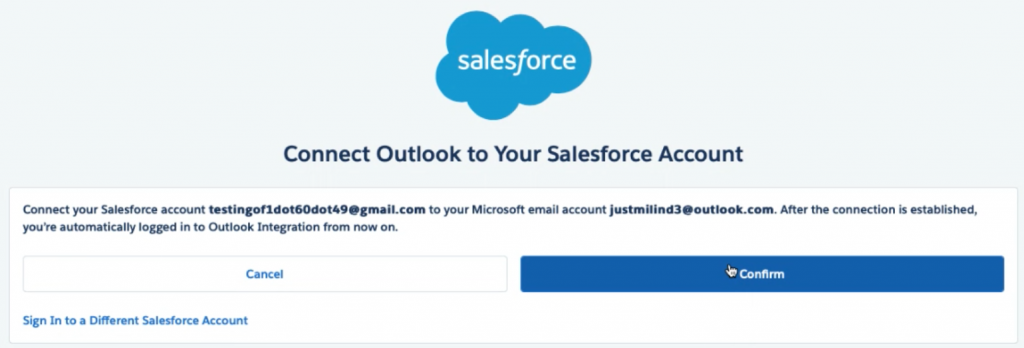
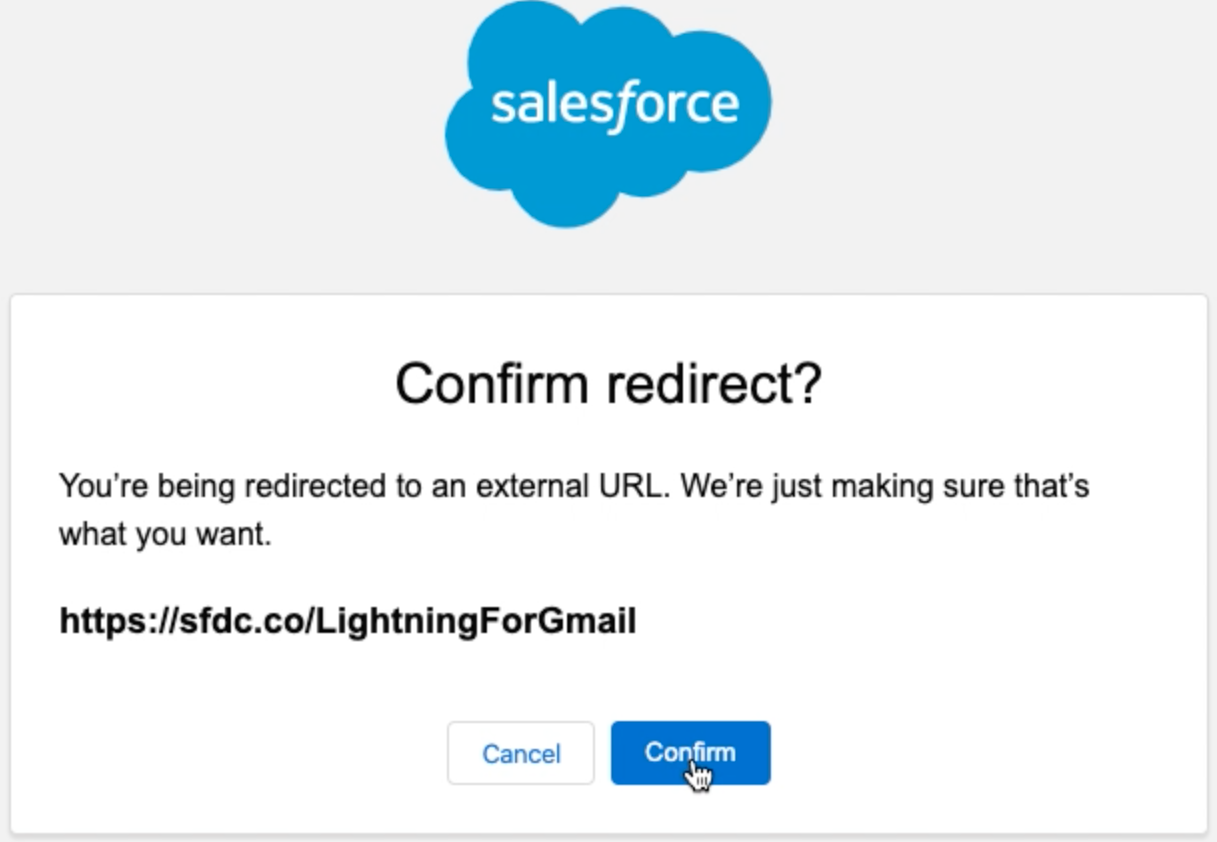
- It will open a window asking the redirect confirmation. Click on the ‘Confirm’ button:
- Click on the ‘Continue’ button to proceed:
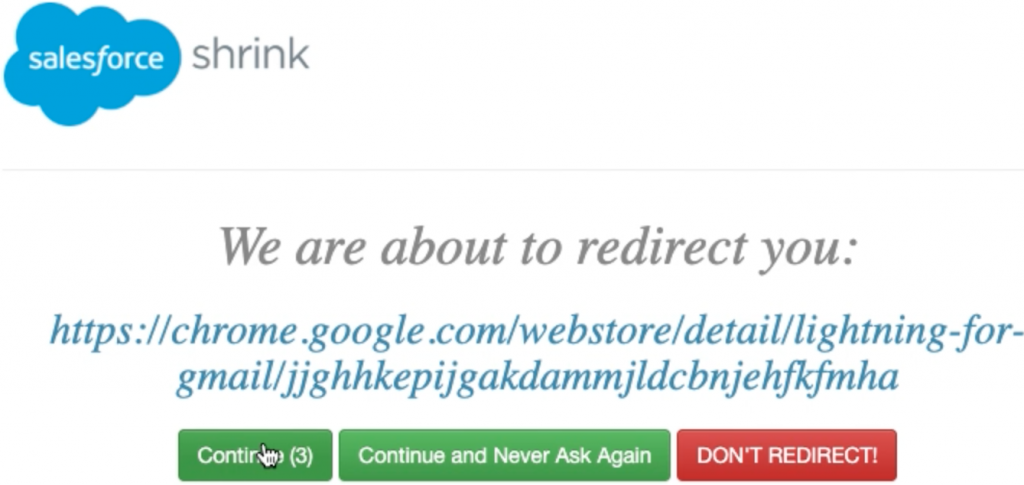
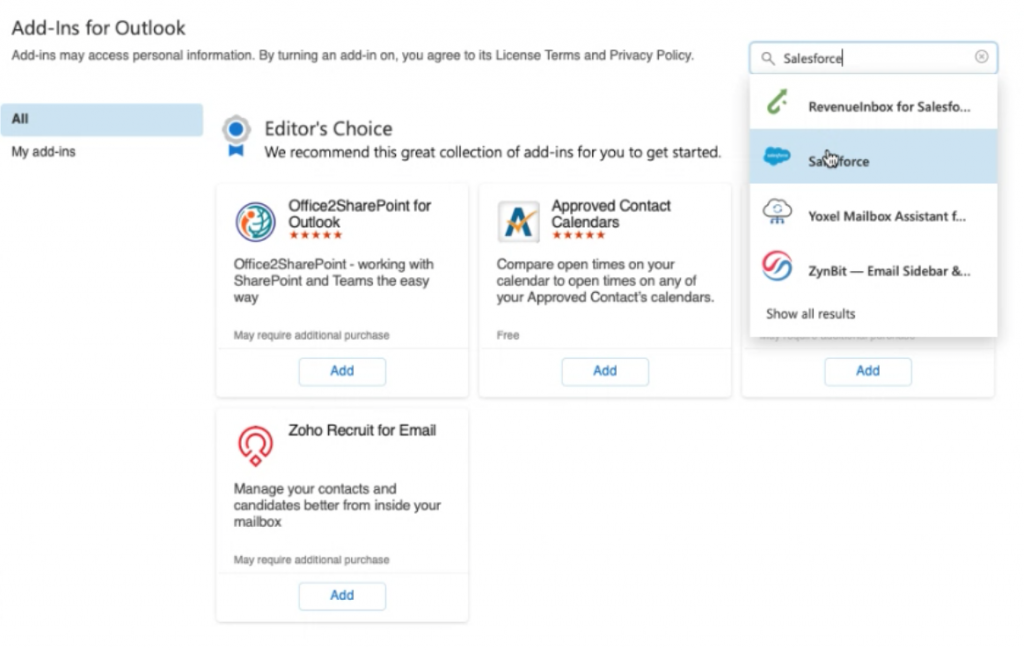
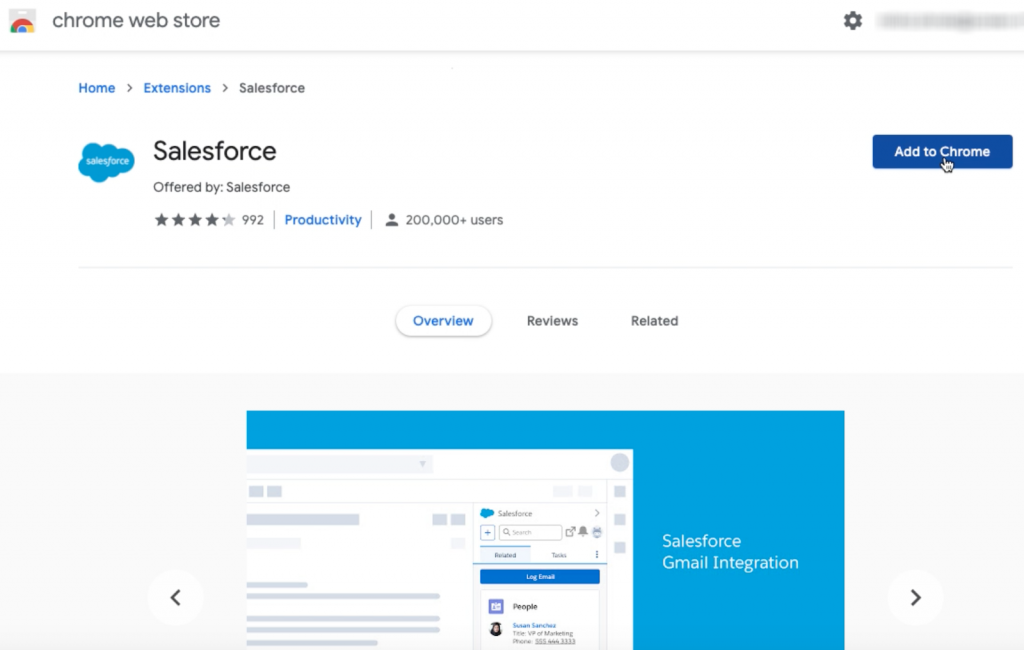
- This will take you to the Chrome extension page. This extension is only used on Chrome, not on Firefox. Click on the ‘Add to Chrome’ button as shown in the image below:
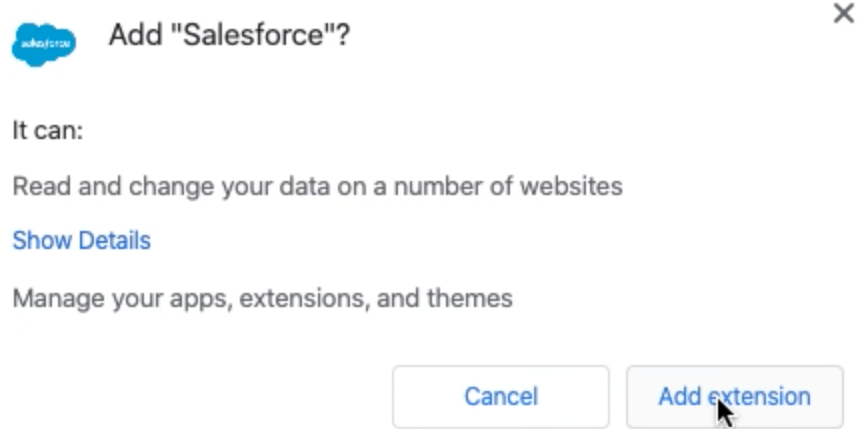
- Click on the ‘Add extension’ button
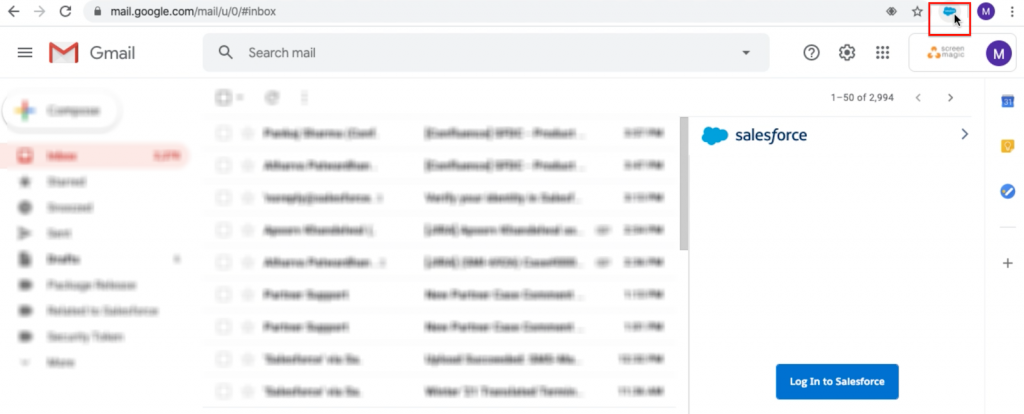
- Go to your Gmail account and refresh the page. You will find a new extension added to your Gmail account, as shown in the image below:

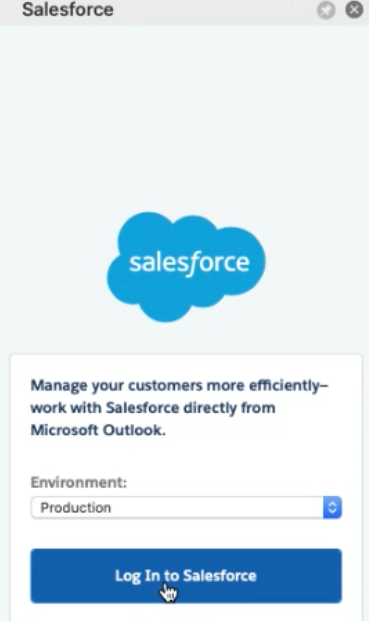
- Click on the ‘Login to Salesforce’ button:
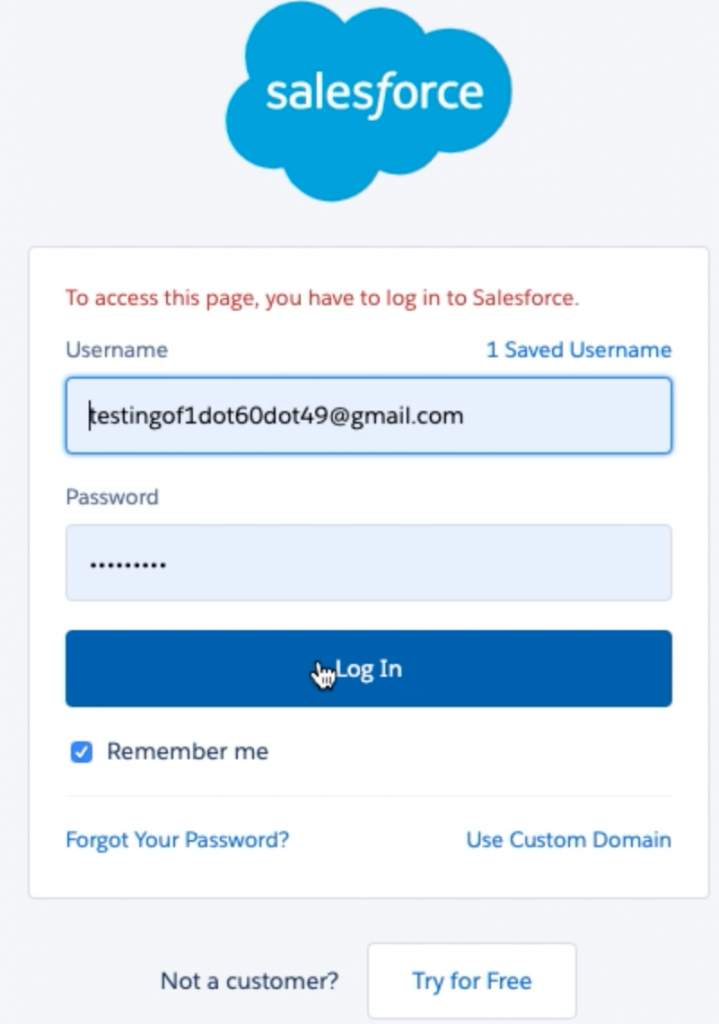
The next step is to log in to Salesforce. Click on the ‘Login to Salesforce’ button and login to production by using the same org, i.e. testingof1dot60dot49@gmail.com and the valid password.
- Please note that we need to enter your credentials here. Click on the ‘Log in’ button
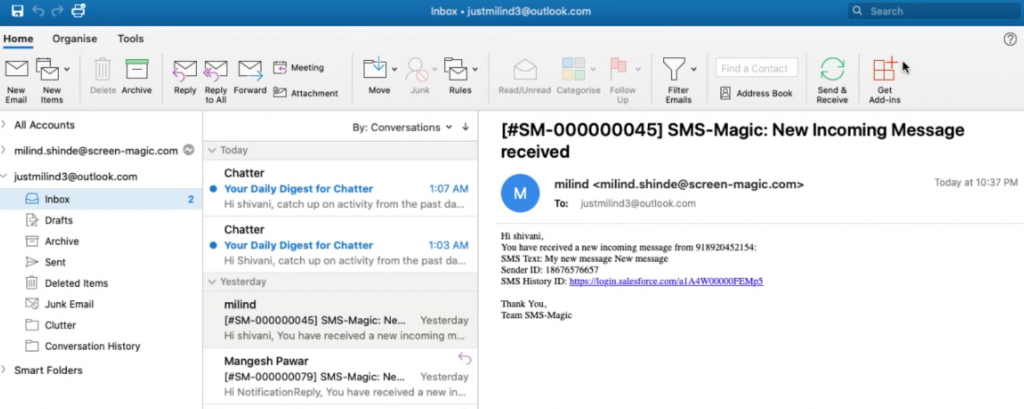
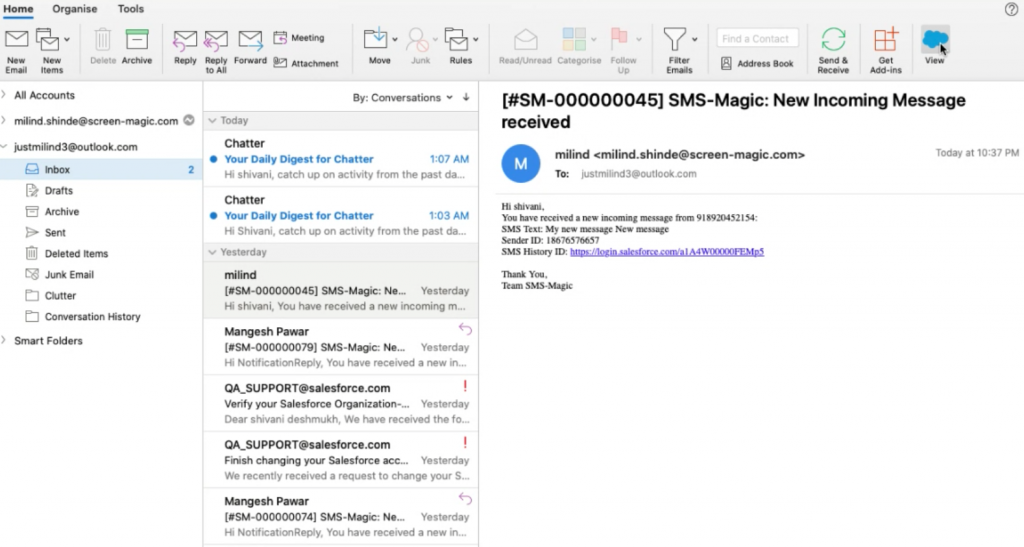
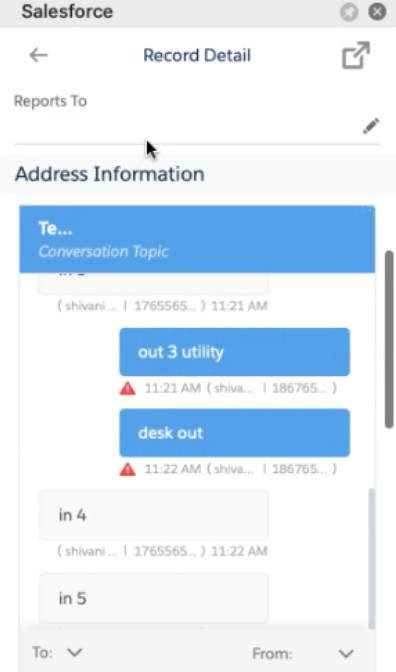
- These are the conversations that you can view from here:
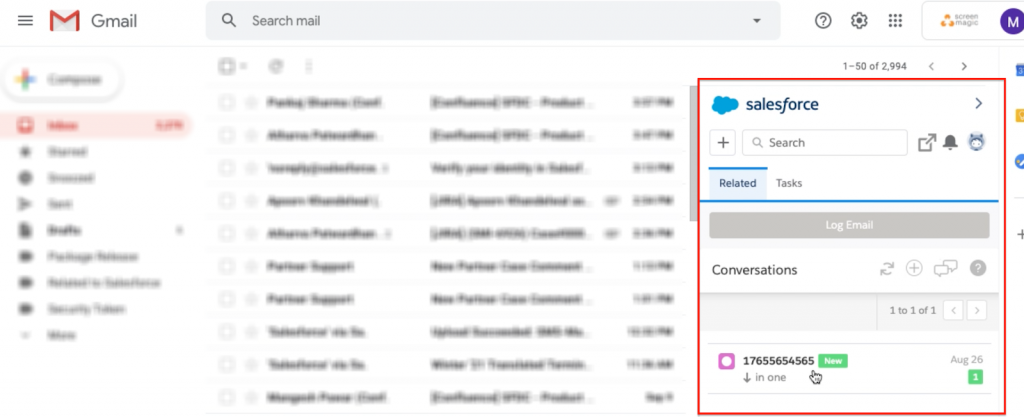
- We have added two components here, and it will show you the unread conversations of all users. You can type your reply and click on the ‘Send’ button:

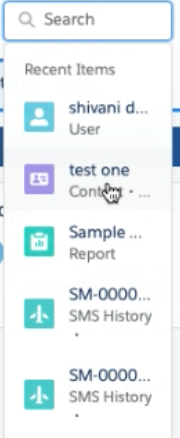
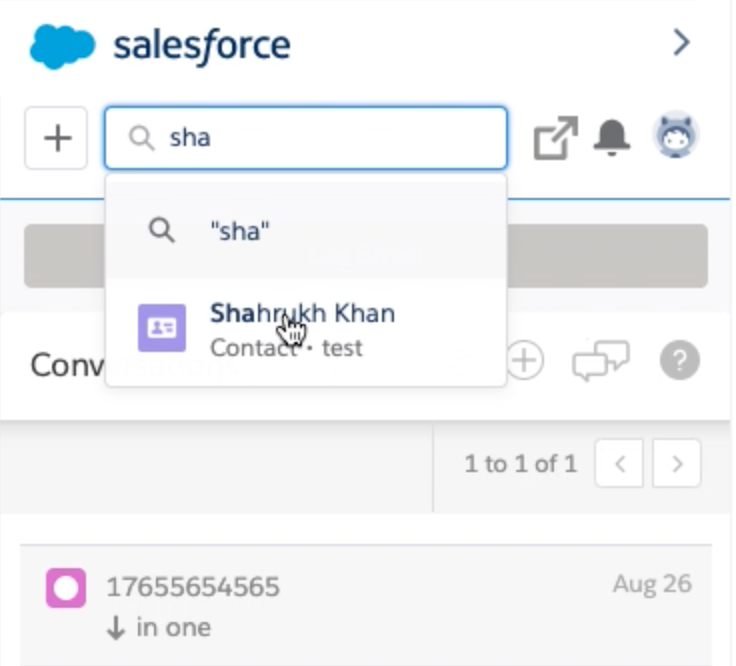
- We have added the conversations component, and we can search for any contacts using the ‘search’ field. Search for any of the contact records, let’s say ‘Shahrukh’.
- Here, you can see the conversation template that we had added.
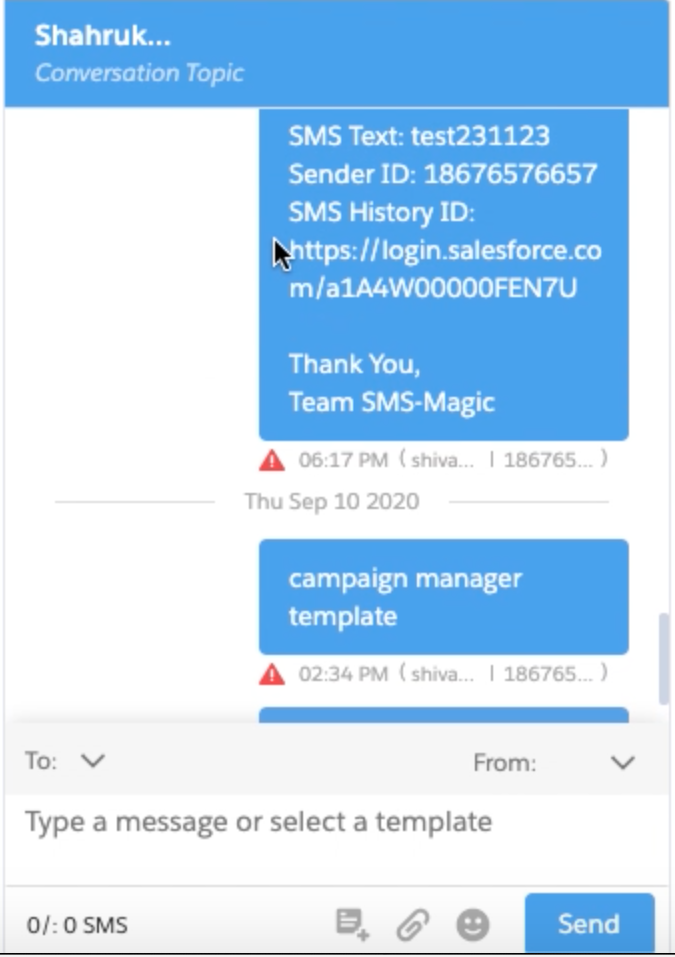
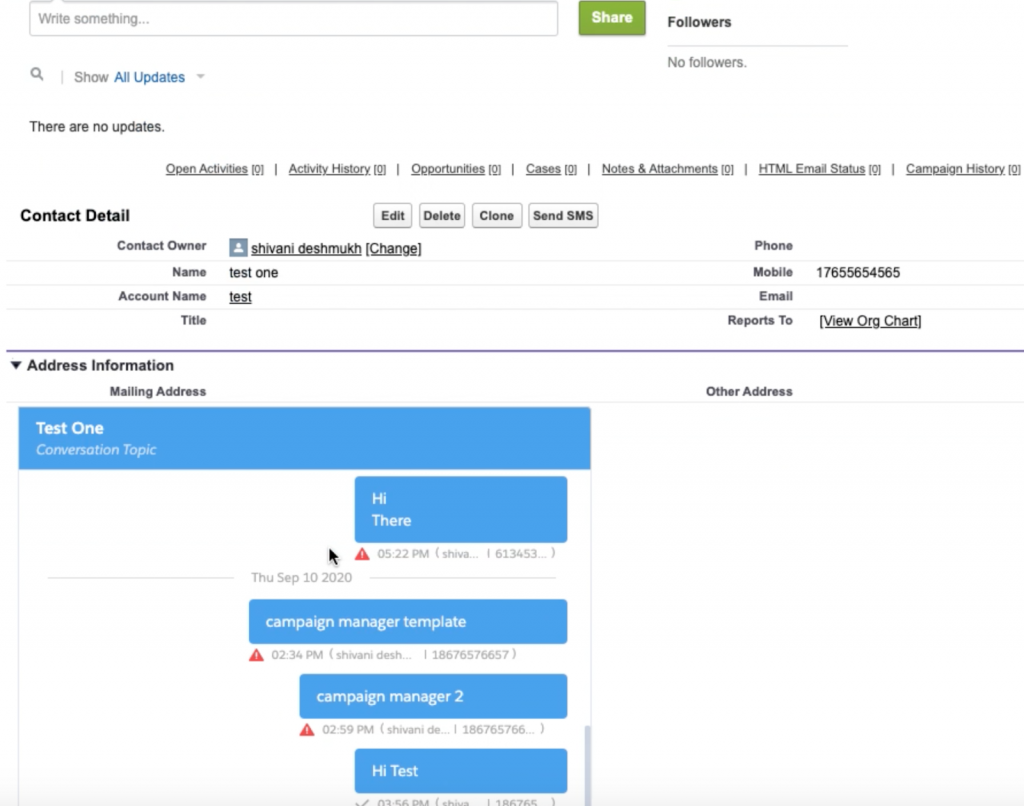
- Now from here, you can send and receive messages. Simply, type your message and click on the ‘Send’ button. You can cross-verify it by going to your conversation page, as shown below:
This is how you can configure the SMS-Magic App on Gmail and send and receive messages.
Once you configure the SMS-Magic App on Gmail, businesses can easily send and receive messages from the same place and manage the contacts. Integrate the SMS-Magic App with Gmail and send messages to multiple recipients or individuals who would receive them on their phone.
[pmb_print_buttons]