You can view all campaigns you have created. You can search for a specific campaign or filter records based on their run status.
On the Campaign Manager page, search for a campaign and do one of the following:
Click on the search icon to open the Search bar. Type the name of the campaign and press Enter.
Click on the filter icon to select the required run status filters from the options and click on Apply. You will see the campaign list filtered based upon the run statuses you selected.
2. The results are in the CAMPAIGNS list view
3. You can also sort the campaign results based upon Date and Time. Click on the sort option and then select the appropriate sorting option from the drop-down menu that appears. The results are sorted and the selected options displayed on the top.
4. Click on the icon adjacent to the campaign that you want to view and click on ‘View Details’ from the drop-down menu that appears. The campaign details appear:
Edit Campaigns
|
You can edit campaigns that are in the draft and scheduled stage. While editing, you can update any of the parameters defined while creating the campaign.
1. Search for the campaign you wish to edit. The campaign appears in your search result.
2. Click on the icon adjacent to the draft campaign and then click on the ‘Edit Campaign’ from the drop-down menu that appears.
The Campaign Builder page appears in the edit mode. Edit the fields as required.
3. Click on the ‘Save Campaign’ button on completing all modifications
Clone Campaigns
|
You can clone a campaign to retain and reuse some of its settings for a new campaign. For example, you may need to retain the same template in a campaign but for a new recipient list. Therefore, in order to save time in recreating the campaign all over again, you can clone the existing campaign and update the parameters in the new cloned version.
1. Search for the campaign you wish to clone. The campaign appears in your search result. You can even clone campaigns that have completed their run.
2. Click next to the draft campaign and click on the ‘Clone Campaign’ option from the drop-down menu that appears. The confirmation pop-up window appears.
3. Click on the ‘Yes’ button. The cloned campaign appears on the campaign manager page with a timestamp of when it was cloned included in its name.
4. Click next to the cloned campaign and click on the ‘Edit Campaign’ option from the drop-down menu that appears if you wish to modify the campaign configurations. The Cloned campaign appears in the edit mode.
Schedule Campaigns
|
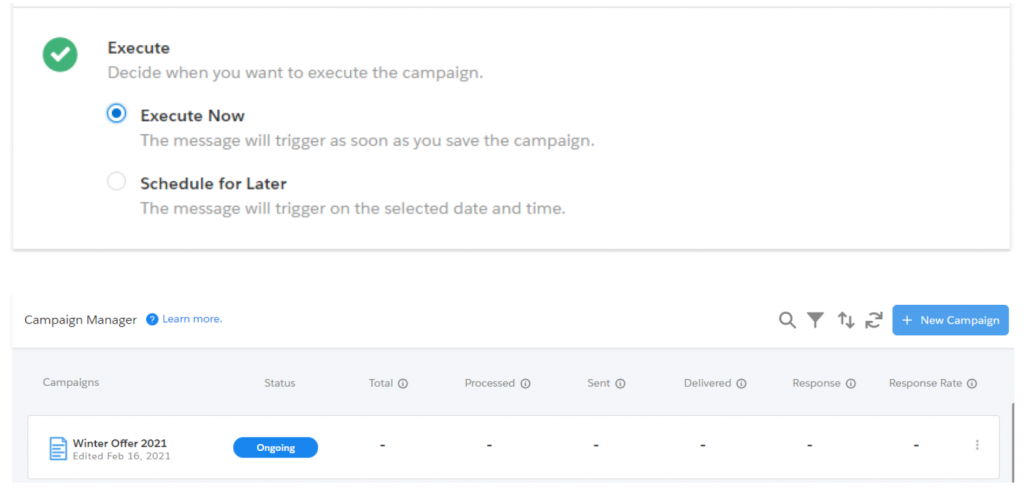
You can define a schedule for running a campaign. Campaign schedules can be configured for single runs or for recurring frequency. You can either choose to execute the campaign right away or you can schedule it for execution at a future time.
1. If you choose to execute right away, on clicking on ‘Start Campaign’, you will see your campaign getting into ongoing status.
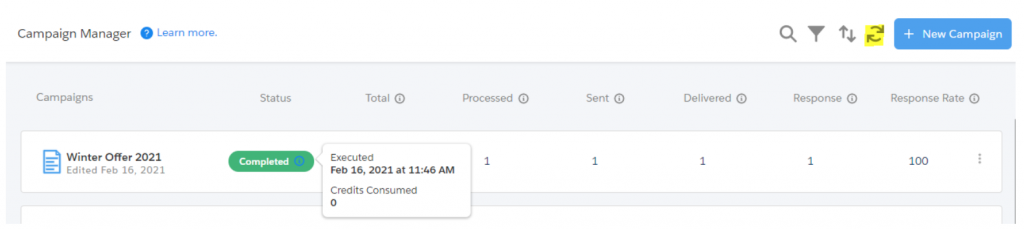
2. You can click on the refresh icon on the dashboard to see the updated status of your campaign. You will also see an info icon beside campaign status. You can get to know the executed date and timestamp information on the hover of this info icon.
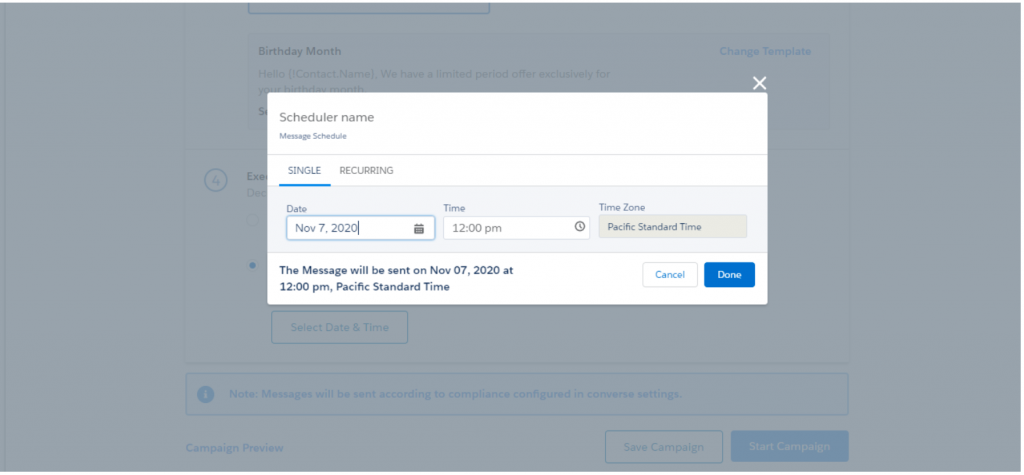
3. If you choose to schedule for later, a popup will appear in which you can choose to schedule it for a single time or on a recurring basis as per your requirement.
One time schedule
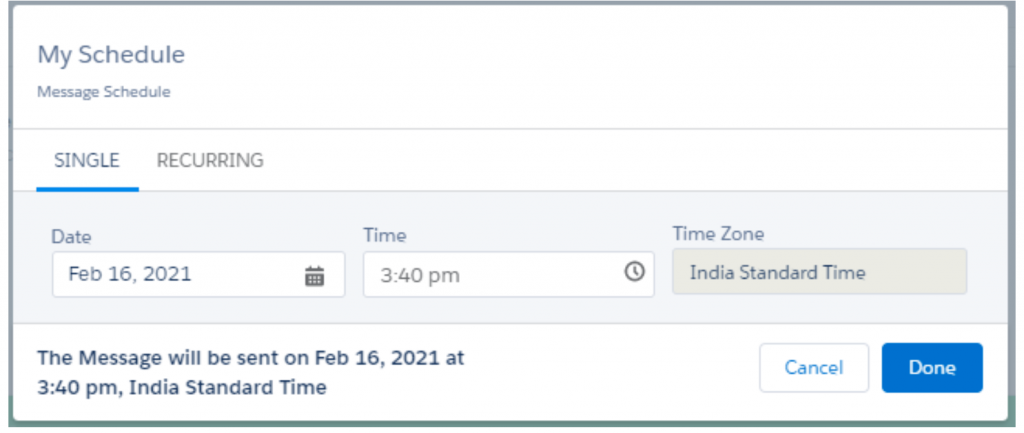
Click on the Single tab to configure a one-time schedule
Click to enter the date
Under Time, click to configure the start time for the campaign
Under Time Zone the default time zone is displayed. Click on the ‘Done’ button to set the schedule.
Note – Time zones can be configured from Profile > My Settings > Language and Timezones. Contact your System Administrator to change your time zone if required.
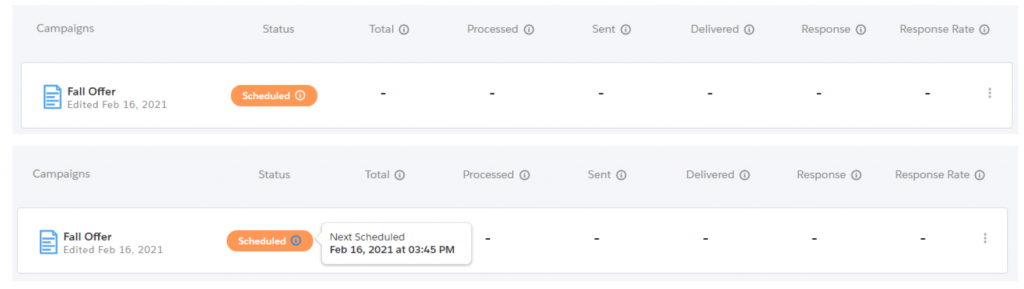
5. Once you click on ‘Start Campaign’, you will also see an info icon beside the campaign status ‘Scheduled’.
6. You can get to know the scheduled date and timestamp information on the hover of this info icon.
Recurring schedule
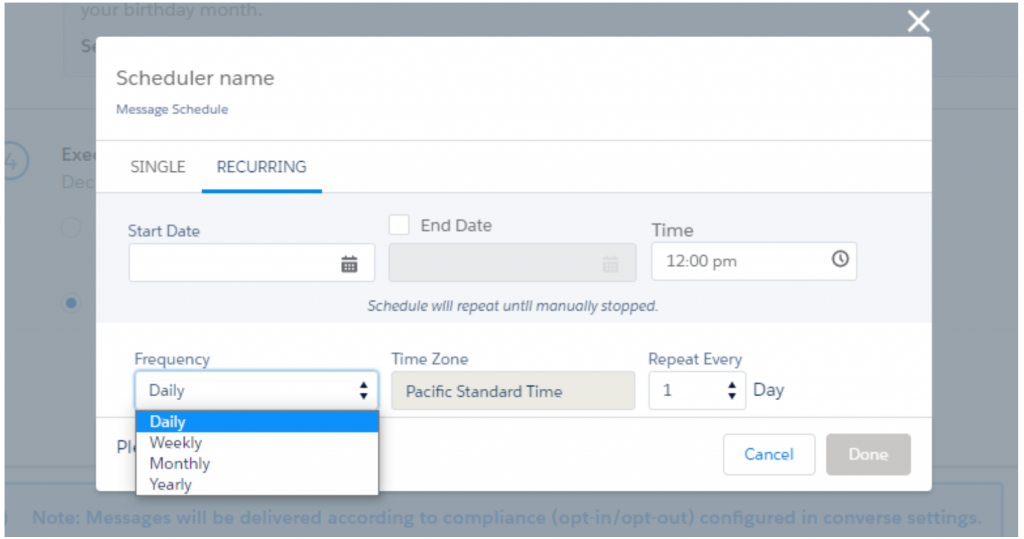
1. Click on the ‘Recurring’ tab to configure a recurring campaign. The following parameters appear:
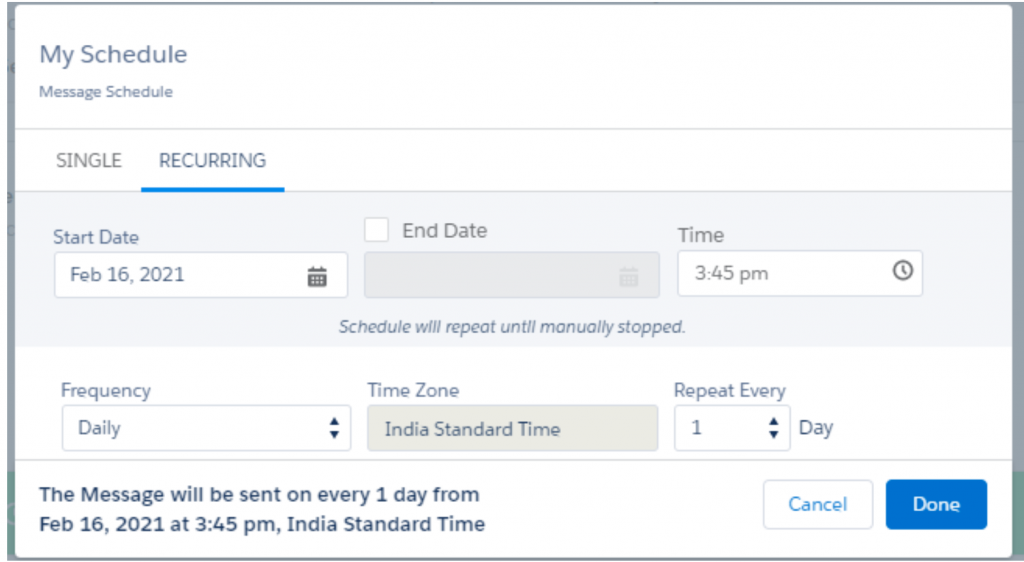
2. Click to enter the start date
3. Select the End Date to configure the date when you want the campaign to end
Note- -If you do not provide an end date for the campaign, it will continue uninterrupted unless you manually cancel it. However, even if you provide an end date, you can still stop the campaign while it is ongoing. Select the relevant action from the drop-down list on the Campaign Manager page.
4. Under Time, click to configure the start time for the campaign
5. Under Frequency, select the schedule frequency. The available options are:
Daily – Select the number of days after which you want the campaign to run
Weekly – Select the day of the week when you want the campaign to run. You can also select ‘All Days’ to run the campaign on all days of the week.
Monthly – Select the Month and the day of the month when you want the campaign to repeat. You can also select ‘All Months’ to run the campaign on the selected day of every month.
Yearly – Select the number of years after which you want the campaign to repeat. When you select the yearly frequency, you also need to specify the day and the month in the year when you want the campaign to recur. You can also select ‘All Months’ to run the campaign every month. For example, if Repeat Every = 1 year; Day = 2nd; Every Month checkbox = Selected then the campaign is scheduled to run on the second day of every month on every alternate year.
6. Under Time Zone the default time zone is displayed
Note – Time zones can be configured from Profile > My Settings > Language and Timezones. Contact your System Administrator to change your time zone if required. Click on the ‘Done’ button to set the schedule.
7. Once you click on the ‘Start Campaign’ button, you will also see an info icon beside the campaign status ‘Scheduled’. You can get to know the details about the next scheduled date and timestamp information on the hover of this info icon.
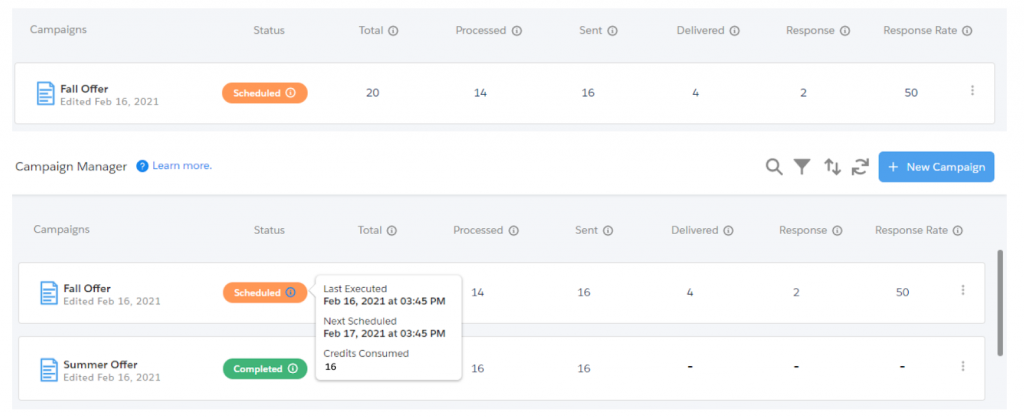
8. Once the campaign gets executed for one time, the campaign status will remain as ‘Scheduled’ considering this is a recurring campaign. After one-time execution, the info icon will show the ‘Last Executed date and time-stamp’ along with the ‘Next scheduled date and time-stamp’.
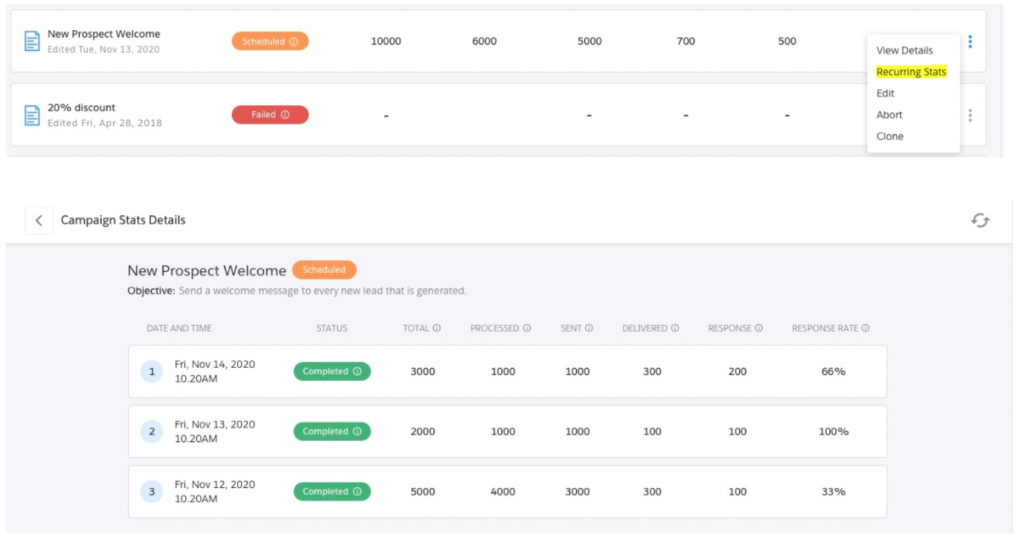
9. For recurring campaigns, you have an option to check the per execution specific campaign statistics. Search for any recurring campaigns and from the more options, click on the ‘Recurring Stats’
Abort Campaigns
|
You can pause a campaign that is in ongoing or scheduled status. Once aborted, all actions will be stalled and no further actions will be executed. You can edit an aborted campaign and execute it as a new campaign. Please note that this will not resume the aborted actions.
1. Search for an ongoing or scheduled campaign. The campaign appears in your search result.
2. Click on the icon adjacent to the ongoing or scheduled campaign and click on the ‘Abort Campaign’ option from the drop-down menu that appears. The confirmation pop-up window appears.
3. Click on the ‘Yes’ button. The campaign is aborted and appears as shown.
Failed Campaigns
|
Whenever a campaign fails due to any reason such as configuration issue, processing of list view or report gets failed, etc., the status of the campaign will get updated as ‘Failed’.
Along with the status being updated as failed, on hover of the info icon, the user can get to know the details about when the campaign was executed along with the reason because of which the campaign got failed.
Email Notification on Campaign Failure
If your admin has enabled ‘Email notification on campaign failure’ then the user initiating the campaign will receive an email notification once campaign execution is failed. Users can refer to the ‘Failure reason’ and ‘steps to rectify’ to re-configure and rerun the campaign again to avoid failure.
Here’s the list of reasons that you can see along with the remedies.
Failure Reason
Remedy (Try these steps & run the campaign again; if it still fails, contact the support team)
The campaign is not configured correctly.
Re-configure the campaign with correct data.
Failed to collect List View Data.
1. Check if ‘Campaign Launcher Permission Set’ is assigned to the user. 2. Check if the user has access to the list view object and records. 3. Check if the remote site setting is correctly configured.
Failed to process List View data.
1. Check for permission set assignment 2. Check if Template for the correct object is used or not
Valid records not found to trigger messages
1.Check if the list view or report records have valid data like phone numbers etc. 2.Check if the report has an ID field of configured message object. 3.Check compliance status of records in the list view/ reports.
Failed to fetch report data.
1.Check if the report is configured correctly with the required data 2.Check if the report has an ID field of configured message object.
Failed to create Report Access Job.
1. Check if ‘Campaign Launcher Permission Set’ is assigned to the user. 2.Check if the report is configured correctly with the required data 3.Check if the report has an ID field of configured message object.
Failed to process report.
1. Check if ‘Campaign Launcher Permission Set’ is assigned to the user. 2. Check if the report is configured correctly with the required data
Selected object not found in the report OR Object ID field is null in the first row of the report
Re-configure the campaign with proper data OR update the report to have ID field of configured message object
Scheduled job processing failed.
Check if ‘Campaign Launcher Permission Set’ is assigned to the user.