1

Bulk SMS Component

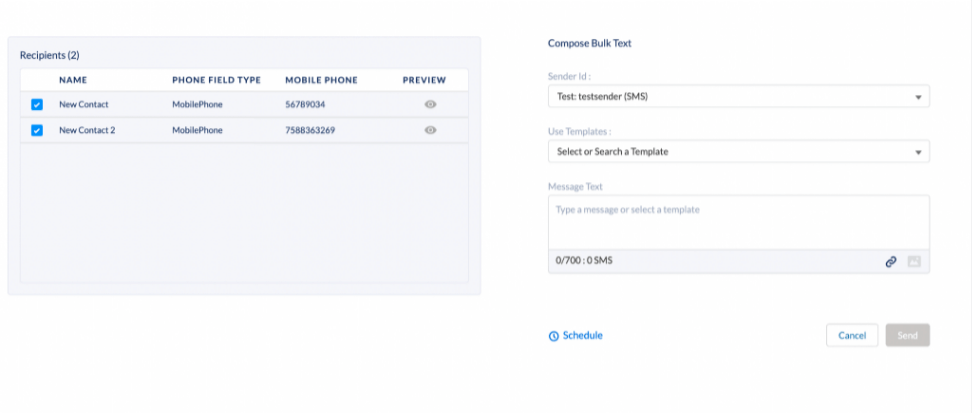
For bulk messaging, a new component BulkSMSForCommunity has been created. The user just has to drag and drop that component on the required page. 

Pre-requisites

Following are the pre-requisites to enable the Bulk SMS Component on Experience Cloud:

1) Create a remote site setting that contains the Community URL. (The community URL can be found in Setup → Home → All sites).
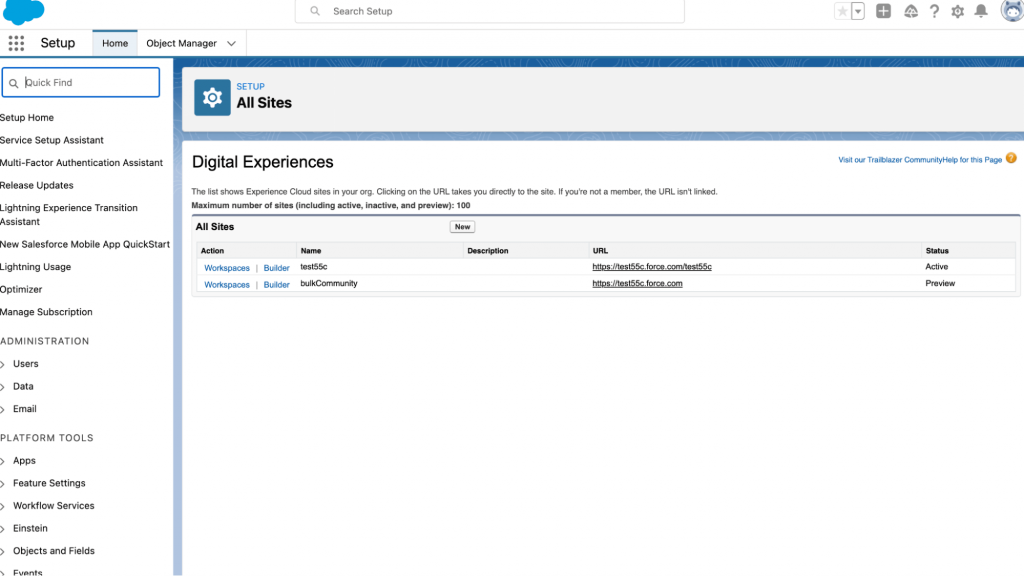
Create a remote site setting

2) Clone the “SMS Converse Conversation User” permission set and assign it to community users. In the cloned permission set:

  • Give permission to smagicinteract.FetchSessionId VF Page in the permission set
  • Set the checkbox “API Enable” to true. (API enable is required)
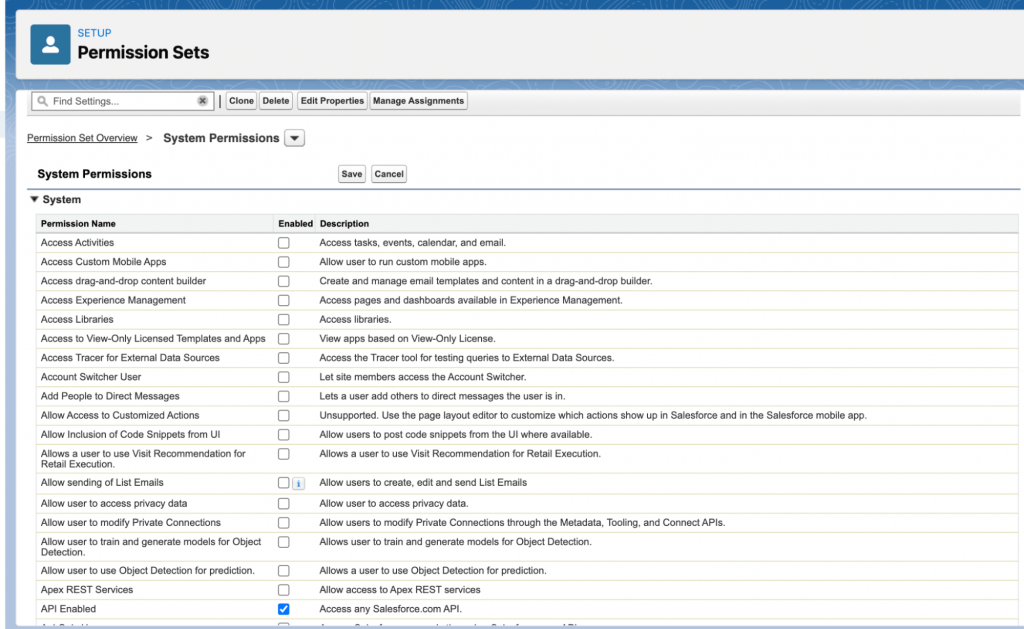
Give permission to smagicinteract.FetchSessionId

3) Make sure that the appropriate Sender ID is visible to the contact the user who will log in to the community. Sharing rule needs to be applied for objects License Type, Feature and License object.

4) Make sure that the community user has the ‘Community Power User’ license to access the UI on bulksmscomponent.
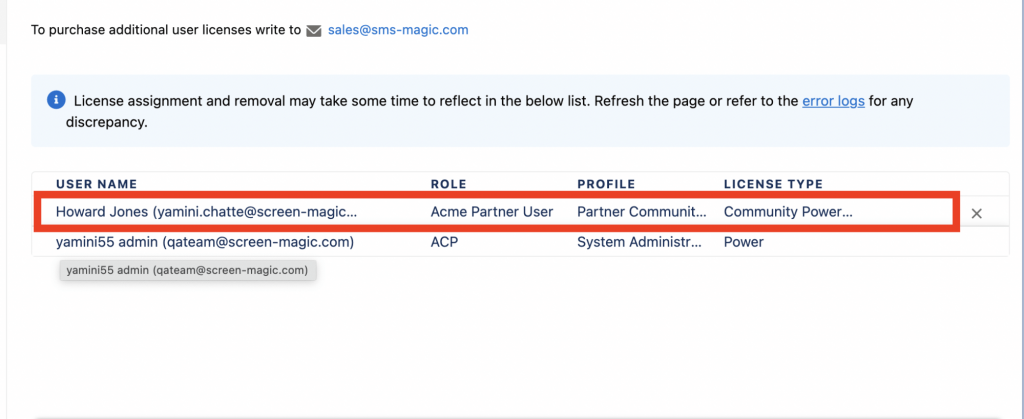
community user access check

5) Make sure that the user has access to the object (e.g. Lead/Contact) to which the message is sent.

Ex – Let MOC be Lead/Contact the community user must have access to the object otherwise the user won’t be able to retrieve the object records.

Limitations:

1) Only 2000 records can be fetched from a list view on the Community

Limitation-1
Limitation-2

Steps to Navigate to Bulk SMS Component

Follow the below steps for Bulk Community – 

  • Navigate to the builder in the salesforce community
  • For bulk messaging we have created a new component BulkSMSForCommunity as highlighted in the image below
  • The user just has to drag and drop that component on the required page 
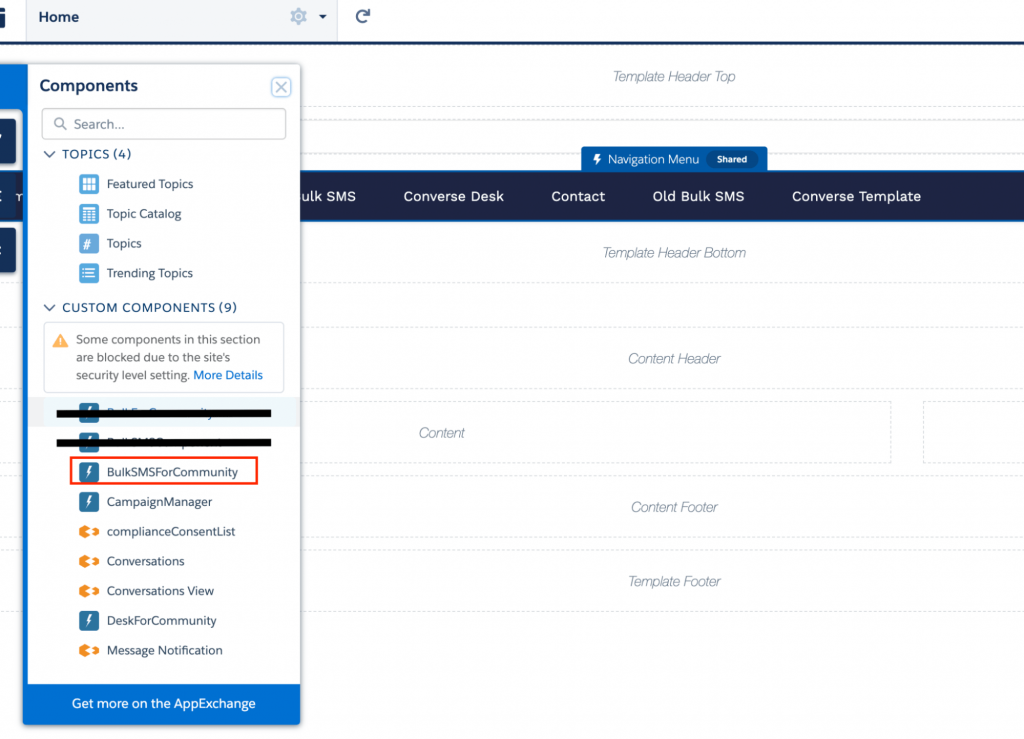
Steps to Navigate to Bulk SMS Component


Converse Desk

 Pre-requisites

Following are the pre-requisites to enable the Converse Desk Component on Experience Cloud:

1) Create a remote site setting that contains the Community URL. (The community URL can be found in Setup → Home → All sites).

Create a remote site setting

2) Clone the “SMS Converse Conversation User” permission set and assign it to community users. In the cloned permission set :

  • Give permission to smagicinteract.FetchSessionId VF Page in the permission set.
  • Set the checkbox “API Enable” to true. (API enable is required)
Give permission to smagicinteract.FetchSessionId

3) Make sure that the appropriate Sender ID is visible to the contact the user who will log in to the community. Sharing rule needs to be applied for objects License Type, Feature and License object.

Steps to Navigate to Converse Desk

  • Navigate to the builder in the salesforce community
  • For converse desk messaging we have created a component Conversations View as highlighted in the image below
  • The user just has to drag and drop that component on the required page
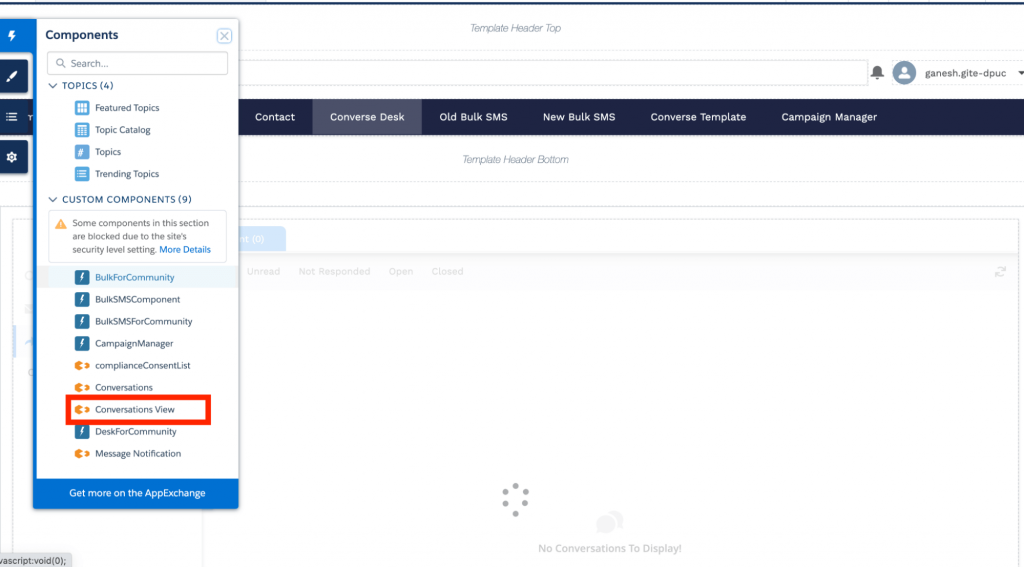
Navigate to Converse Desk


Converse Templates

Pre-requisites

Following are the pre-requisites to enable the Converse Templates component on Experience Cloud:

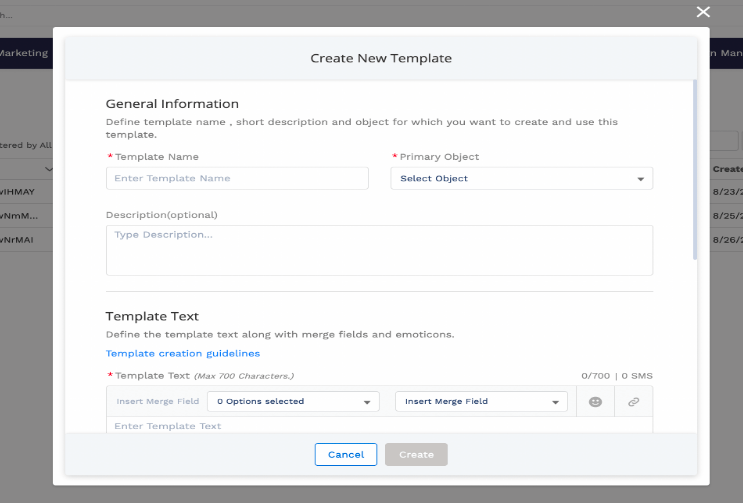
1) New template creation support is added for the Experience Cloud community. The Community needs to override standard actions with a Lightning component setting enabled. 

Code changes are made to handle the navigation in the component.

Administration → Preference → Override standard actions with a Lightning component.

Override standard actions
Create Converse Template

Steps to Navigate to Converse Templates

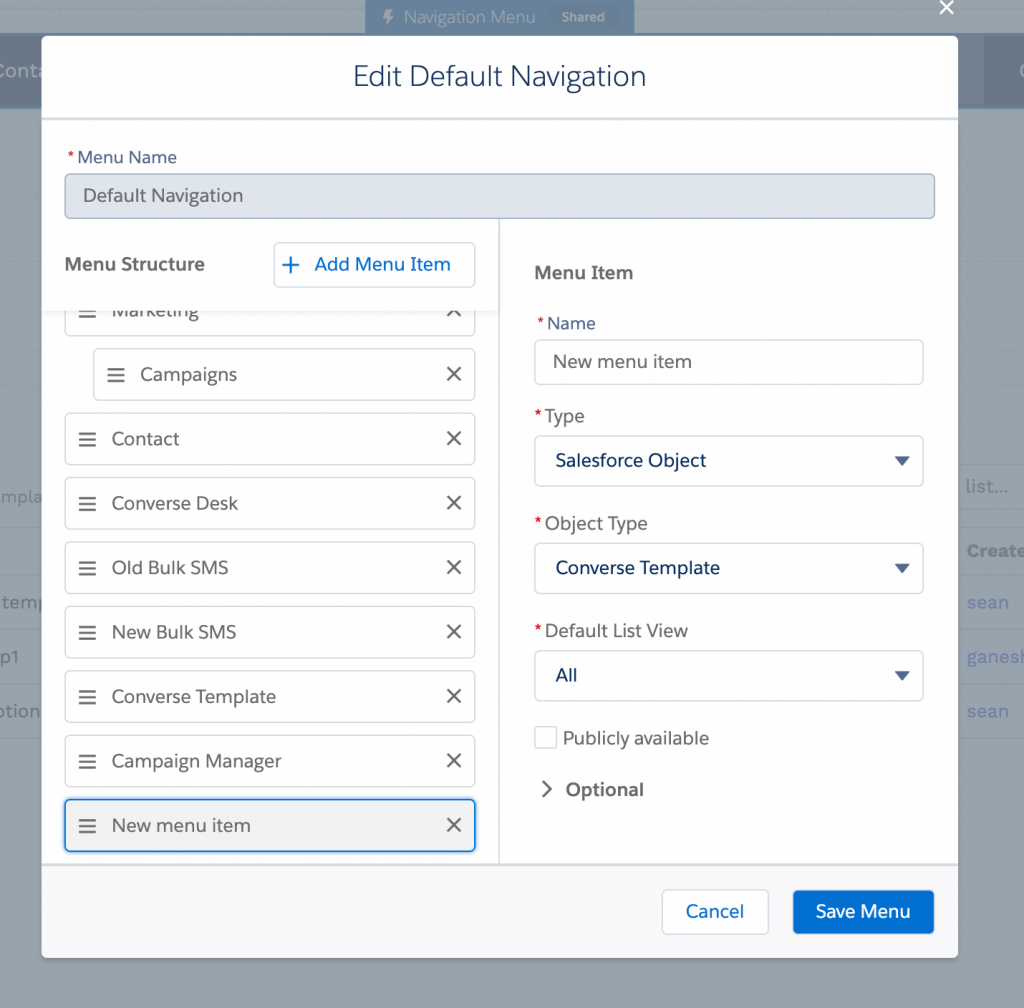
  • Converse Template is a custom object from SMS-Magic converse
  • Converse Template can be added as an object from Edit Default Navigation as shown in the following image:
Navigate to Converse Templates


Campaign Manager

Pre-requisites

Following are the pre-requisites to enable Campaign Manager Component on Experience Cloud:

1) Create a remote site setting that contains the Community URL. (The community URL can be found in Setup → Home → All sites).

Create a remote site setting

2) Clone the “SMS Converse Conversation User” permission set and assign it to community users. In the cloned permission set :

  • Give permission to smagicinteract.FetchSessionId VF Page in the permission set.
  • Set the checkbox “API Enable” to true. (API enable is required)
Give permission to smagicinteract.FetchSessionId

3) Make sure that the appropriate Sender ID is visible to the contact the user who will log in to the community. Sharing rule needs to be applied for objects License Type, Feature and License object.

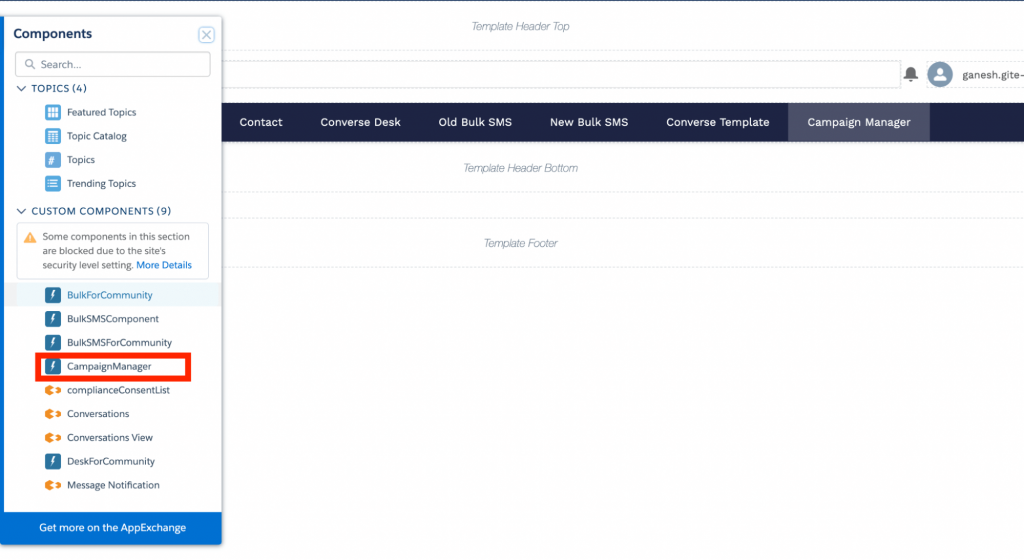
Steps to Navigate to Campaign Manager

  • Navigate to the builder in the salesforce community
  • For the campaign manager, we have created a component CampaignManager as highlighted in the following image
  • The user just has to drag and drop that component on the required page 
Navigate to Campaign Manager