1

Email To Text Overview

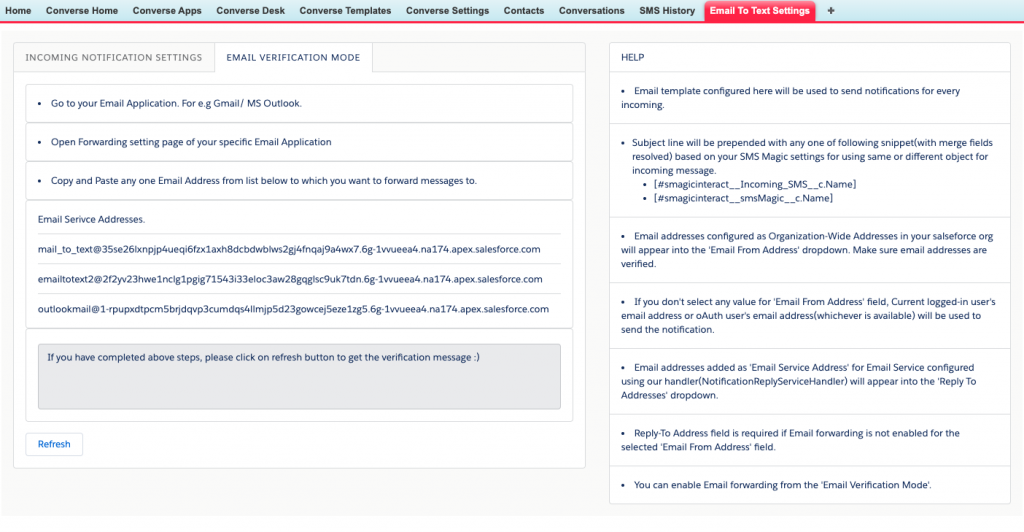
You can setup an organization-wide email service that routes the replies to notifications received from Salesforce email service without logging in to the Salesforce platform. The application allows you to do the following:

  • Reply to email notification without logging in to the Salesforce platform.
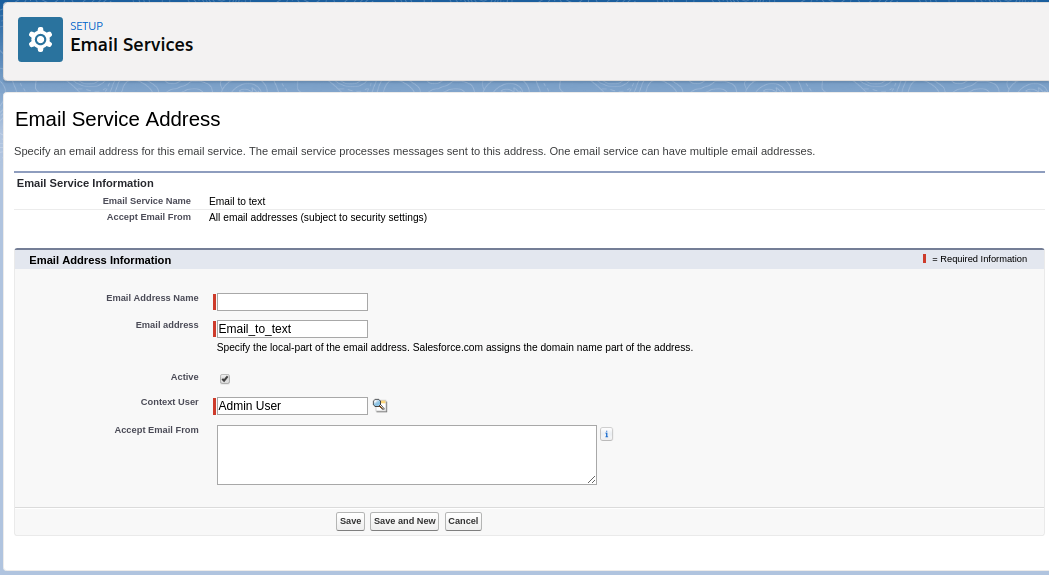
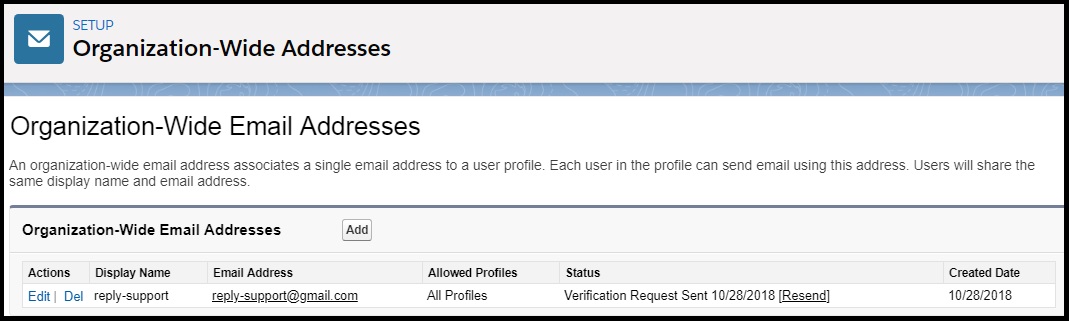
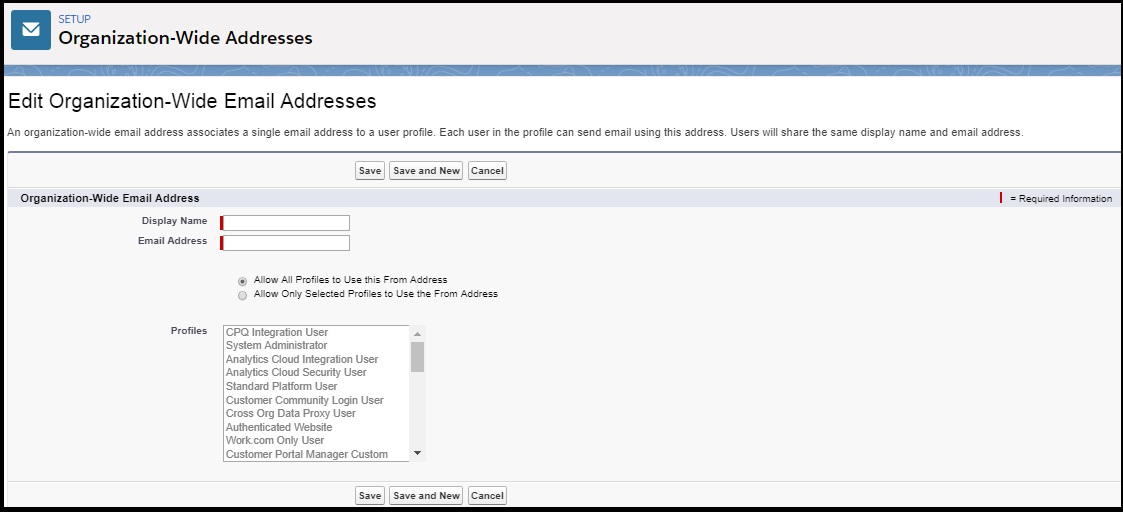
  • To set up an organization-wide email address to route reply for notifications to the Salesforce email services address.

Prerequisites

Some of the prerequisites for a manual setup for reply notification are as follows:

  • Install the email-to-text package in the Salesforce platform.
  • The SMS-Magic application is version 1.64 or higher.
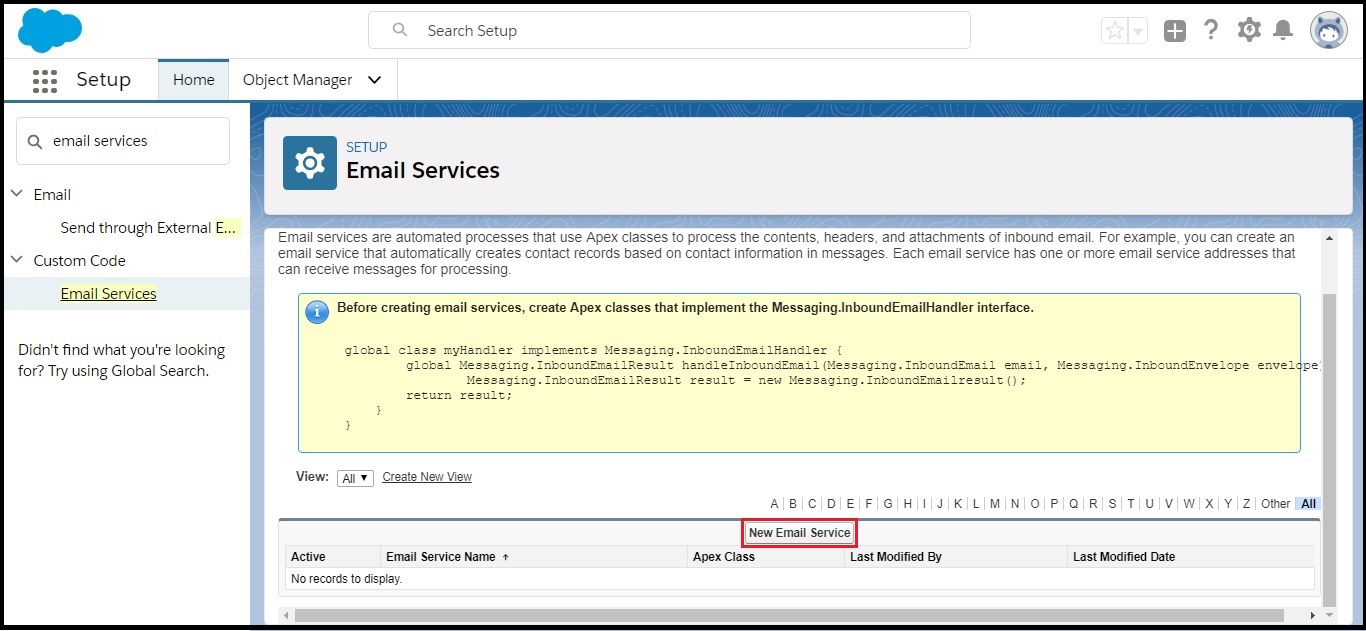
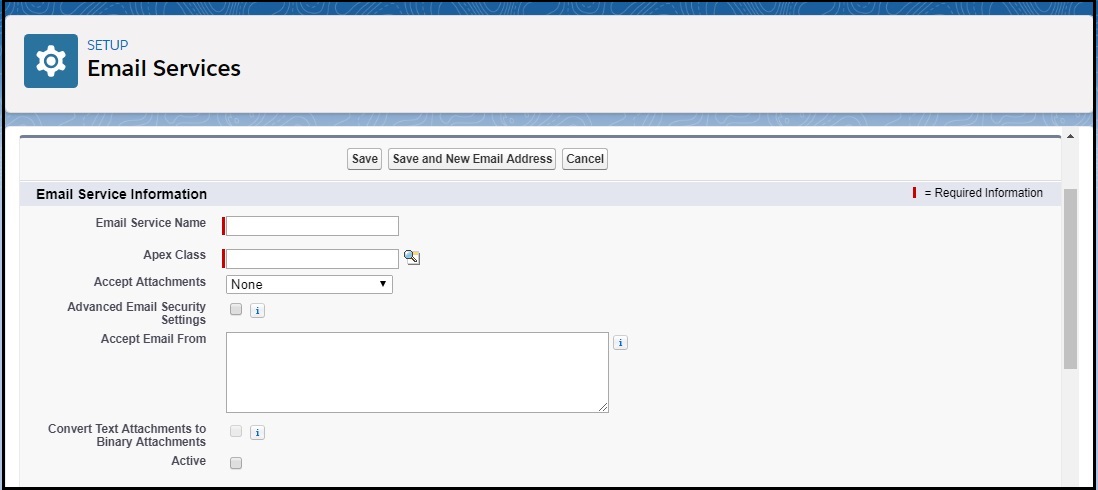
  • The user has permission to configure Apex email services and email service addresses.
  • The user has permission to create Apex classes.


Setup Email Services

You can configure the Email Services to handle the inbound messages. Perform the following steps to manually set up Email Services:

  1. Click on the Salesforce navigation bar and then click Setup.
  2. Select Email Services by:
    • Use the Search Setup/Quick Find search field, or
    • Select Platform Tools > Custom Code > Email Services.
  3. Click New Email Service.
  4. Enter NotificationReplyService in the Email Service Name field. This is mandatory.
  5. Enter NotificationReplyServiceHandler in the Apex Class field. This is mandatory.
  6. Do not enter values in the Accept Email From text box.
  7. Select Active to enable the email services.
  8. Click Save and New Email Address.
  9. For more information about Email Services, see Defining Email Services.

Email Service Address Configuration Steps

  1. Enter ‘Email Address Name’ in the Email Service Name field. This is mandatory.
  2. In the Email Address field, enter the local-part of the email service address. Salesforce generates a unique domain-part for each email service address to ensure that no two email service addresses are identical. The generated domain-part appears to the right of the Email Address field.
  3. Select the Active checkbox if you want the email service address to be activated when you click Save.
  4. Choose the Context User.
  5. Optionally, configure this email service address to only accept messages from certain senders by listing their email addresses and domains in the Accept Email From text box. Separate multiple entries with commas.
  6. Click Save to save your changes, or Save and New to define another inbound email address for this email service.


Setup Organization-Wide Email Address

After the email service is set up, you need to activate the email addresses from the user’s domain to receive alerts. Through the Salesforce platform, you can activate the email service address. To activate the Email Service Address, perform the following steps:

  1. Click on the Salesforce navigation bar and then click Setup.
  2. Select Email Services by:
    • Using the Search Setup/Quick Find search field, or
    • Selecting Administration > Email > Organization-Wide Addresses.
  3. Click Add.
  4. Enter a display name in the Display Name field. For example, reply-support.
  5. Enter the alias email address in the Email Address field. For example, reply-support@gmail.com.
  6. Select Allow All Profiles to Use this From Address.
  7. Click Save.
  8. This setup sends a verification code / link to the alias email address. You need to activate the code to verify the alias email address.


Create An Email Template

We are providing a default template for Addon Package users. If you want to create a separate template you can follow the steps and create your Email template and many more as per your requirements.

  1. Click Setup
  2. Search Classic Email Templates in the Quick Find and go to that page.
  3. Click New Template.
  4. Select Text in Step 1 and click Next.
  5. In the Email Template Information Form type in a name for the Email Template and a Unique Template Name.
  6. Fill the Subject field with [#smagicinteract__Incoming_SMS__c.Name] or [#smagicinteract__smsMagic__c.Name] to receive proper notification.
  7. Click Save.


Notification Settings

Overview

This is a separate installation package provides a similar Email To Text functionality with a capability to configure email forwarding and verification via UI or use the functionality without forwarding enabled. To enable Email to Text notification with addon package, you must disable “Notification on Incoming” option given in SenderID and Assignment section under Converse settings as shown below.

Once installation is complete, add “Email to Text Settings” tab and follow below instructions to enable Email to Text notification.


Incoming Notification Settings Tab

  1. Click Edit.
  2. Select an Email Template if don’t need the default template.
  3. The subject is fetched from the template.
  4. Add a From Email Address.
  5. The Email Body is pre-filled from the template selected above.
  6. Select a Reply To Email Address.
  7. Click Update Settings.

Email Verification Mode Tab

Move on to the next tab. Follow the instructions mentioned on screen and you are good to go.

Note: To enable Email to Text notification with addon package, you must disable “Notification on Incoming” option given in SenderID and Assignment section under Converse settings.