Exporting Campaign Statistics
You can export the data of Campaign Statistics as per your requirement by creating a custom report using objects Converse Campaign and Recurring Statistics. Following is the step-by-step process for the same.
Create Report Type
- Click on Setup. For classic click on Setup and for lightning click on Gear Icon ⚙️ > Setup.
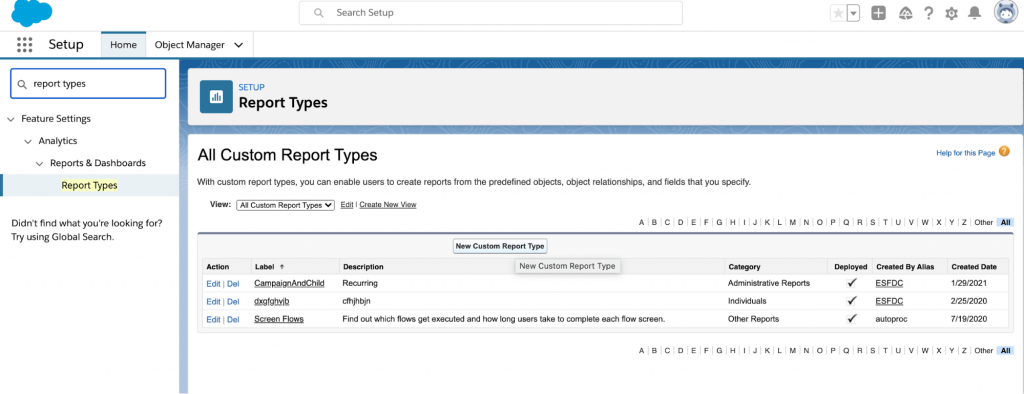
- In Setup search for Report Types.
- Click on New Custom Report Type
- In step one: Define the Custom Report Type
- Select Primary Object as Converse Campaigns
- Give any value to Report Type Label and Report Type Name
- Add Description
- Select Store in Category as Administrative Reports
- In Deployment Status select Deployed
- Click Next

- In step two: Define Report Records Set
- Click on Click to relate another object.
- Select another object as Recurring Statistics.
- Select A to B Relationship as “A” records may or may not have related “B” records.
- Click Save.

Create Custom Report
- Go to the Reports tab.
- Click on New Report.
- In Report Type, search the report type that you have created earlier in the above steps.
- Select the report type and click create/continue.

- You will land on the report creation page. Here you have to choose desired columns that you want in your report.
- First Click on Remove All Columns Option. This will remove all columns from the report.

- Next, in the quick find box of the Field section, search for Converse Campaign ID.

- Similarly, do the same for the following fields. (follow steps 7 and 8)
| Object | Field | Description |
| Converse Campaign | Name | Name of the Campaign |
| Converse Campaign | Converse Campaign ID | ID of the Campaign |
| Recurring Statistics | Recurring Statistics ID | ID of the Recurring Campaign |
| Converse Campaign | Converse Template: Converse Template Number | Template used for the Campaign |
| Converse Campaign | isRecurring | Describes if the Campaign is Recurring |
| Recurring Statistics | Status | Status of the Campaign |
| Converse Campaign | Failed Reason | Failed Reason for the failed Campaign |
| Converse Campaign | Created Date | Created Date of the Campaign |
| Converse Campaign | End Date | End Date of the Campaign |
| Recurring Statistics | Executed Date | Last Executed Date of the Campaign |
| Converse Campaign | Next Scheduled Date | Next Scheduled Date of the Campaign |
| Converse Campaign | Object | Object selected to run the Campaign |
| Recurring Statistics | Total Records | It is the total number of records that were present in your List view or Report at the time of processing |
| Recurring Statistics | Processed | It is the number of valid records processed from List view/ Report to trigger messages. Records that do not have phone field value won’t be processed. |
| Recurring Statistics | Sent | It is the total number of messages sent after processing valid records from the List view/ Report, excluding messages failed in the system with SMS-History status as ‘ERROR’ or ‘FAILED’. |
| Recurring Statistics | Delivered | It is the total number of messages delivered successfully |
| Recurring Statistics | Response | It is the total number of incoming messages received against the delivered messages |
| Recurring Statistics | Response Rate | It is the percentage of the number of incoming messages received divided by the total delivered messages |
| Recurring Statistics | Credits Consumed | Total credits consumed for the Campaign |
- You can add Filters from the Filters Section i.e. Range of created dates must be from <x> to <y>.

- Click on Run Report.
- Click on Save As.
- Add Report Name, Report Description, Report Unique Name, Report Folder, and click on Save.
- Your report is saved now.
- You can customize it again by clicking on your Report and clicking on Customize.
- To Export your report data in Excel form, click on Export Details.

- Select desired Export File Encoding and Export File Format and click on Export.
