Create a Campaign
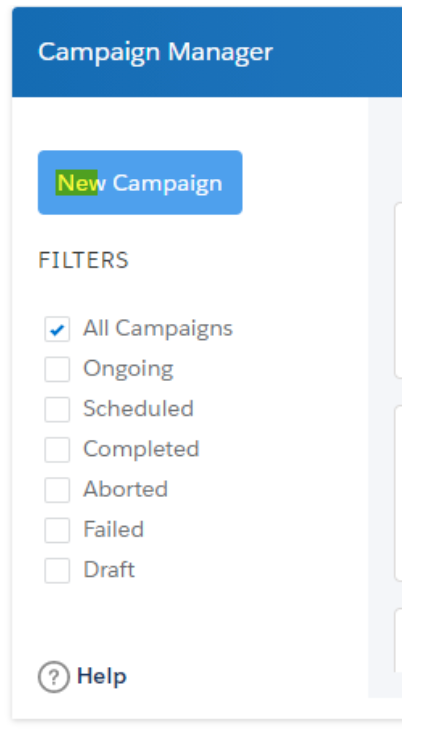
Here, users can use the filter to select and view either the ongoing campaigns, scheduled, completed, aborted, failed, draft campaigns, or all campaigns.
1.Click on the New Campaign button
2. In the pop-up window, enter the Campaign Name, Objective, and Description.
- Under Campaign Name, type the name of the Campaign
- Under Objective, type an objective for launching the campaign
- Under Description, type a description for the new campaign
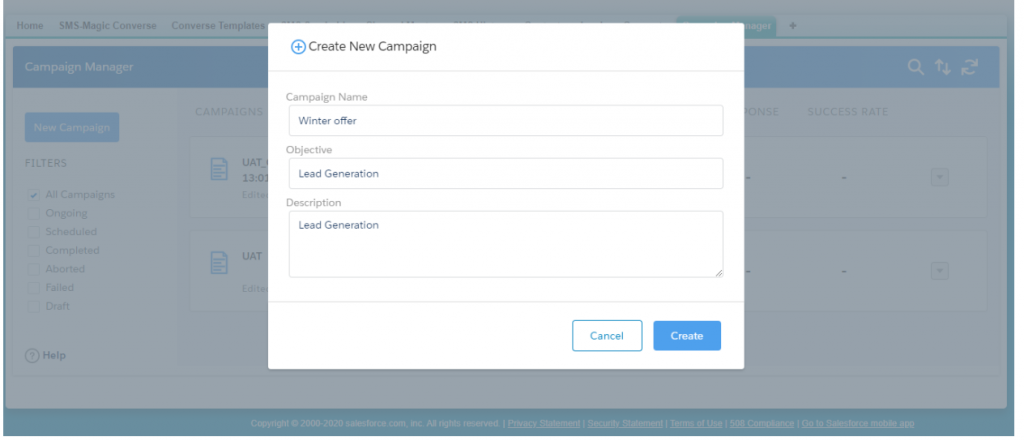
3. Click on the Create button to continue
4. At the top of the Campaign Builder page (see the figure below), you’ll see a summary of the information you entered in the popup. Click on the small Edit link to edit the summary information.
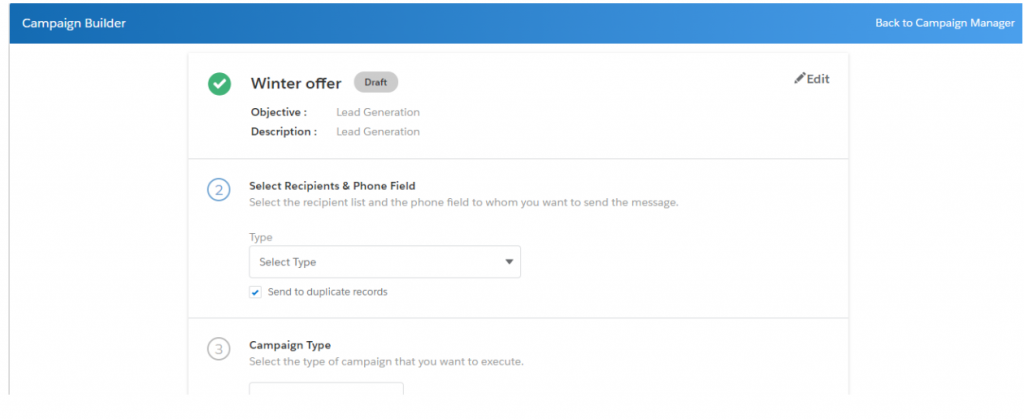
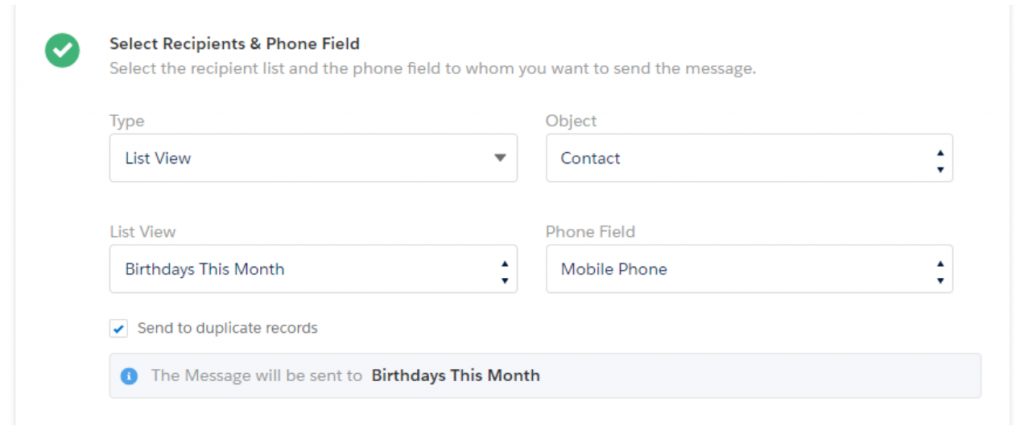
5. Under Select Recipients & Phone Fields, click on the Type drop-down and select one of the following:
- List View
- Report
6. Choose an object from the Object drop-down. From List View, choose the list view for which you want to run this campaign, and also choose the Phone Field that you want to target in this campaign.
Note – Make sure that you have the required permission to access the selected phone field.
| Field | Description |
| Object | Select the object to define the corresponding recipient list |
| List View | Select the list view that will define the recipient list |
| Phone Field | Select the relevant phone field that has been configured in message object configurations in Converse Settings. Make sure that you have the required permission to access the selected phone field. |
7. When you select a Report, the page displays the following fields:
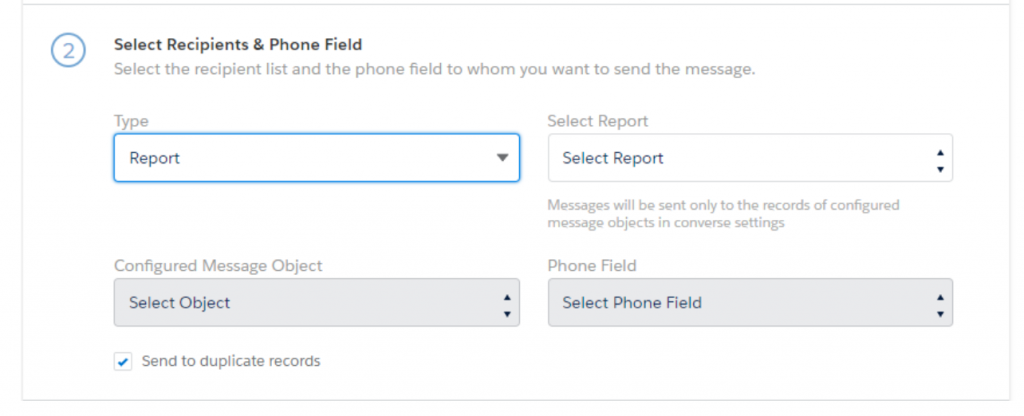
| Field | Description |
| Select Report | Select the report that needs to be used for generating the recipient list. These reports are generated based on the pre-defined Salesforce reports for the different message objects that you have configured. All reports are tabular in structure. |
| Configured Message Object | Select the object to define the corresponding recipient list. |
| Phone Field | Select the relevant phone field that has been configured in message object configurations in Converse Settings. Make sure that you have the required permission to access the selected phone field. |
8. Select the ‘Send to Duplicate Records’ check box if you wish to include duplicate records in the campaign recipient list
9. In the ‘Select Sender ID and Template’ section, click on the Select ID dropdown and choose sender ID using which you want to send the messages.
10. In the Select Template popup you’ll find options for selecting a template to use with the campaign. Choose a template from the Converse Templates. Click on the ‘Select’ button to display a pop-up window to use the template.
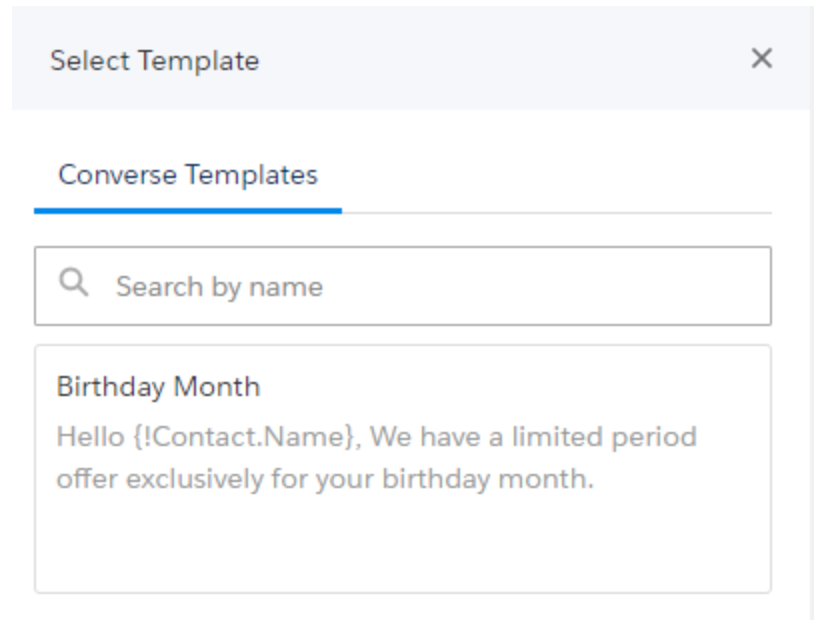
11. In the Select Template popup you’ll find options for selecting a template to use with the campaign. Choose a template from the Converse Templates. Click on the ‘Select Template’ button to display a pop-up window to use the template.
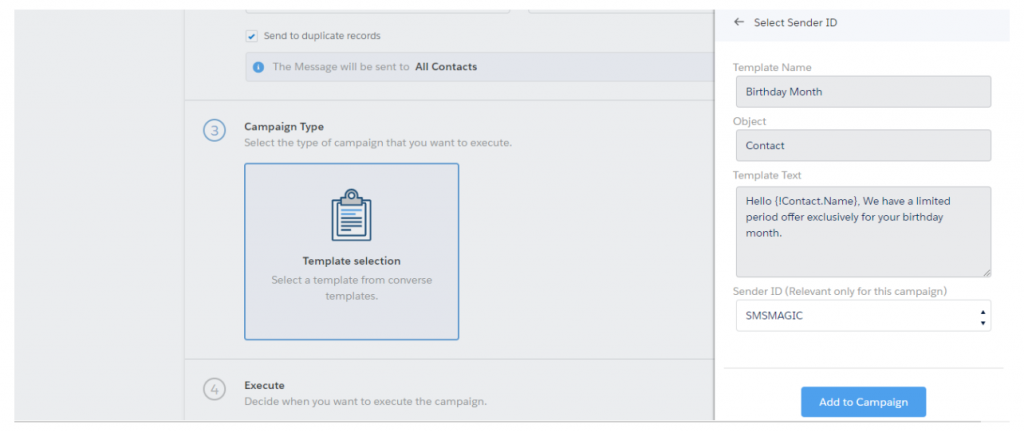
12. Once you click on the ‘Add to Campaign’ button, you will see the template added to the campaign as shown below:
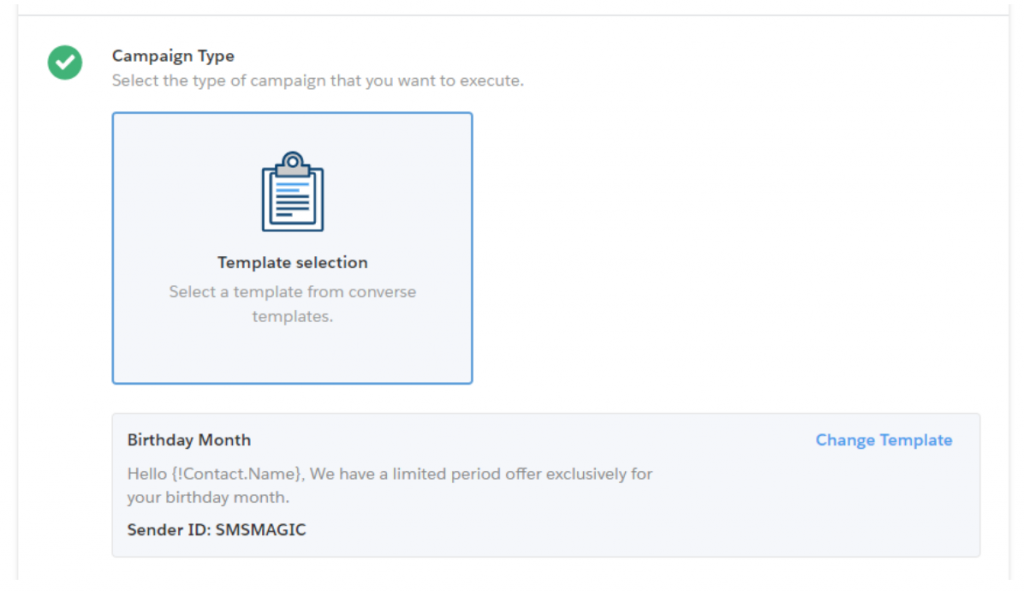
13. Once you click on the ‘Add to Campaign’ button, you will see the template added to the campaign as shown below:
14. Return to the Campaign Page and at the bottom of the page, choose when you want to execute the campaign. You can either choose to execute the campaign right away or you can schedule it for execution at a future time.
15. Click on the ‘Campaign Preview’ link at the bottom of the page to see the preview of the campaign configuration. Click on the ‘Close Preview’ button to dismiss the popup window and then click on the ‘Save Campaign’ button to commit your changes to this campaign.
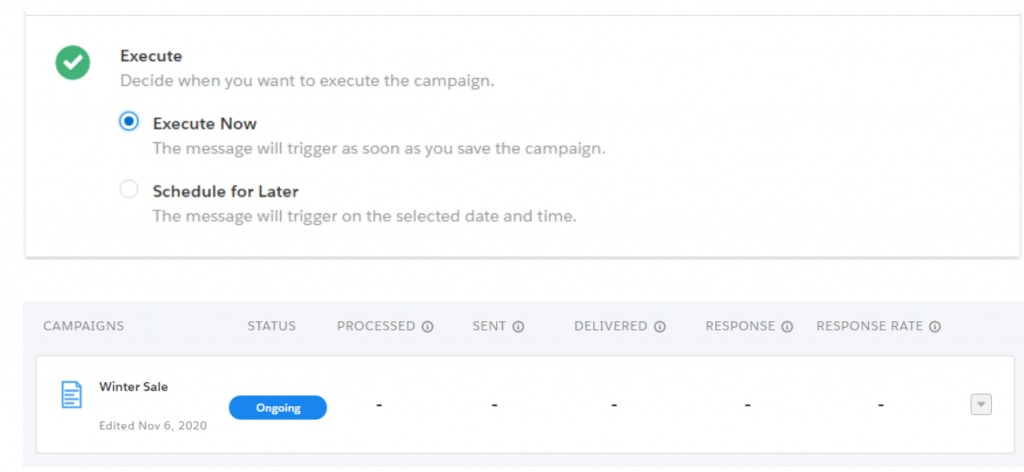
16. If you choose to execute right away, on clicking on the ‘Start Campaign’ button, you will see your campaign getting into ongoing status.
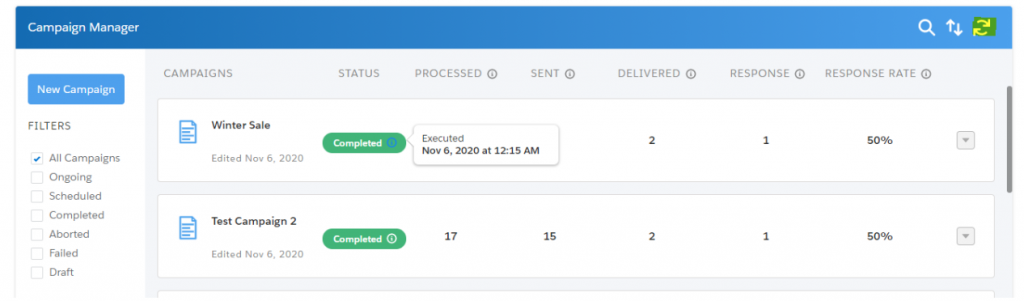
17. You can click on the refresh icon on the dashboard to see the updated status of your campaign. You will also see an info icon beside campaign status. You can get to know the executed date and credits consumed information on the hover of this info icon.
18. If you choose Schedule for later, a popup will appear in which you can choose to schedule it for one time or on a recurring basis as per your requirement.
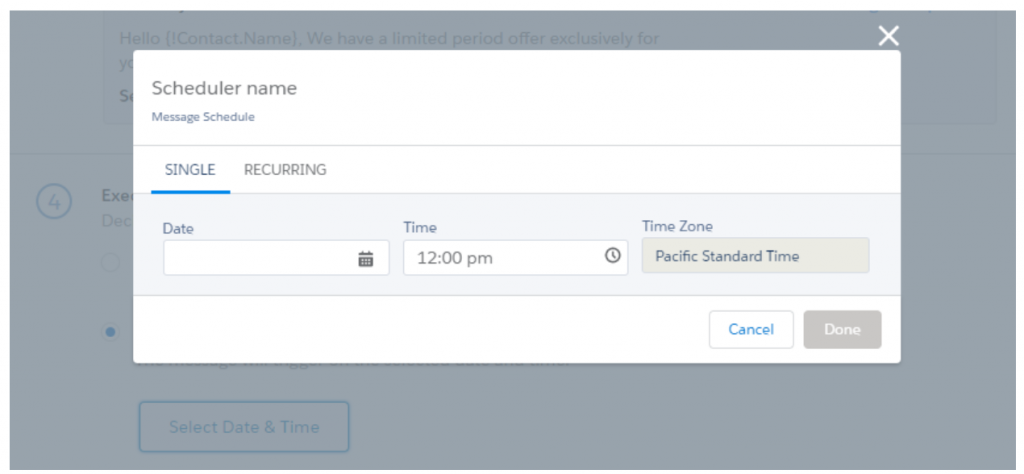
For more information, see Schedule Campaigns.