Archival of SMS History Records
Background information
SMS-Magic does not have its archive mechanism for SMS History data. If you are facing storage usage problems for your Salesforce org and want to clear some storage by deleting older SMS History data then you can do it using Data Loader or Workbench tools.
Before you delete data, we recommend you to take back-up of SMS data.
Back up Procedure of SMS History Records
This can be done using Workbench & Dataloader. Be sure to include this in the KB.
Steps I – Take Data Back up (Full Export for SMS History Object)
Step II – Prepare file for Deletion
Step III – run deletion
Step IV – Review Success & Failure logs from Dataloader / Workbench.
Best Practices to delete SMS History Records
- Don’t Delete SMS History in a single go
- Try Deleting SMS History in chunks by using filters
- Verify after every chunk gets deleted
- It is advisable to delete the SMS History by date
- Check if any Process Builders/Workflows/ Apps are active on SMS History object. If yes, deactivate them.
Methods to delete SMS history records
- By Dataloader/Workbench.
- By Query from Developer Console(if req we can provide the queries)
- By List Views
Steps to Delete SMS History through Workbench
Incorrect records are deleted or the customer wants to restore the deleted messages. They should be able to do it using a backup file.
This can be done using Workbench & Dataloader. Be sure to include this in the KB.
Step I – Take Data Back up (Full Export for SMS History Object)
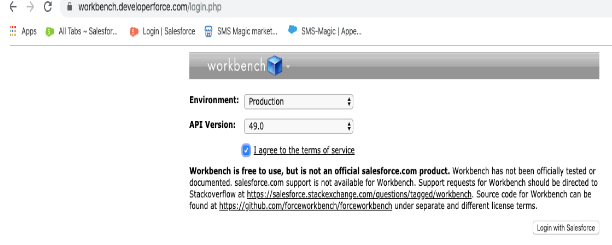
- Login to https://workbench.developerforce.com/
- Enter the org through which you are logging in (I have selected production)
- Enter the API version. (I have selected the latest version.)
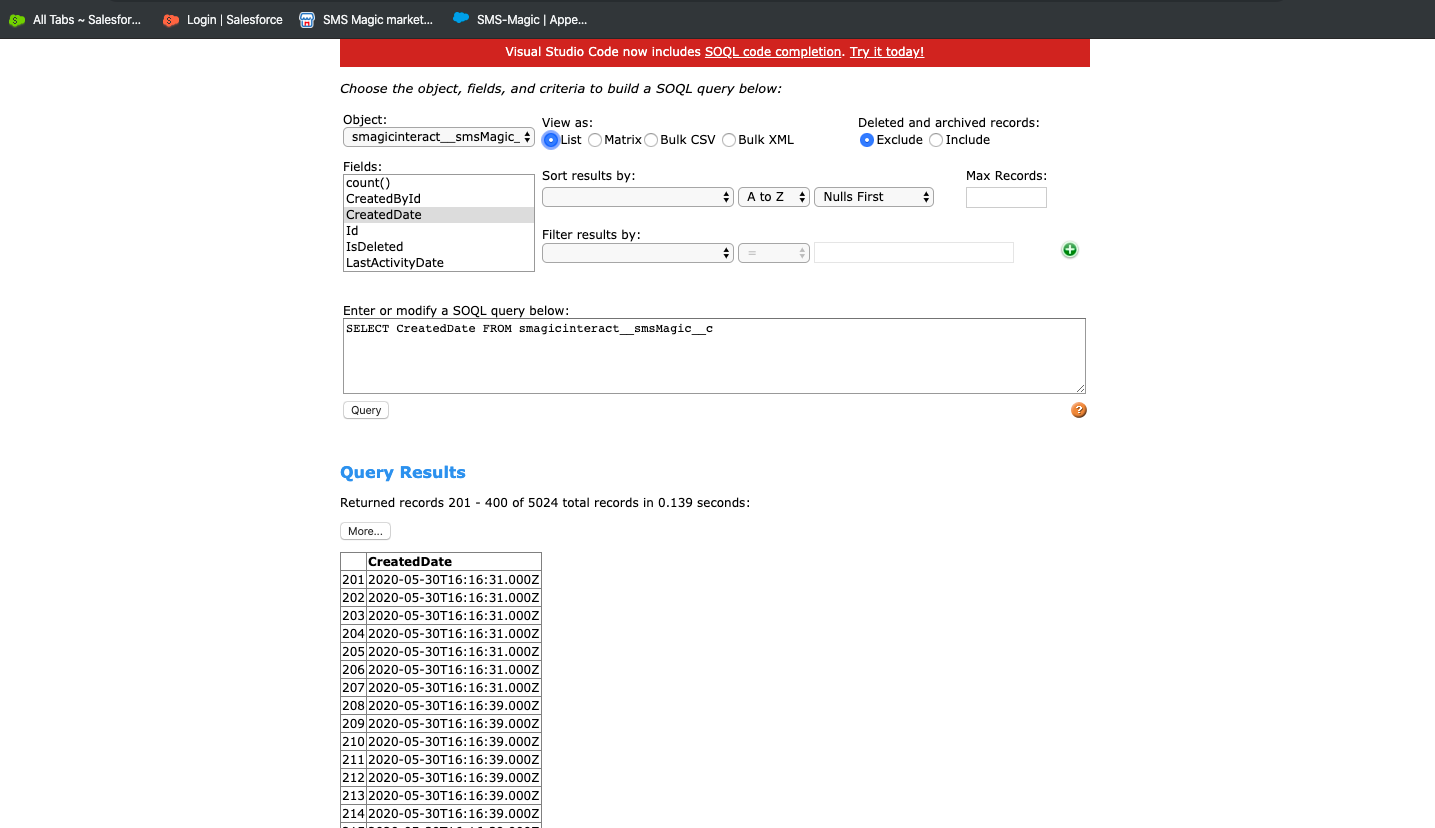
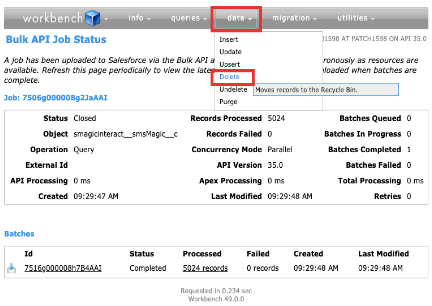
- In Action to perform – add “SOQL Query” and select the object as smagicinteract_smsMagic__c (This is the API name of SMS History object)
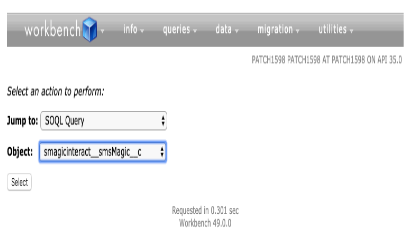
- Now you need to run the query by selecting the column you wish to display. You can either select listview or select Bulk CSV.
Listview data –
After Selecting Bulk Csv, it redirects to a page where the CSV file is created and displays the status when it is completed.
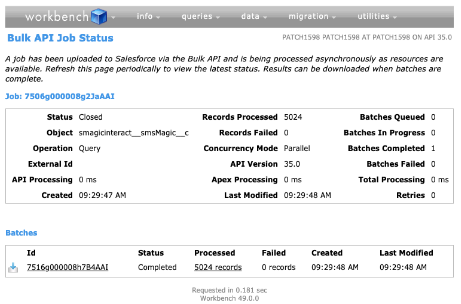
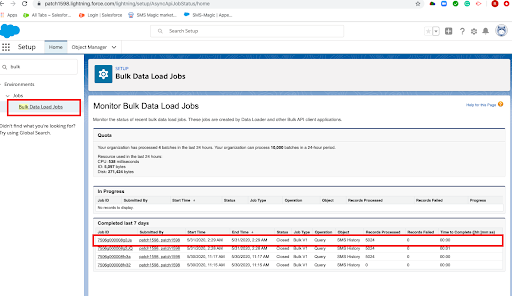
To view the created file you need to login to salesforce and search “Bulk Data load jobs” in the quick find box.
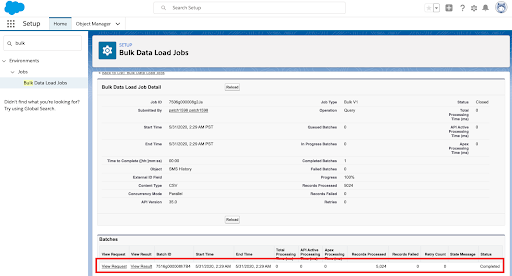
To view the CSV file, click on “View Request”.
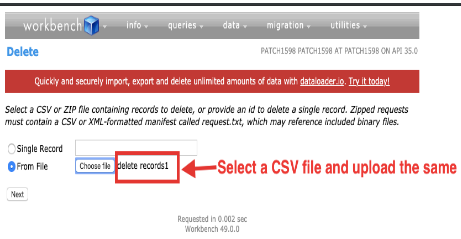
Step II – Prepare file for Deletion
Select Data→ Delete → Choose the file → Next → Select the CSV (The one requested from the salesforce to view the request).
Step III – run deletion (If you select -Permanently hard delete records option, you won’t be able to see/track deleted records from Recycle bin)