Setup Multi-Channel Integrations
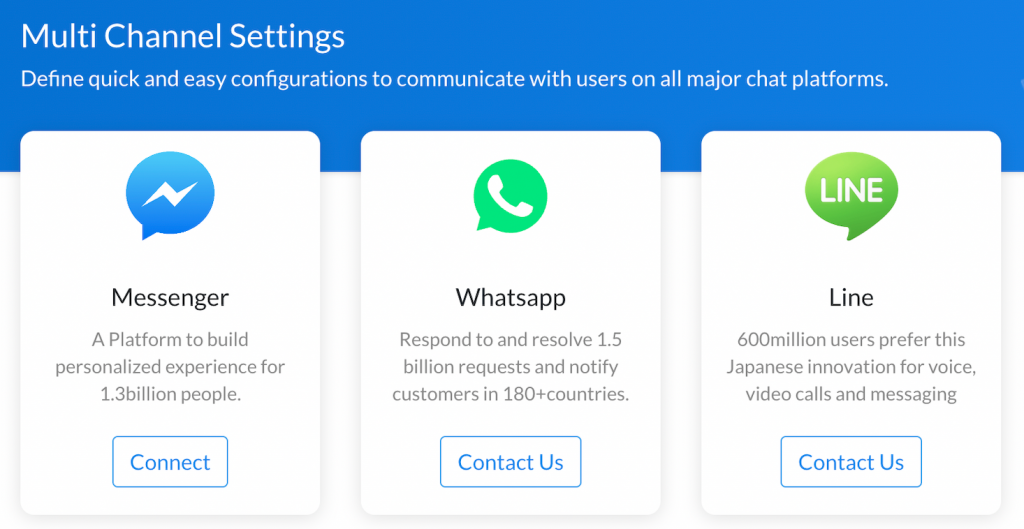
This section helps you set up Integrations for multiple messaging channels such as Facebook, WhatsApp, Line, WeChat, etc. Support for WhatsApp and Facebook Integration is available on the SMS-Magic Web Portal. Support for integrating other channels will be available soon.
For WhatsApp Integration, please Contact Us. For Facebook Integration, follow the steps mentioned in the next section.
Facebook Messenger Integration
Facebook Messenger helps in seamless conversations using the renowned social media messaging services. This can now be integrated with Converse Desk of SMS-Magic Converse Application on Salesforce for managing conversations from all ends. Integrating Facebook Messenger with Converse desk expands the customer outreach via social media. Gathering leads via comments and posts and managing conversations using Converse desk gets easier once the integration is complete.
Facebook Messenger subscribers are acquired only when the customer initiates the conversation through the Facebook Page that is integrated with the Customer Portal.
Prerequisites
- A valid Facebook profile for authentication.
- A minimum of 1 valid Facebook Page for integration.
1. To Integrate Facebook Messenger via Portal
- Log in to SMS-Magic Portal (https://app.sms-magic.com)
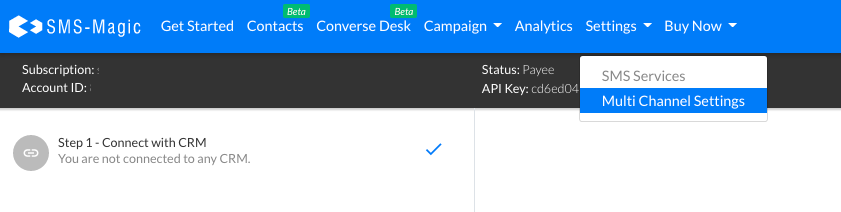
- On the top menu bar, click Settings. Click Multi Channel Settings. The integration page appears.
- Click Connect on the Facebook Messenger tile. The Create New Integration pop-up window appears.
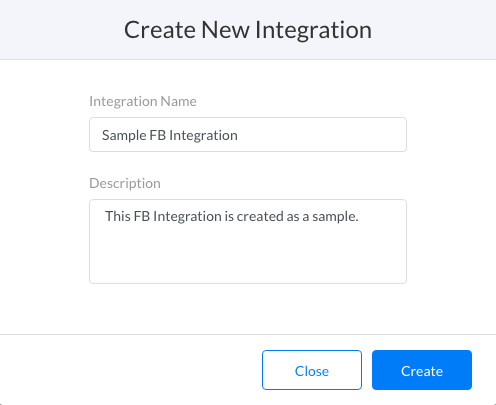
- Under Integration Name assign a name for the integration.
- Type a brief description.
 | The Integration Name is mandatory. The description field is optional. |
- Click Create. The Messenger Integration page appears.
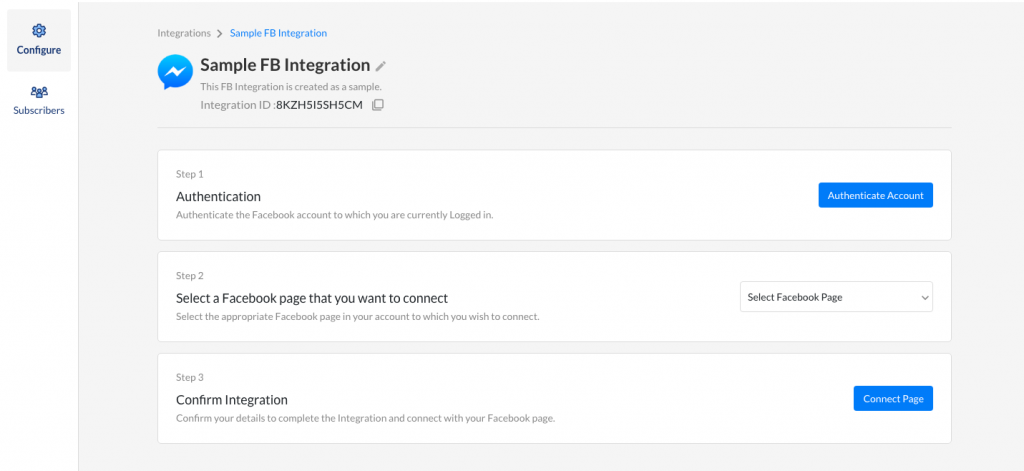
- Click Authenticate Account on the right to authenticate using your Facebook credentials. The Facebook Login page appears.
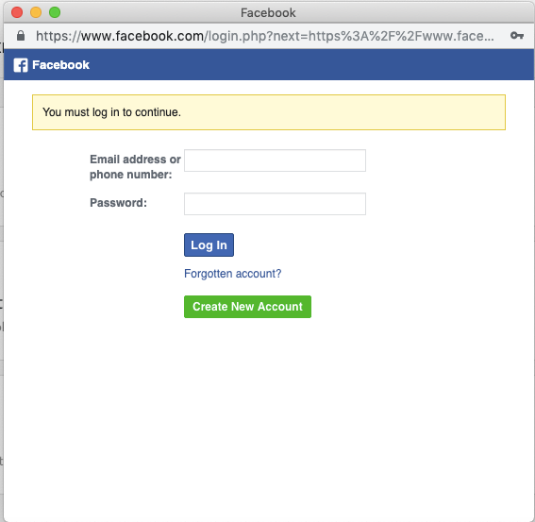
- Log in to the Facebook account. The Facebook page selection pop-up window appears.
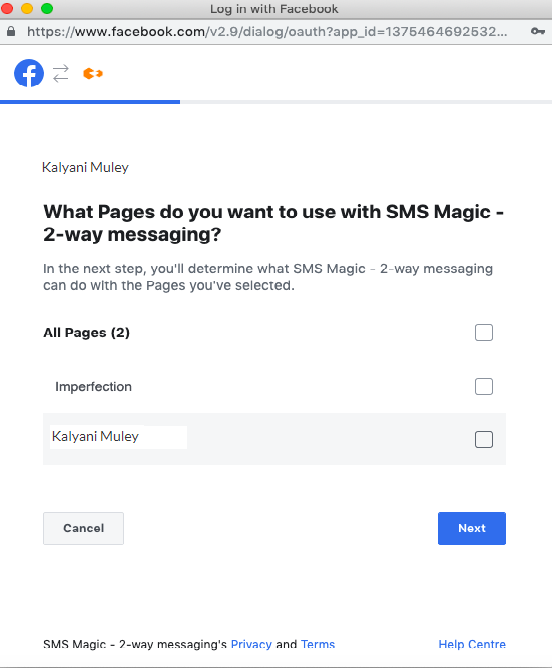
- On the Facebook pop-up window, click the pages for which you want to enable permissions.
- Click Next. The Permissions section appears.
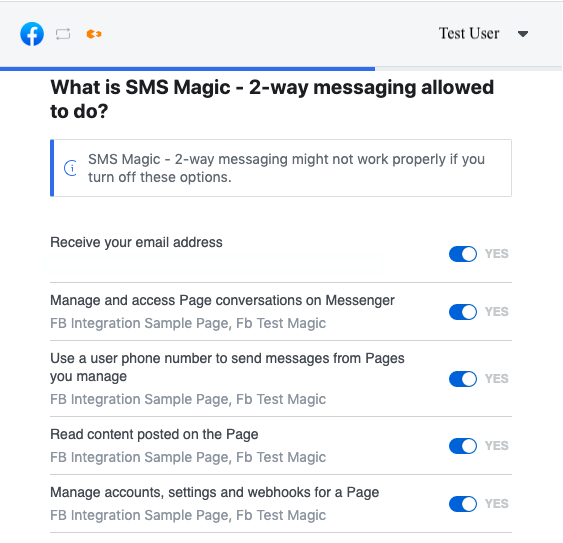
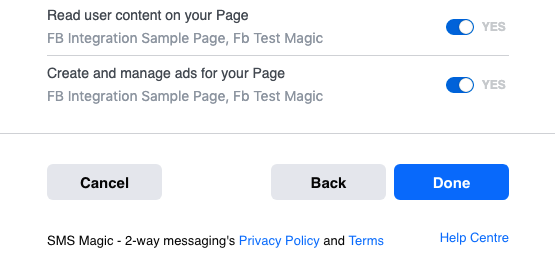
- Toggle the button to enable or disable the relevant permissions.
- Click Done. The Facebook confirmation page appears.
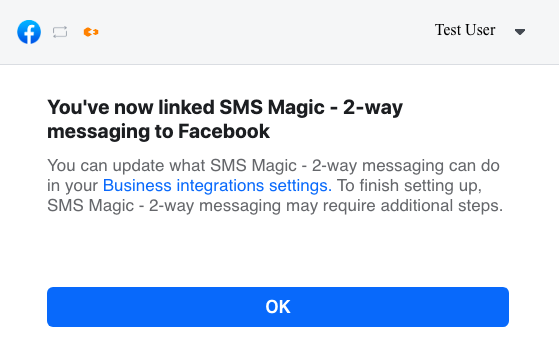
- Click OK. The authenticated Facebook account appears.
- On the Integration page, under Step 2, select the Facebook page from the drop-down list. The Page ID appears indicating the selected page.
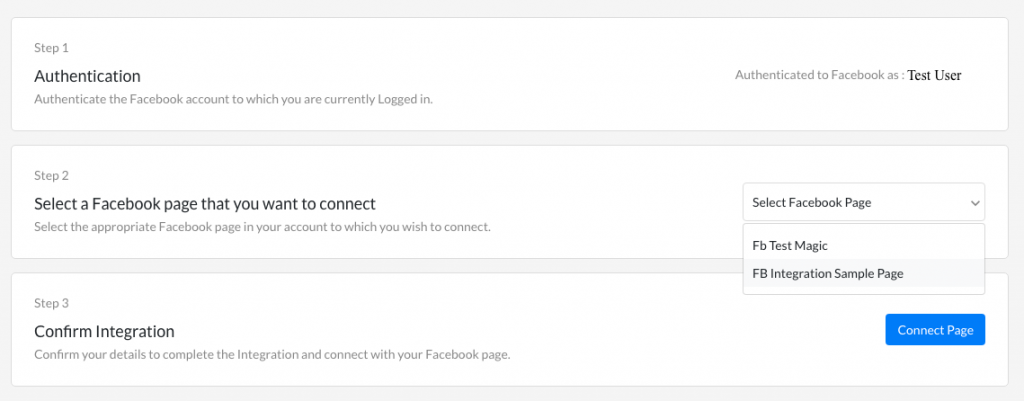
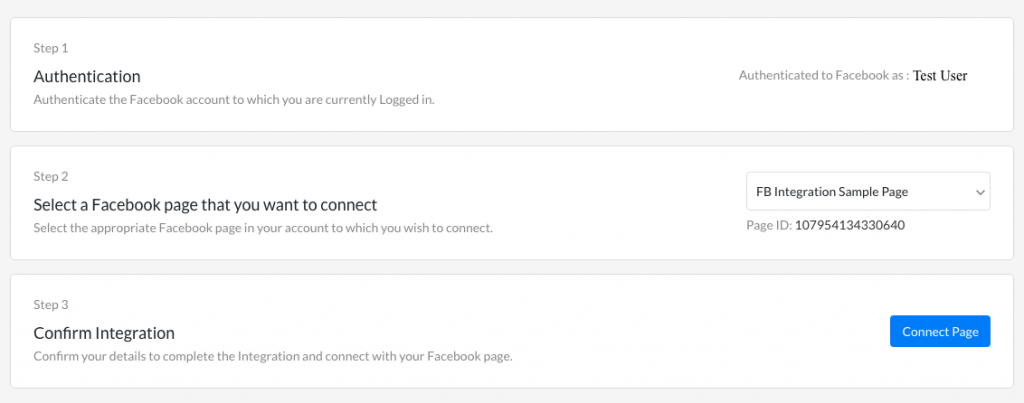
- Under Step 3, click Connect Page. The Facebook page integration is complete.
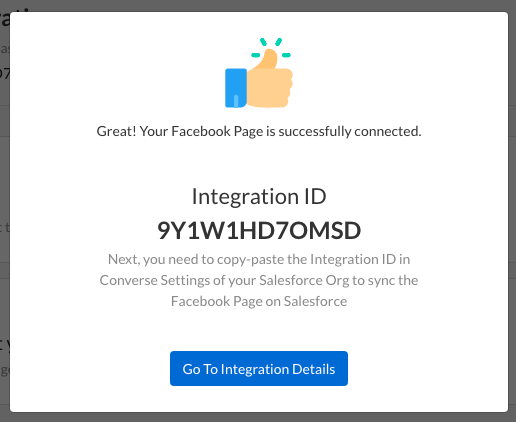
| Click Disconnect this Page and then click Disconnect from the drop-down list to delete the page connection. Click Disconnect this Page and then click Delete Integration from the drop-down list to delete the existing integration. Click Delete Configuration at the bottom of the page to delete the Facebook Page configuration and the account authentication. |
- Click Subscribers. The Subscribers section appears.
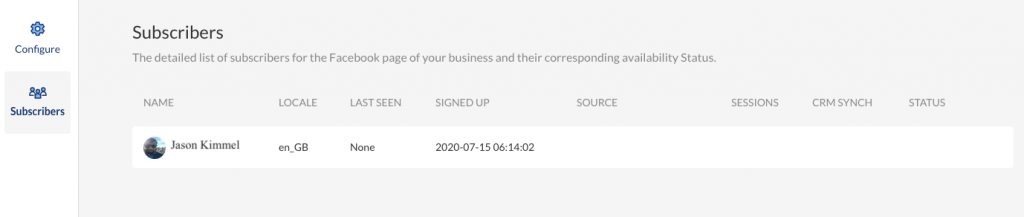
- View the list of customers who are added as subscribers.
| All customers sending a message for the first time to the Facebook page that you have integrated are added as subscribers. Hover over the subscriber row and click to send messages to the Subscribers. |
2. Manage Message History
You can view and manage all Facebook messages received and sent from within the Message History section. This section also comprises text messages under the SMS Tab. You can view all the Facebook messages under the Facebook Messenger tab.
- On the menu bar click Campaign and then select Message History. The Message History page appears.
- Click Facebook Messenger. The Outgoing Messages tab appears displaying all the messages that has been sent to subscribers from the portal.

- Click Incoming Messages. The list of incoming messages appears displaying messages that the portal receives from subscribers for all the Facebook pages that have been integrated for the business.

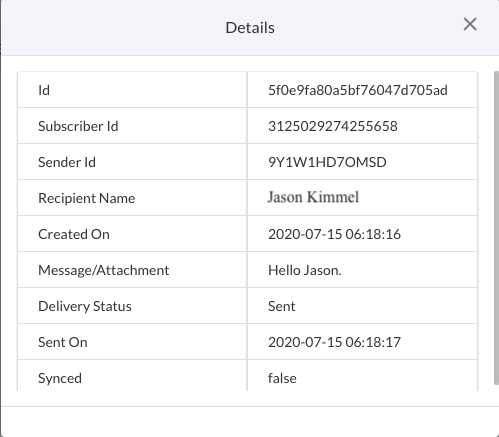
- Click
to view additional details about a specific incoming or Outgoing message. The Details pop-up window appears.