SMS-Magic Web Portal provides a capability for businesses to manage their customer (recipient) lists and use them to initiate messaging communication from SMS-Magic.
There are 2 different ways of managing your contacts
Contact Lists
Contacts Manager
Contact Lists
|
The list of contacts (recipients) uploaded as a CSV file while sending Bulk Campaign is stored as a Contact List for later use while sending Bulk Campaigns. The CSV file is saved as a Contact List when you Save the campaign.
You can view the saved Contact Lists under Campaign -> Contact Lists. Name of the List and the No. of Contacts in each list is visible.
Contact Lists can contain at max 50K contacts. There is no limit on the number of Contact Lists saved.
You can perform two actions on these lists-
Download – Download the list for your use
Delete – Delete the list if it is no longer required
Contacts Manager
|
Contacts Manager allows you to manage your contacts individually and create a Group of contacts. Individual Contacts are useful while having a direct conversation with the customers. Group of Contacts are useful to send Bulk Campaigns to a targeted audience.
You can add a maximum of 1000 contacts. To add more contacts to the Contacts Manager, please contact care@screen-magic.com.
Add a Single Contact
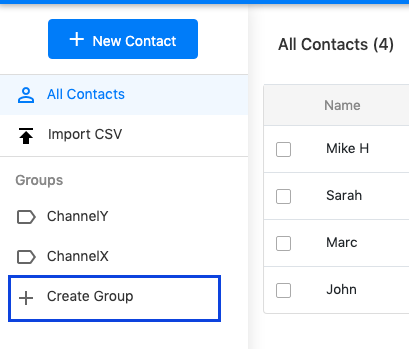
Click on the ‘New Contact’ button
Type in Full Name of the Contact
Select the Country Code (ISD Code) and type in Contact Number. e.g.: Select 91 for India and type in 98***64756
Type in Email ID. (This is optional)
Click on the ‘ Add’ button
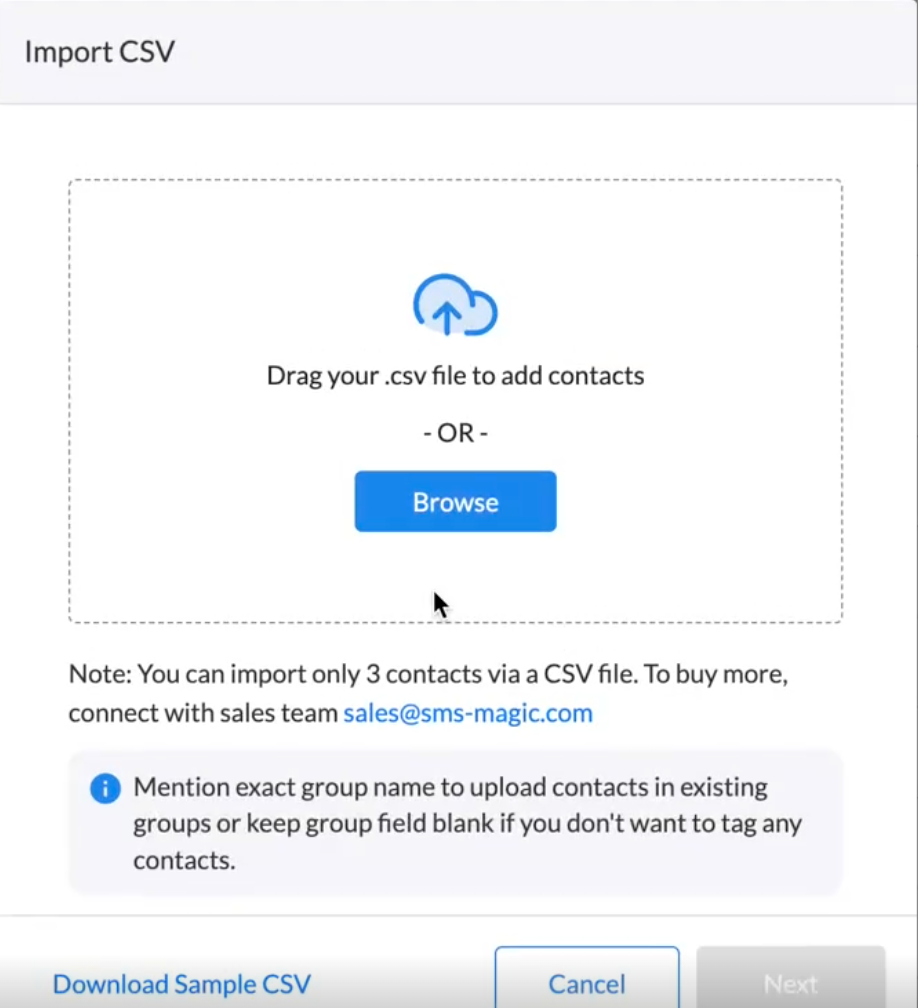
Add Contacts in Bulk
Click on the Import CSV button
A sample CSV can be downloaded for reference from the Import CSV dialog.
You can either browse or drag and drop the CSV file. (file needs to be in .csv format). The CSV can contain a maximum of 1000 records.
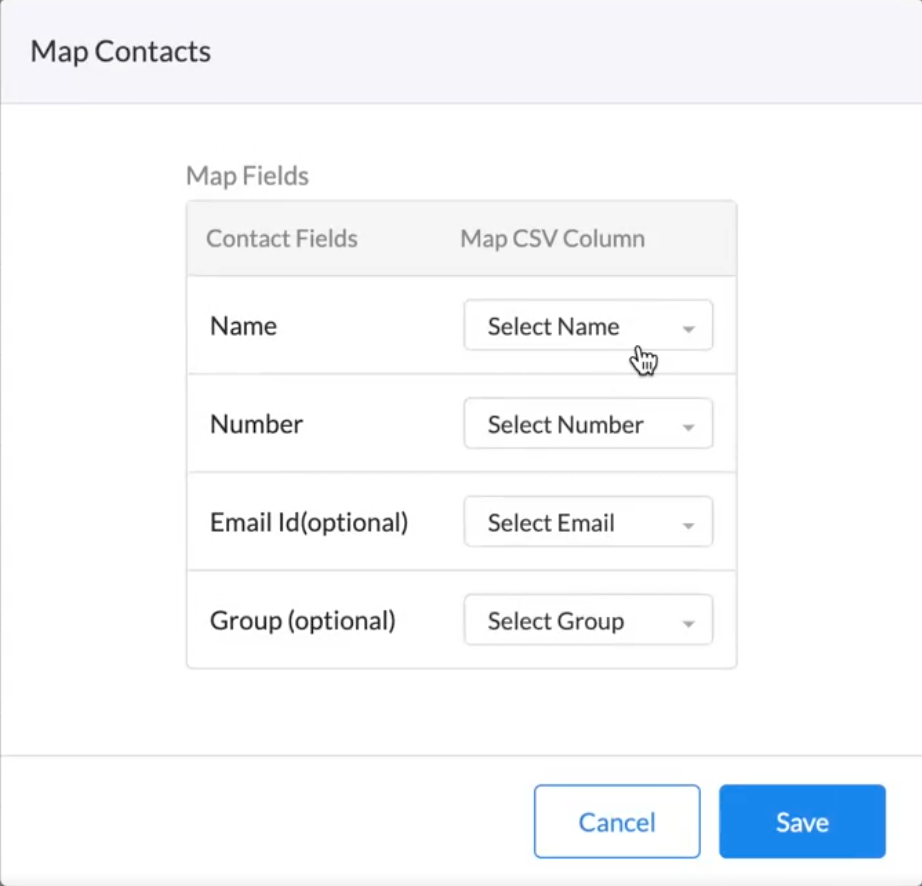
Click on the ‘Next’ button
Select the relevant columns in CSV to map the data with the fields of Contacts Manager
If you wish to add all the Contacts in CSV to a single group, select the Group from the dropdown
Click on the ‘Save’ button
Your Uploaded CSV file:
Should have Mobile Numbers of Recipients with the Country code (ISD code)
Should not have duplicates
Notes:
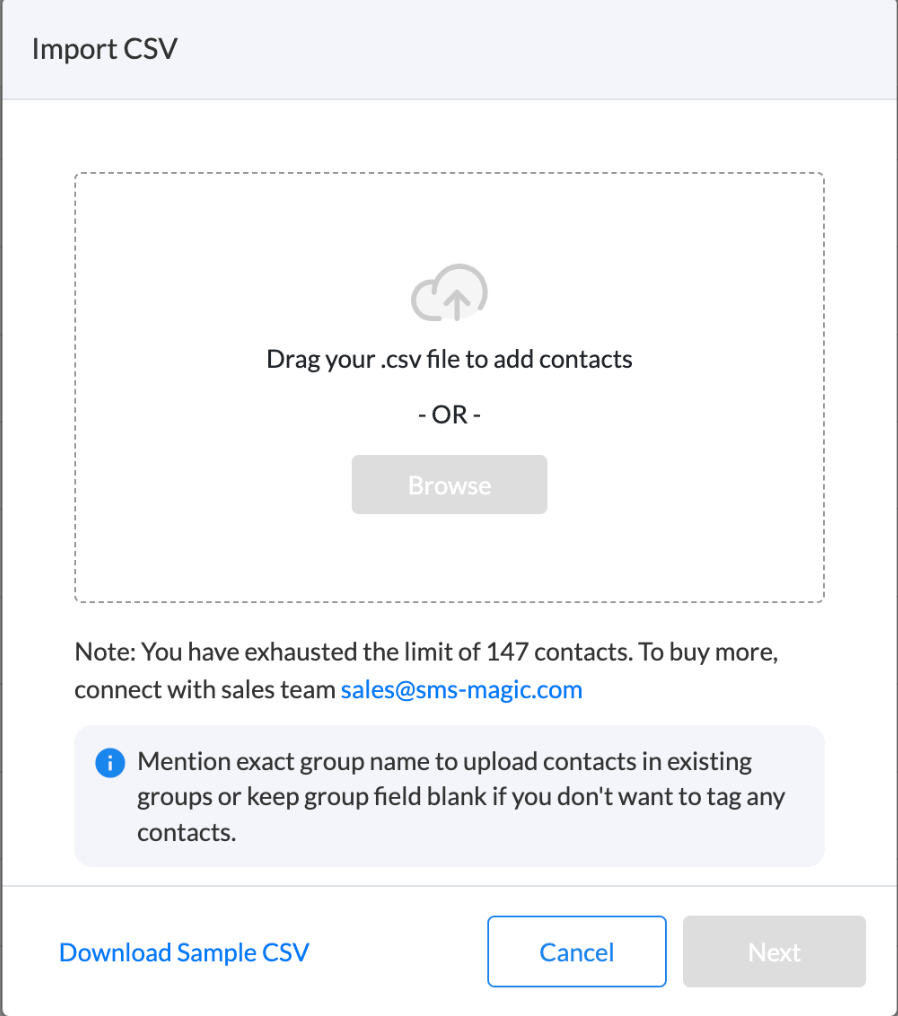
While you import a CSV file, you will be informed about the remaining contacts limit.
If the limit is already exhausted, the ‘Browse’ button itself will be disabled, as shown in the image below:
Map Contacts
Map contacts by selecting relevant options from the drop-down list against each contact fields and click on the Save button.
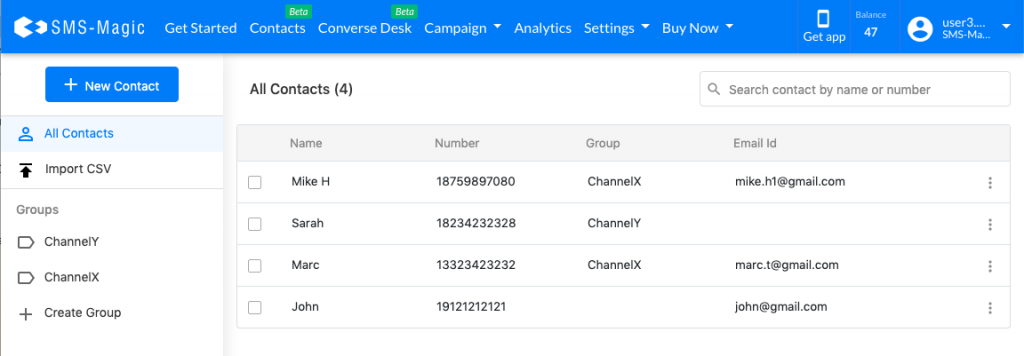
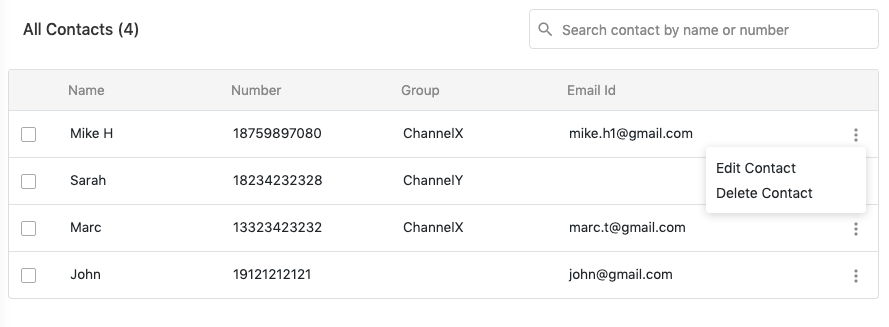
All Contacts
You can view all the contacts added for the SMS-Magic account under the ‘All Contacts’ section
All Contacts list is public and is visible to all Admin and Standard users of that account
You can see Name, Number, Email Address of the contact
You can also see the Group to which the contact is added
Edit a Contact
Click on three dots and select Edit Contact
Modify the details
Click on the ‘Save’ button
Delete a Contact
Click on three dots and select Delete Contact
Confirm by clicking on the ‘Delete’ button
Deleting a contact deletes it from All Contacts and Contact Group both
You can also select multiple contacts and Delete them at once
Search Contacts
You can search matching Contacts using the Search Bar by typing in Name or Number
Create Contact Group
Click on + Create Group on the Left Panel
Enter Group Name. Group Name must be unique across the SMS-Magic account.
Click on the ‘Save’ button
Contact Group’s visibility and access are private to the user who created them
View Groups
The created Groups are listed on the Left Panel under the section Groups
Click on a Group name to see the Contacts added to that Group
You can search for a contact in the Group using Name or Number
Add Contact/s to Group
Select one or more contacts from All Contacts
Click on Add to Group icon
Click on the Group you want the contacts to be added from the dropdown list.
Click on the ‘Apply’ button
The contacts will be added to the selected Group
Move Contacts within Groups
Select one or more contacts from a Group
Click on Add to Group icon
Click on the Group you want the contacts to be added from the dropdown list