1

Overview

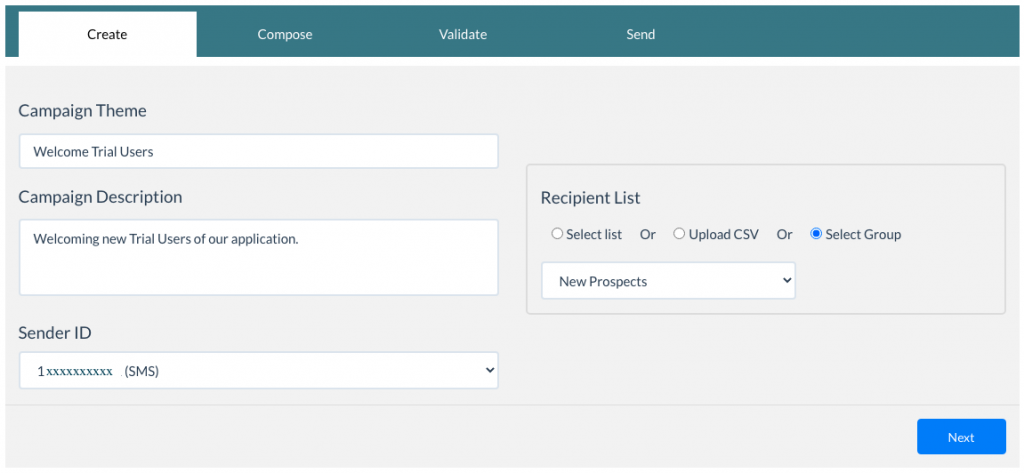
SMS-Magic allows you to run bulk campaigns using SMS/MMS/ WhatsApp to reach out to a large group of the target audience. The major use case for Bulk Campaigns is Marketing Promotions.

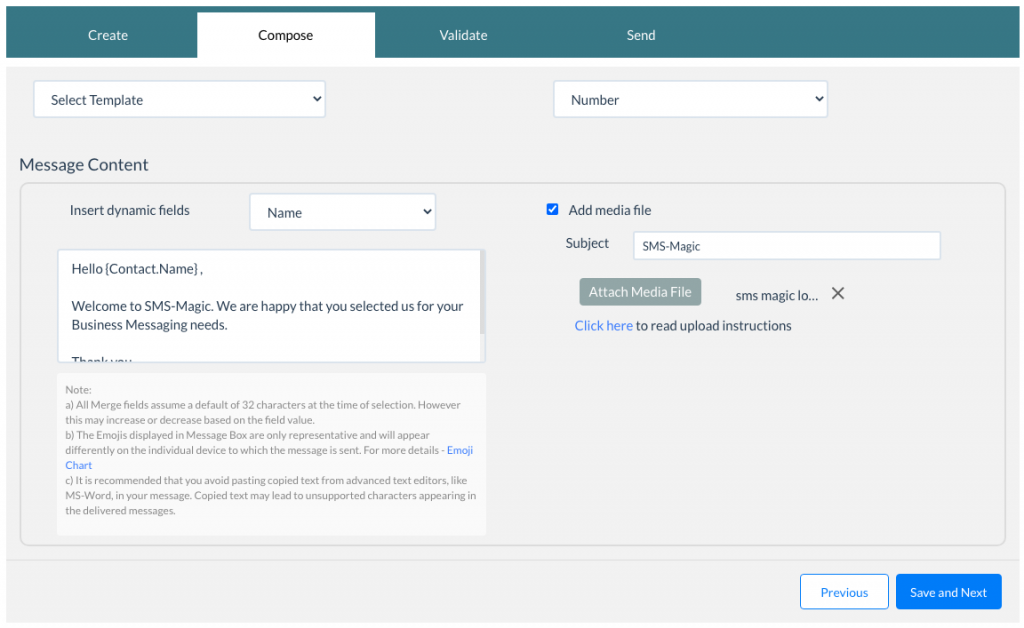
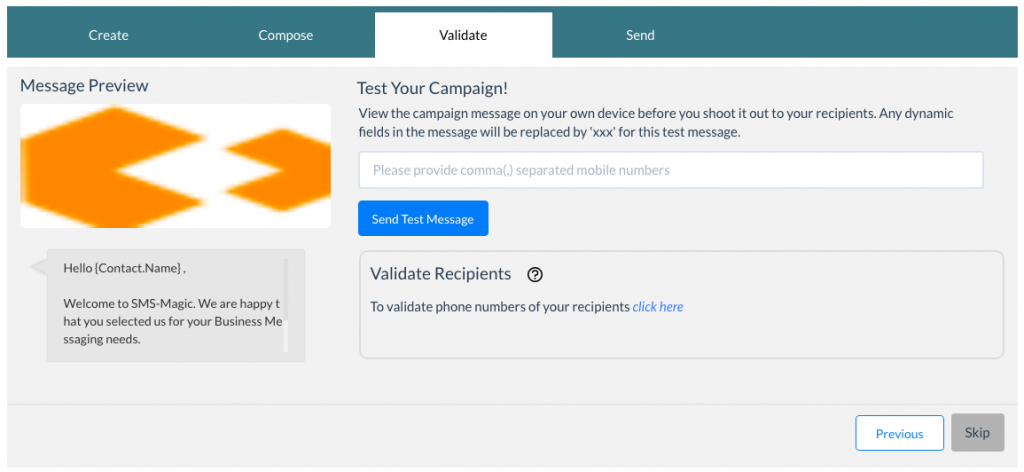
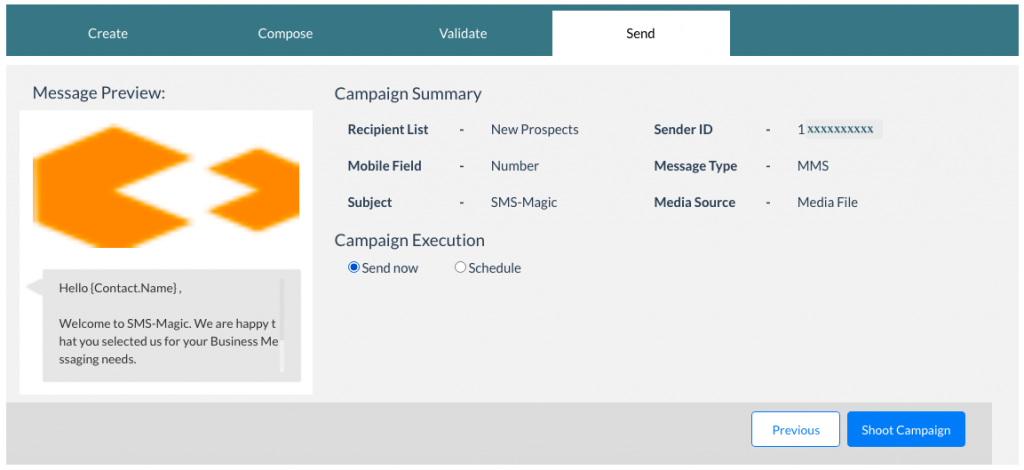
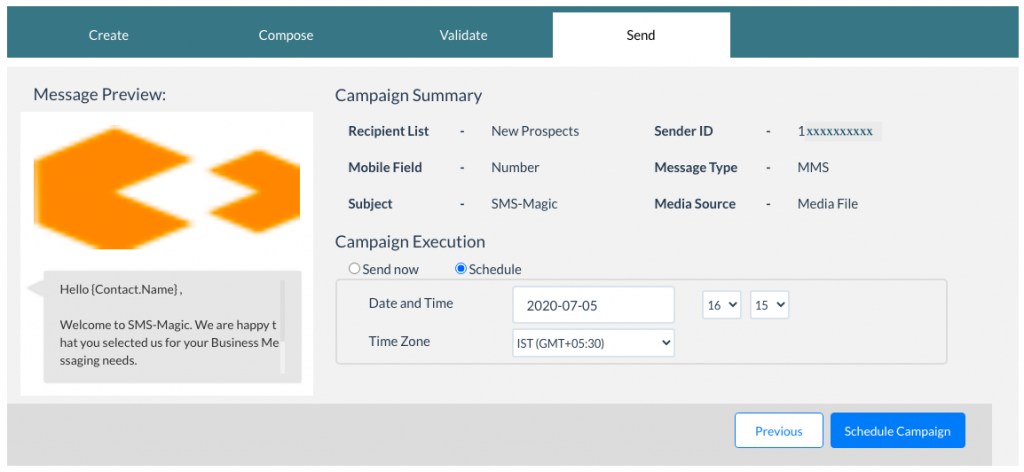
SMS-Magic allows you to create and shoot Bulk Campaigns on the SMS and WhatsApp channels. You can send text or media campaigns.

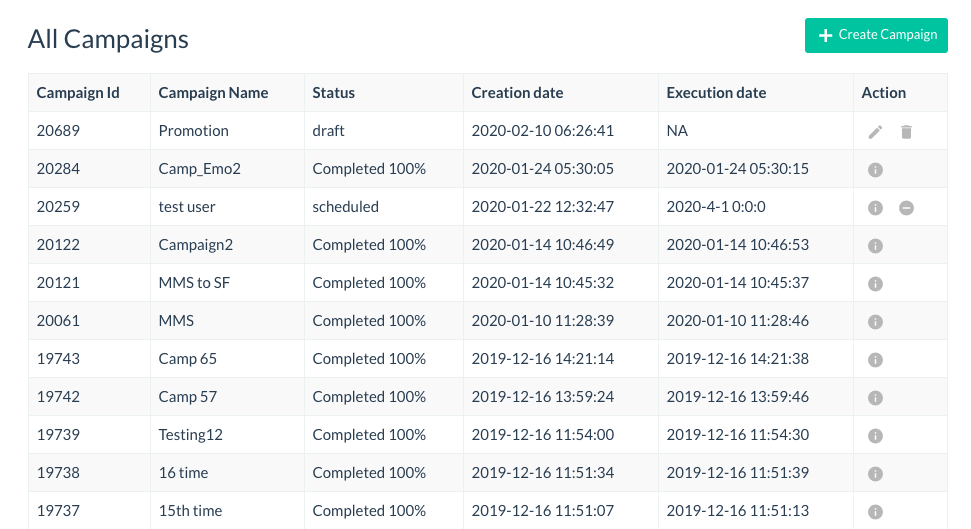
You can view the list of created Message Campaigns under Campaign > Message Campaign dropdown from the main menu.

A screenshot of a cell phone  Description automatically generated


Create Message Campaign

Follow the below 4 steps to create a campaign and launch it with ease!

Step 1: Create

  • Click on + Create Campaign button from the Campaigns List View page
  • Enter Campaign Theme (Name)
  • Add a detailed description to your campaign (This is an optional field)
  • Select a Sender ID you wish to use for this campaign from the dropdown
  • Select a Recipients list from the available options –
    • Select a saved Contact List
    • Upload a new CSV file of recipients
    • Select a Contact Group
  • Click on the ‘Next’ button
A screenshot of a cell phone

Description automatically generated

Step 2: Compose

  • Select Message Template. (This is optional for SMS/MMS Campaigns)
    • Only Message templates of type Campaign, will be listed in the dropdown
    • Message templates listed will be based on the channel configured for the selected Sender ID in Step 1
    • For WhatsApp, only Registered WhatsApp templates will be listed in the dropdown 
  • Select the Mobile Number field in your CSV/Contact List. In the case of Contact groups, the Mobile Number field is selected by default.

Note: If the rows in your uploaded/selected CSV have errors, you will be shown a warning dialog mentioning the number of rows ignored by us while processing your CSV file.

Warning Message for export
  • Compose the Campaign Message
    • Enter Text
    • Add dynamic fields from the CSV/Contact List/Contact Groups in the message text. (Dynamic fields will be replaced with actual data present in the CSV/Contact List/Contact)
    • Tick the check-box on the right to add media and use the campaign as an MMS Campaign. (This is an optional step and will work if MMS support is enabled for your country of operation).
    • For WhatsApp Campaigns, the Message Content will display the selected Template content. You can edit the text and the media as per your requirement.
    • Click on the ‘Save and Next’ button. The Campaign will be saved as a draft.
Notes: For WhatsApp Campaigns:

  • Message text should be the same as registered template text. Placeholders in the text should be replaced with merge fields.
  • The media file for the added Media Type can be changed/removed.
A screenshot of a social media post

Description automatically generated

Step 3: Validate

  • Preview the message
  • You can Test your Campaign by entering a few comma-separated valid mobile numbers 
  • Click on the ‘Send Test Message’ button. This helps you to test and validate how the Campaign message will look on a mobile screen
  • You can Validate Recipients in your selected CSV/ Contact List/ Contact Group. This will provide a count of valid mobile numbers.
  • Click on the ‘Skip’ button to move to the next section
A screenshot of a cell phone

Description automatically generated

Step 4: Send

  • Verify the entered details in the Send section. Click on the ‘Previous’ button to go back and edit the entered information if required.
  • The Campaign Summary has the following details –
    • Recipient List – Name of CSV/ Contact List/ Contact Group selected
    • Mobile Field – The name of the mobile number field selected
    • Sender ID – Selected Sender ID
    • Message Type – SMS/ MMS/ WhatsApp
    • Total Recipients – Total Number of Recipients in the List selected
    • Valid Recipients – Number of Recipients with valid mobile numbers in the List selected
  • Select Send Now to send the campaign immediately. Click Shoot Campaign.
  • Select Schedule to push the Campaign for a later period. Select the Date and Time and a time zone. Click on the ‘Schedule Campaign’ button.
  • The Campaign Status will be seen on the Campaigns’ List View page
A screenshot of a cell phone

Description automatically generated
A screenshot of a cell phone

Description automatically generated


Campaigns List

  • You can see the list of All Campaigns on this page. In the Action column, click the info icon to see the details of a campaign and a message preview.
  • Click on the Edit icon to Edit a Campaign saved as a draft
  • Click on the Delete icon to delete a Campaign saved as a draft
  • Click on the Abort icon to cancel the sending of a scheduled campaign. Once aborted, the scheduled campaign gets saved as a draft.
A screenshot of a cell phone  Description automatically generated